Learning how a customer buys is essential in the competitive e-commerce landscape. One such tool is Google Analytics 4 (GA4), which offers real-time data on customer behavior – including purchases – to Shopify store owners. A sign that setting up Google Analytics 4 to track purchase events is effective and will allow stores to benefit in :
Increase conversions #
Monitor the way users engage with the store, find friction points, and optimize the best shopping experience.
Marketing tactics optimization #
learn which marketing channels help drive sales, and allocate resources accordingly.
Test your assumptions with data #
Monitor the important stats such as conversion rate, revenue, and average order value over time to assess how well the store delivers.
Even though GA4 has some nice new features, purchase event tracking can be tricky. A guide to navigating your way through the GA4 journey, starting from setting up a GA4 property down to fixing issues that pretty much any marketer faces while implementing Google Analytics in Shopify.
What is the GA4 Purchase Event on Shopify? #
This event fires whenever a customer places an order on the Shopify store. It takes 100% transactional detail and provides a comprehensive look at store performance coupled with consumer dynamics.
Advantages of purchase event tracking #
- Understand conversion rate, revenue, average order value and product sales
- Recognize the effect of ancillary events (also “add to cart”).
- Map out customer journeys and improve conversion.
How to Set Up Shopify Purchase Event Tracking in GA4? #
GA4 integrates with Shopify seamlessly for the Google Sales Channel as of around March 2023. One-click access and easy-to-connect GA4 already natively track certain important e-commerce events, including purchases.
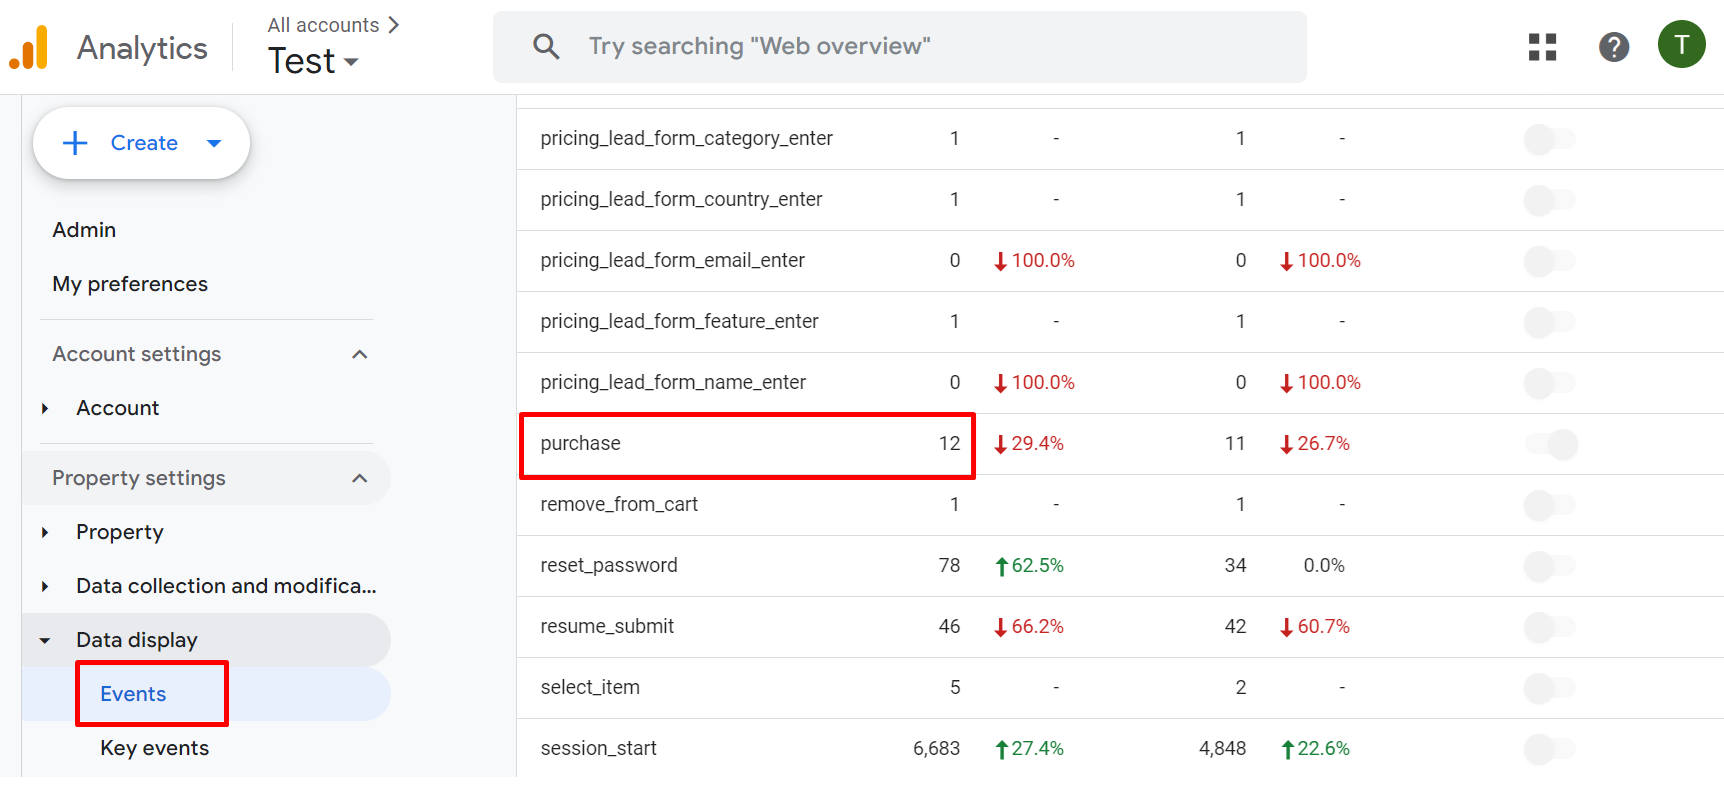
However, if you haven’t connected Shopify to GA4 yet, follow these steps:
Step 1: Create a GA4 Property #
- Log in to your Google Analytics account.
- Navigate to the Admin section and click “Create Property.”
- Follow the prompts to set up your new GA4 property.
- Copy the Measurement ID (looks like G-XXXXXXXXXX) for later use.
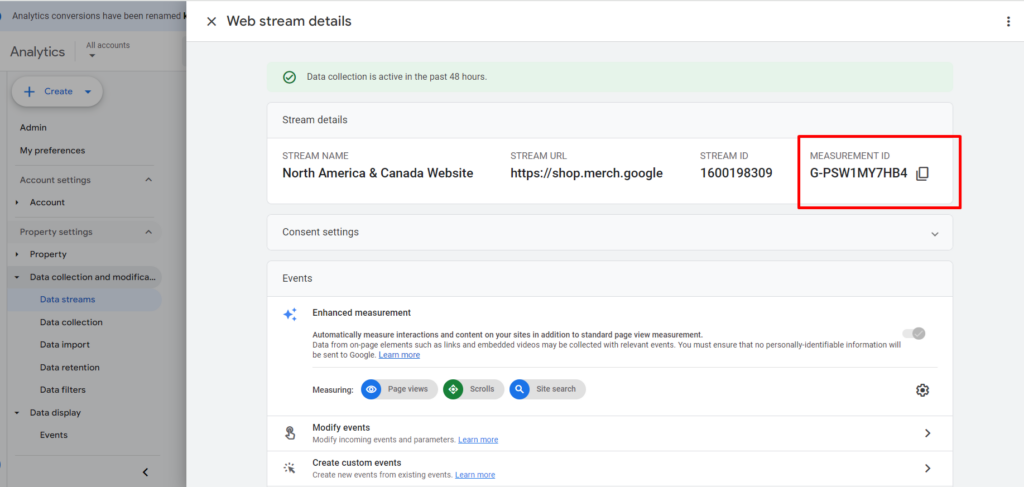
Step 2: Connect Shopify to GA4 #
There are two options:
Direct Integration #
Log in to your Shopify admin panel and go to Online Store -> Preferences. In the Google Analytics section, paste your GA4 Measurement ID.
Using Google Tag Manager (Recommended) #
Log in to your Shopify admin panel and go to Online Store -> Preferences. In the Google Analytics section, paste your GA4 Measurement ID.
Copy the GTM container code and add it to the <head> tag of your Shopify theme.
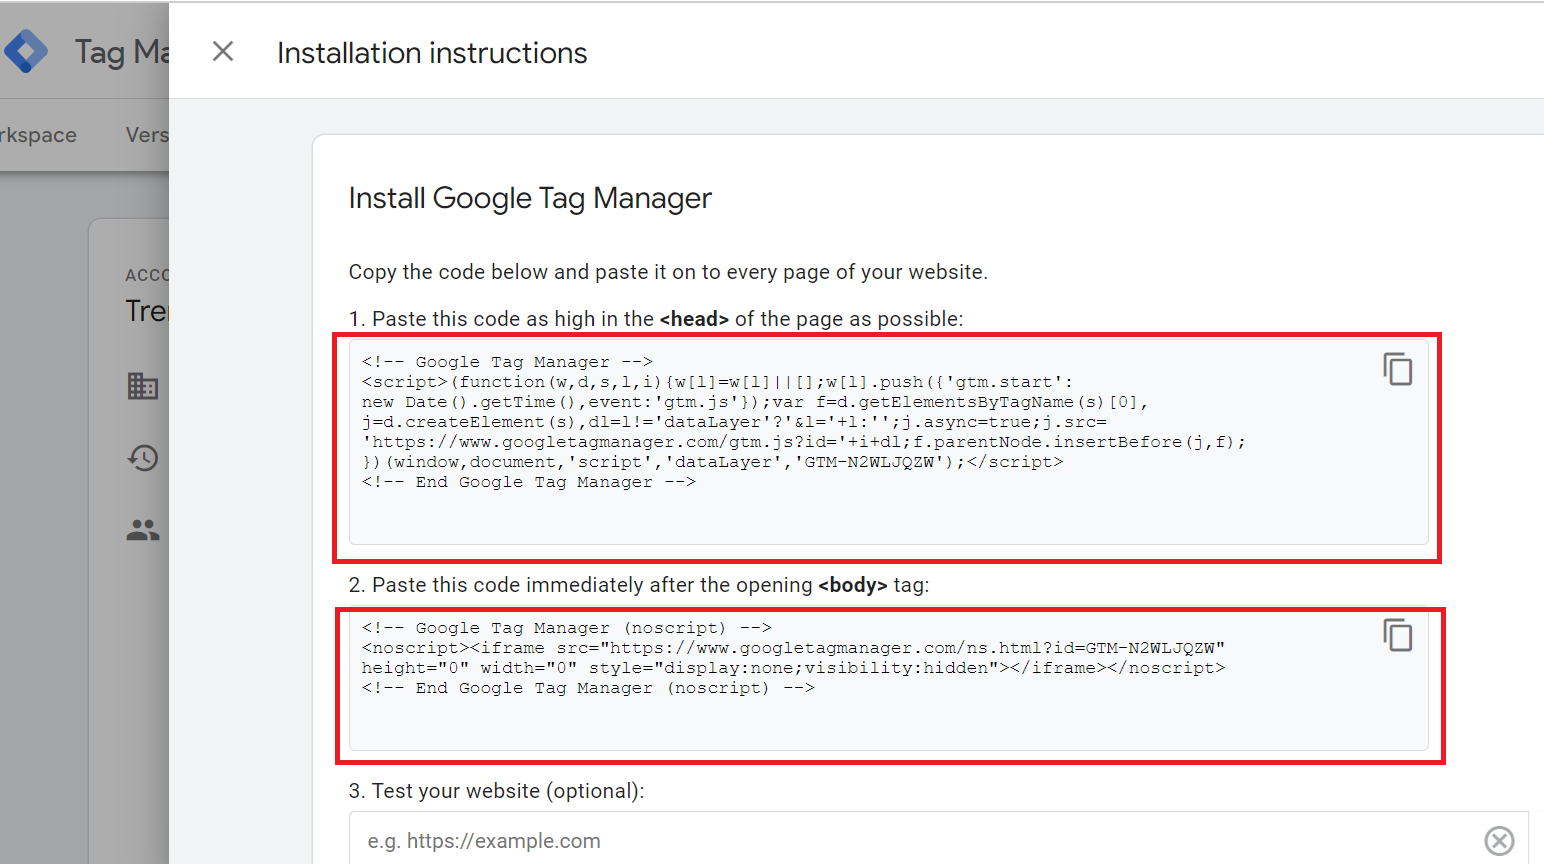
In Shopify, navigate to Online Store -> Themes -> Actions -> Edit Code. Then, in the theme.liquid file, paste the GTM container code that you previously copied.

Step 3: Configure GA4 Tags in GTM #
Log in to GTM.
Create a new tag by clicking on the “Add new Tag” option.
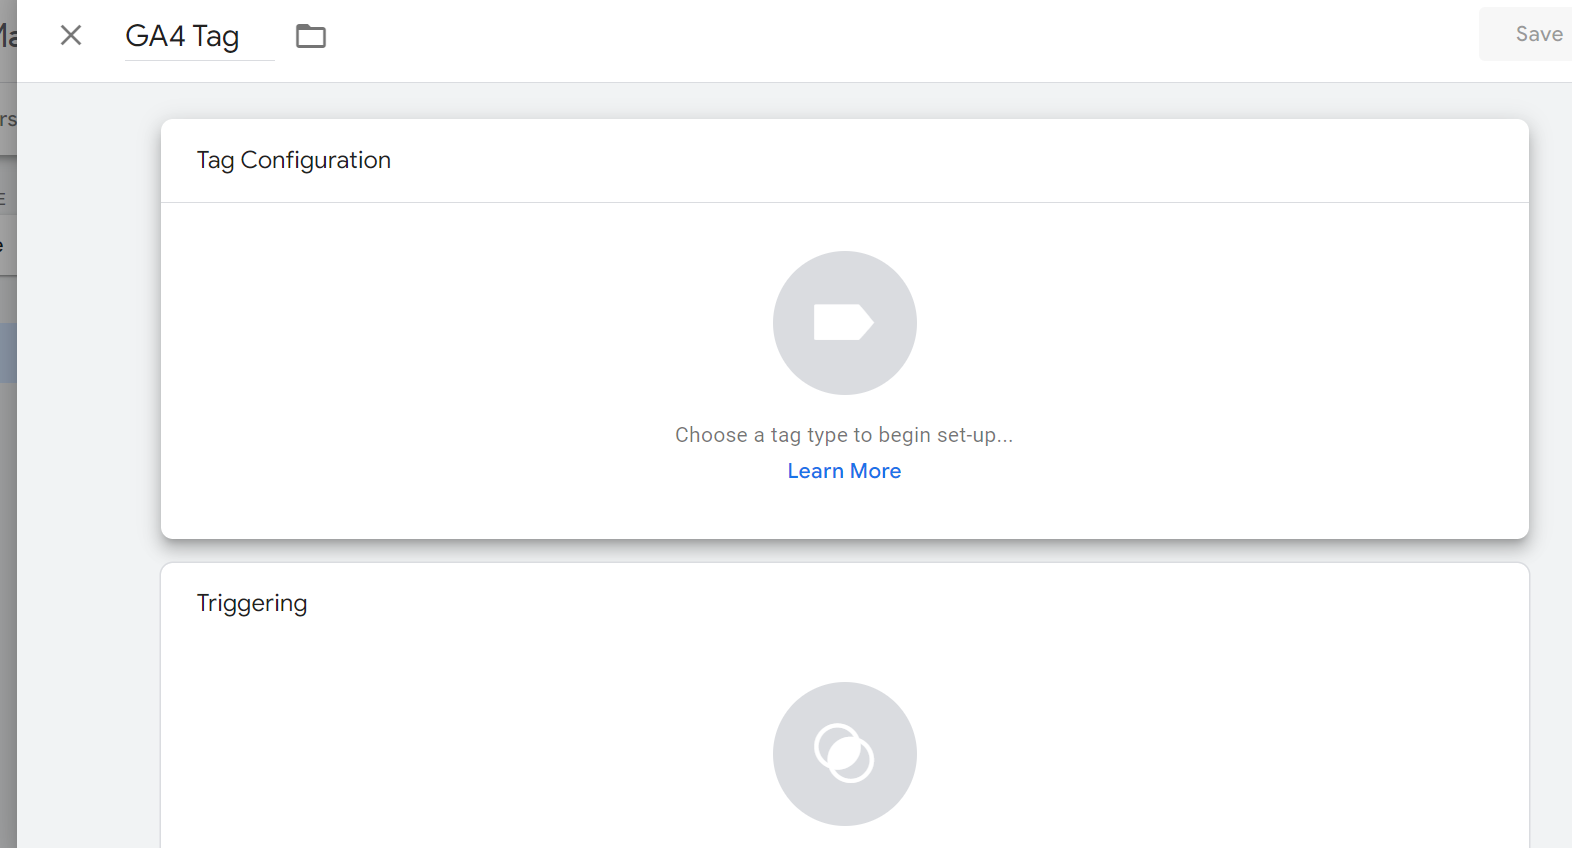
Click on Tag configuration and then choose tag type as a “Google Analytics”
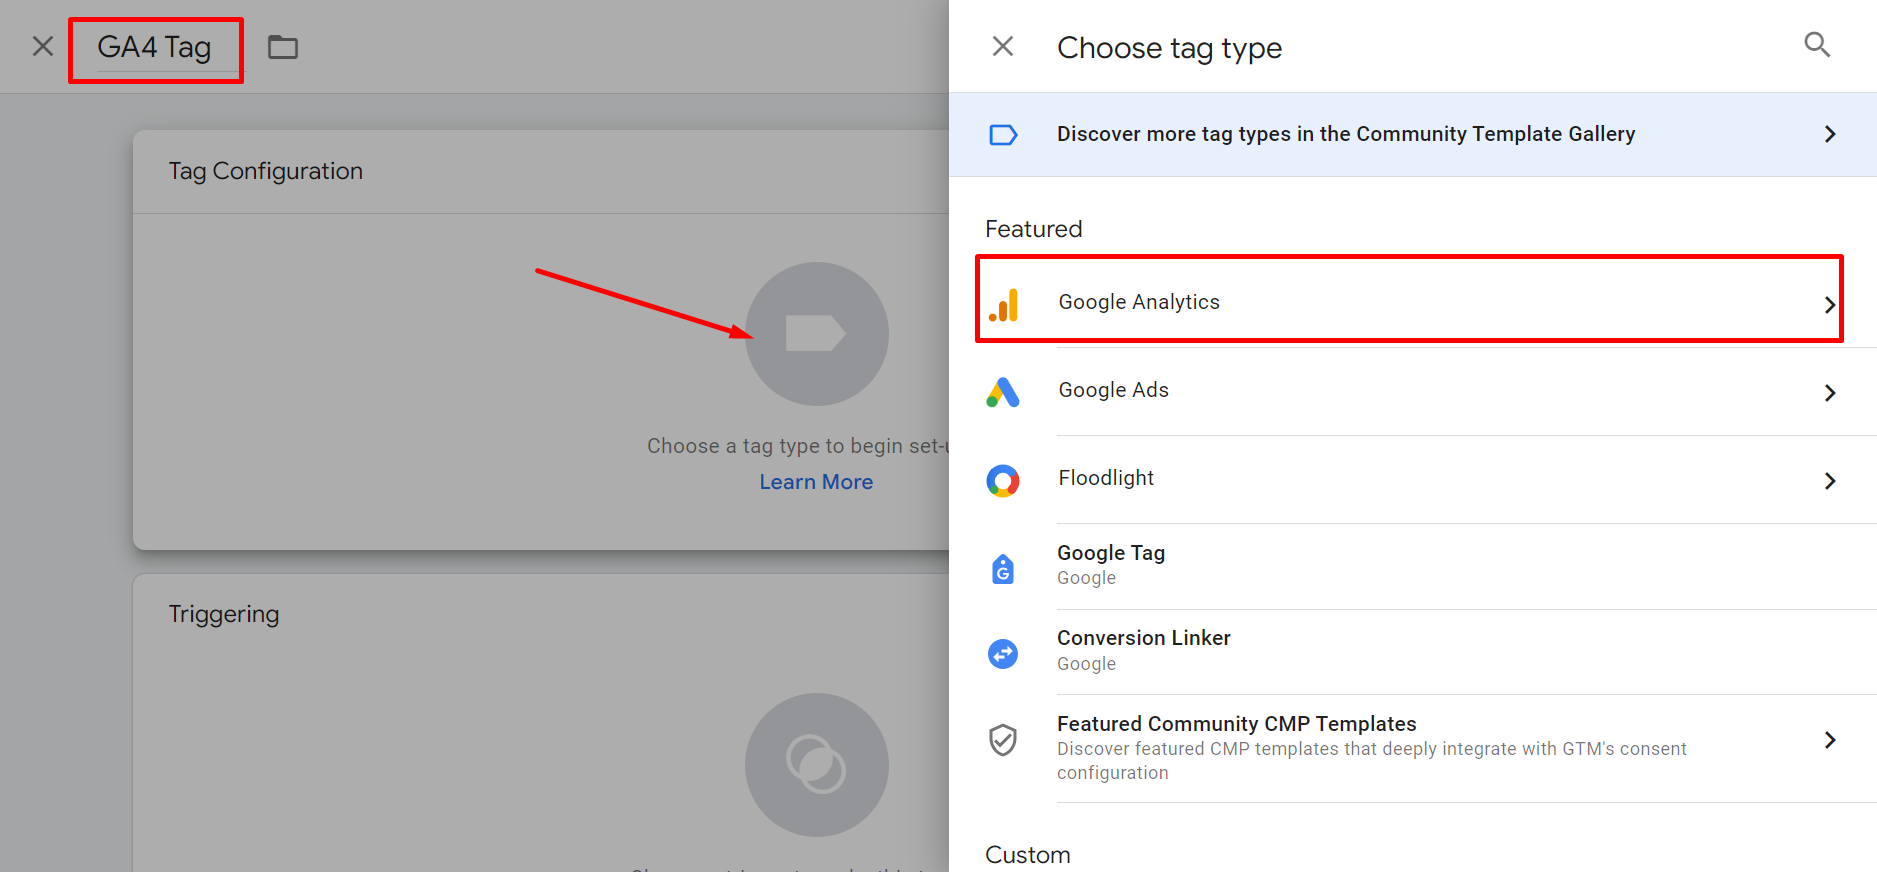
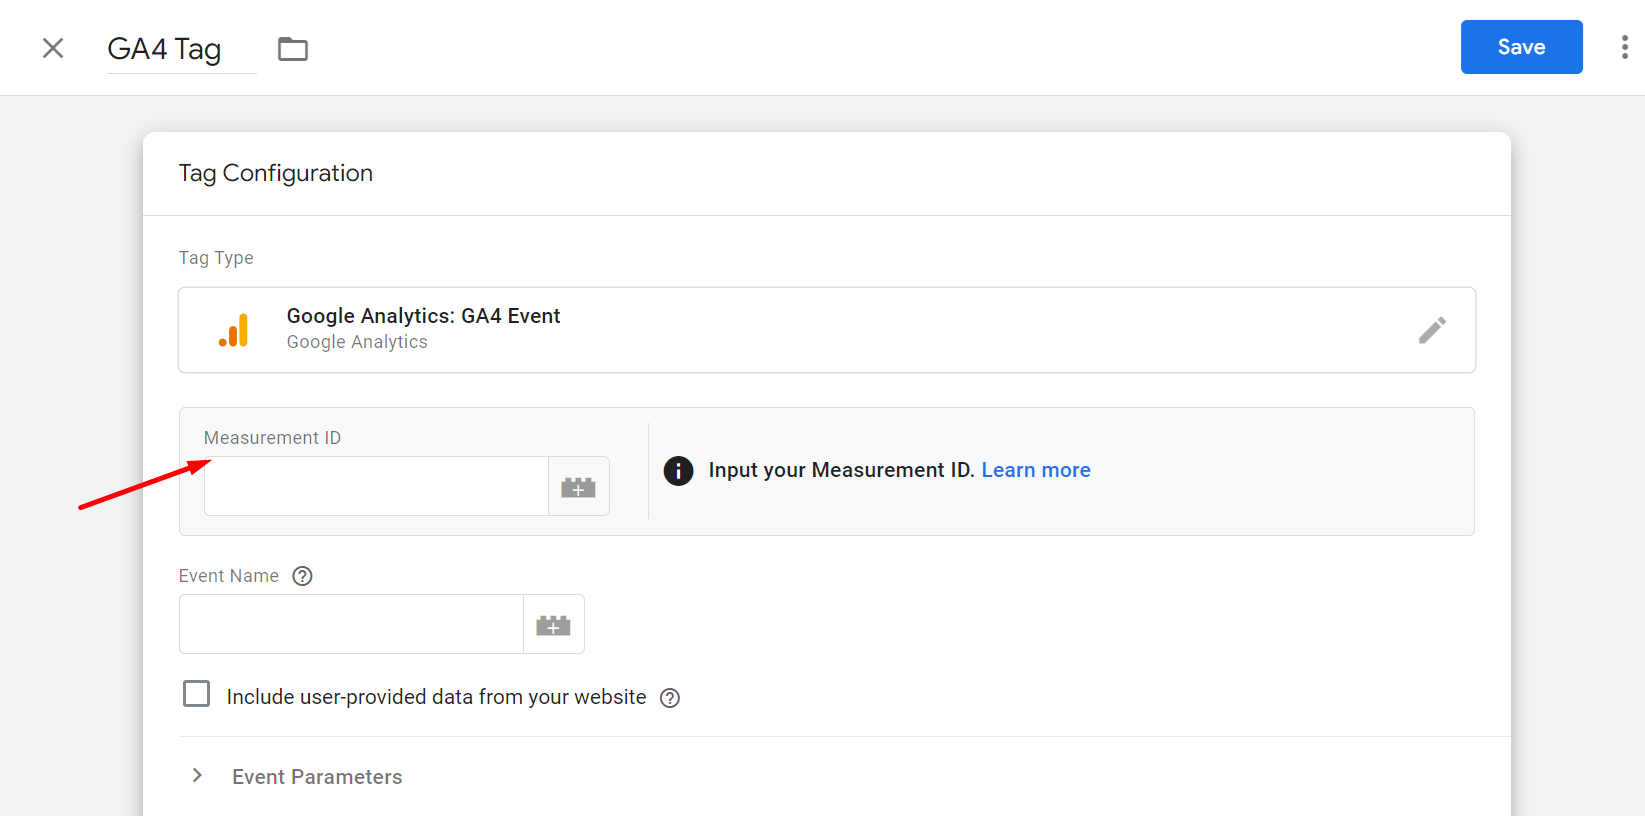
Select “Google Analytics : GA4 Events”
Enter your GA4 Measurement ID and set the trigger to “All Pages.”
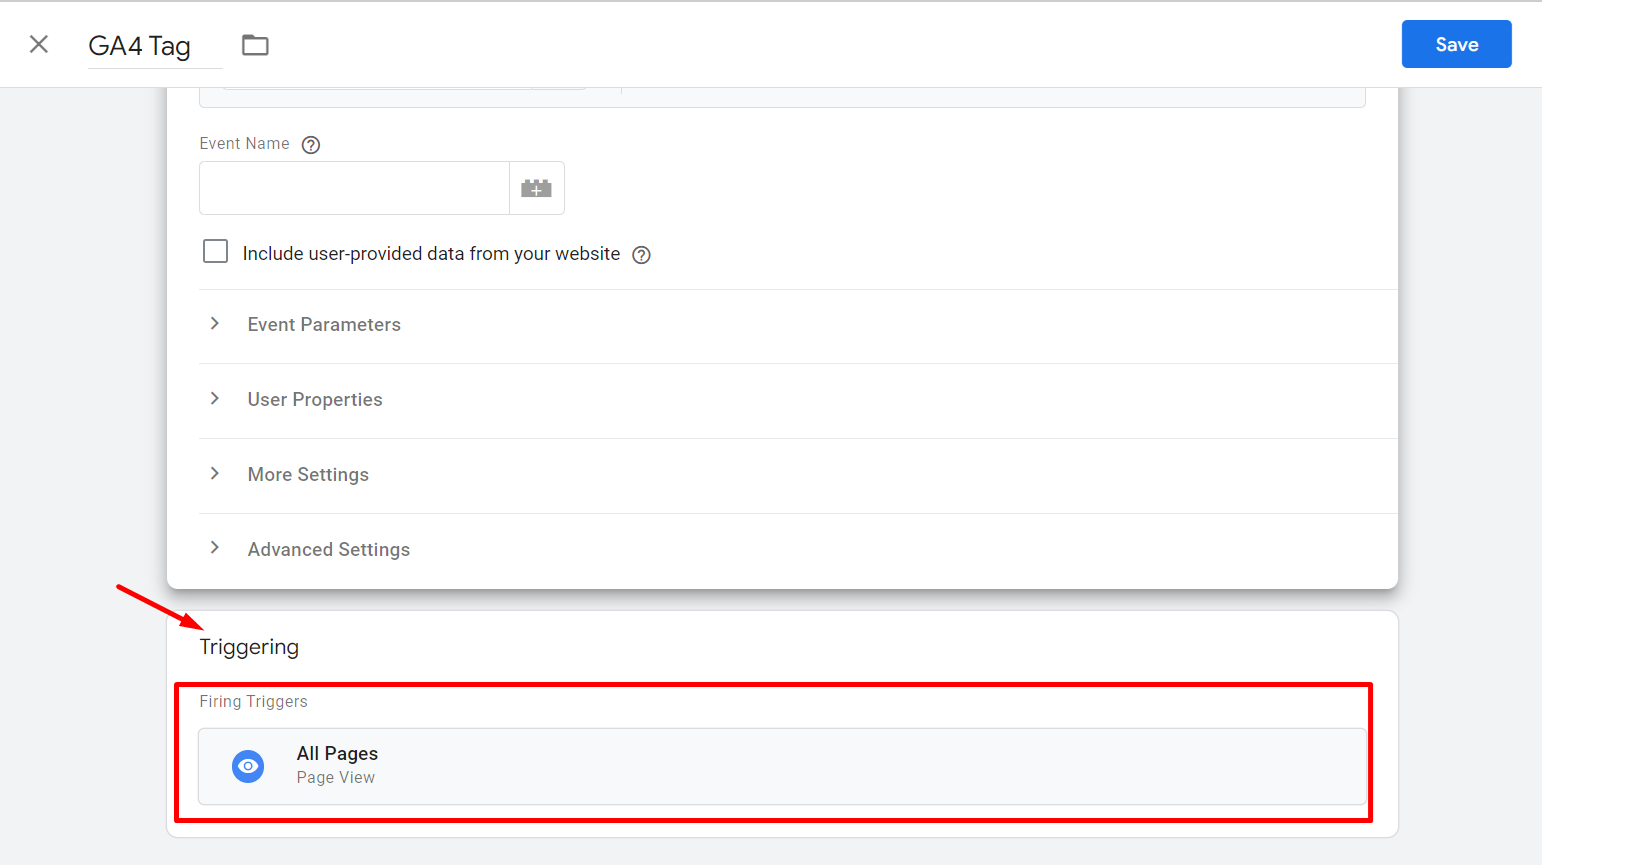
Save and publish the created tag.
Step 4: Configure the GA4 Purchase Event Tag #
Create a new tag and select “Google Analytics: GA4 Event.”
Enter your Measurement ID and name the event “purchase.”
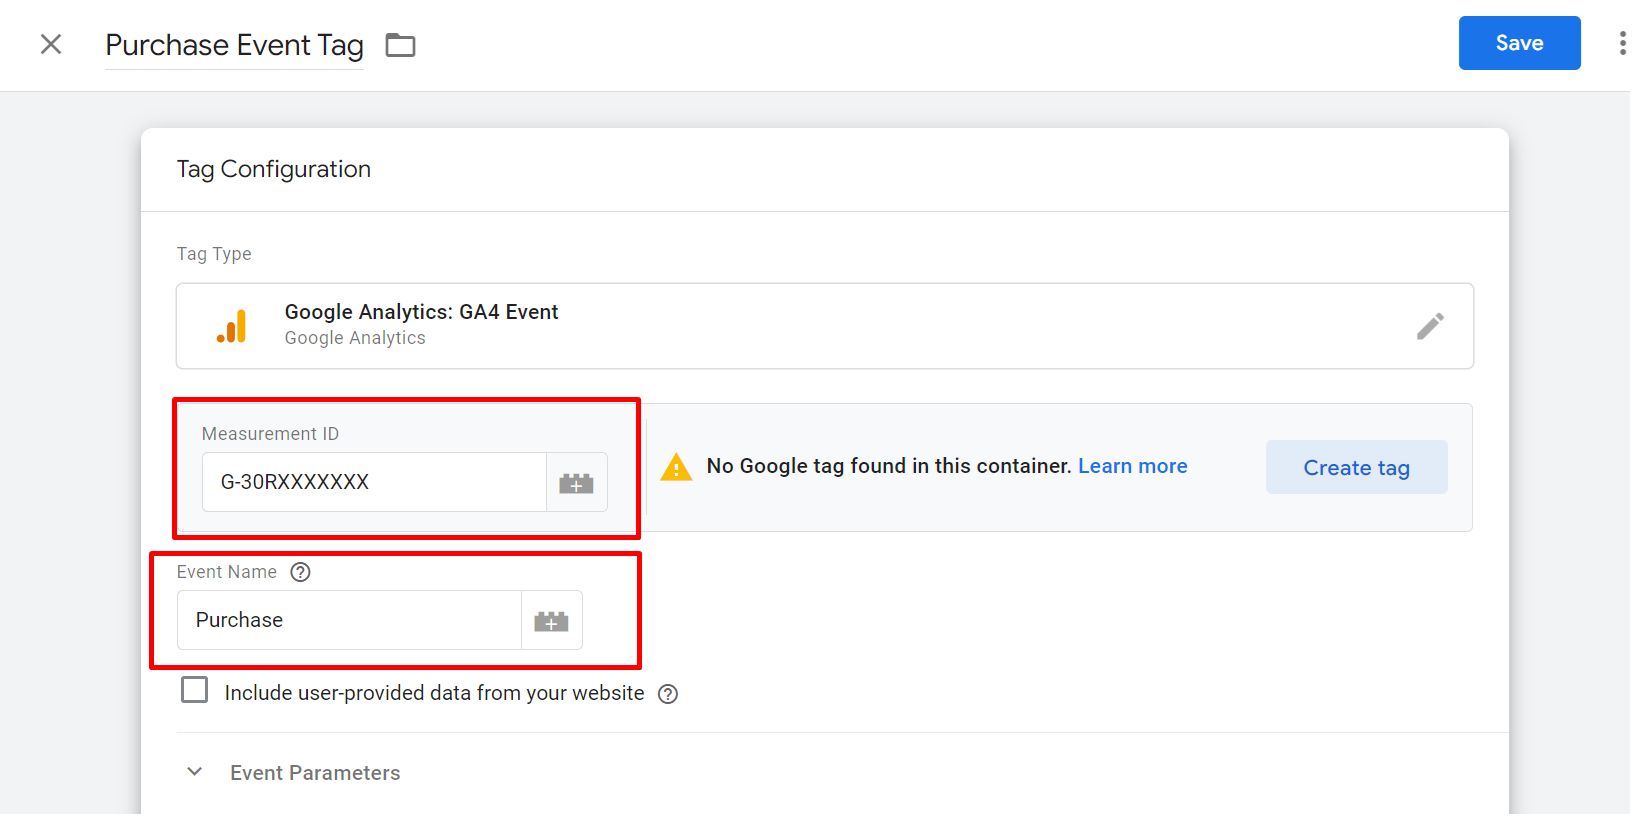
Add the following parameters to capture detailed purchase information:
- transaction_id: captures unique purchase IDs
- value: total monetary value of the transaction
- currency: currency in which the transaction was made
- items: array containing details about each item purchased (e.g., item ID, name, price, quantity)
- coupon: name or code of the coupon applied (if any)
- affiliation: supplier, company, or store location associated with the sale (optional)
- shipping: cost of shipping
- tax: tax amount applied to the transaction
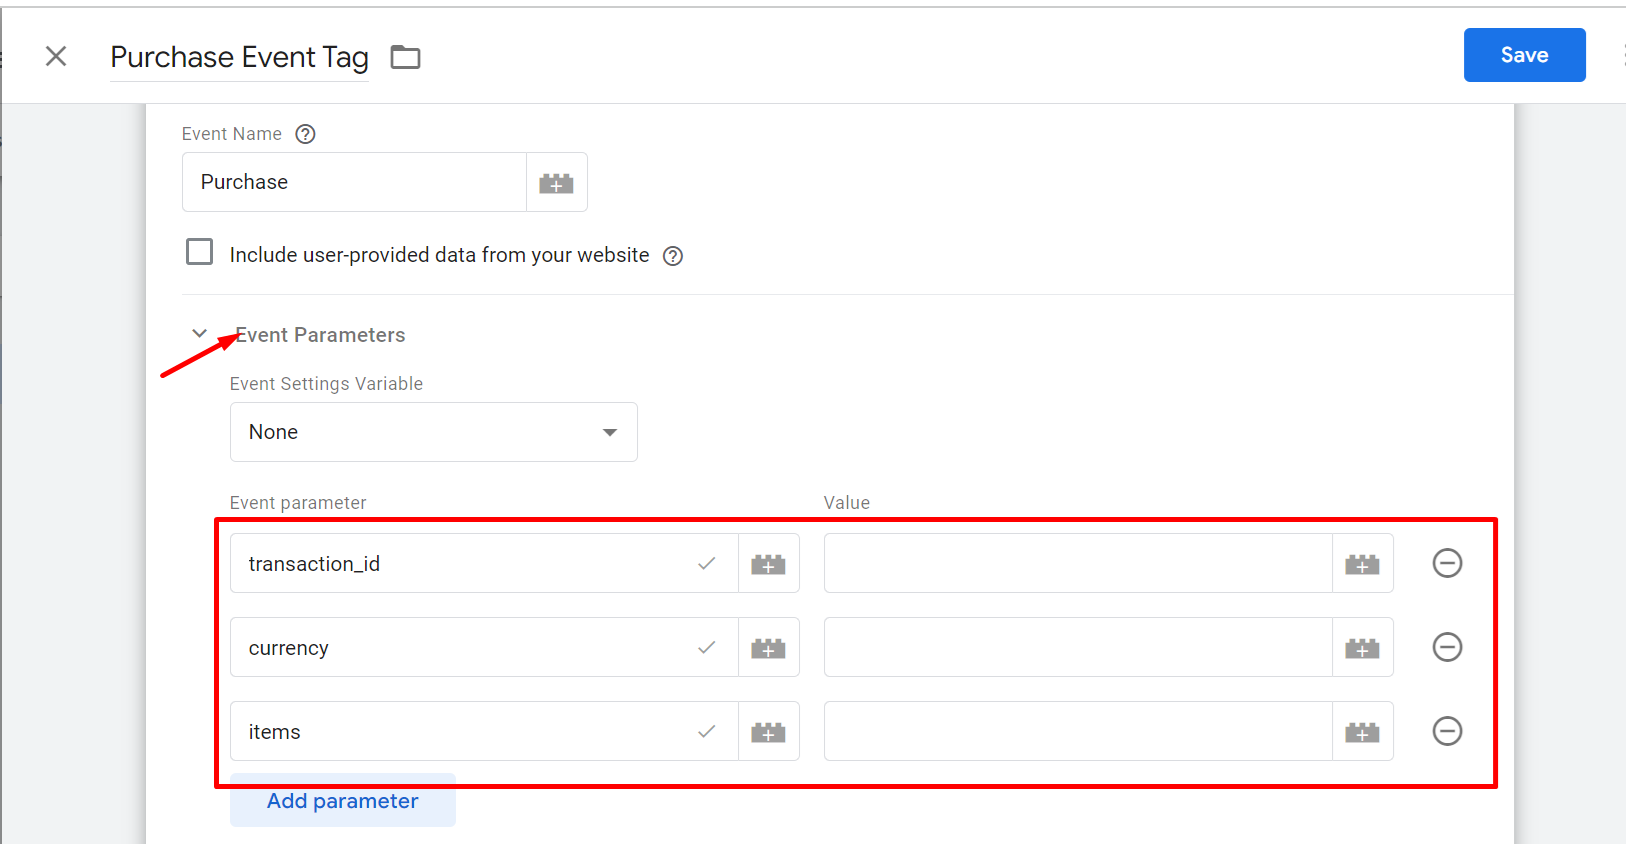
Save the Purchase Event Tag.
Step 5: Set Up the Trigger #
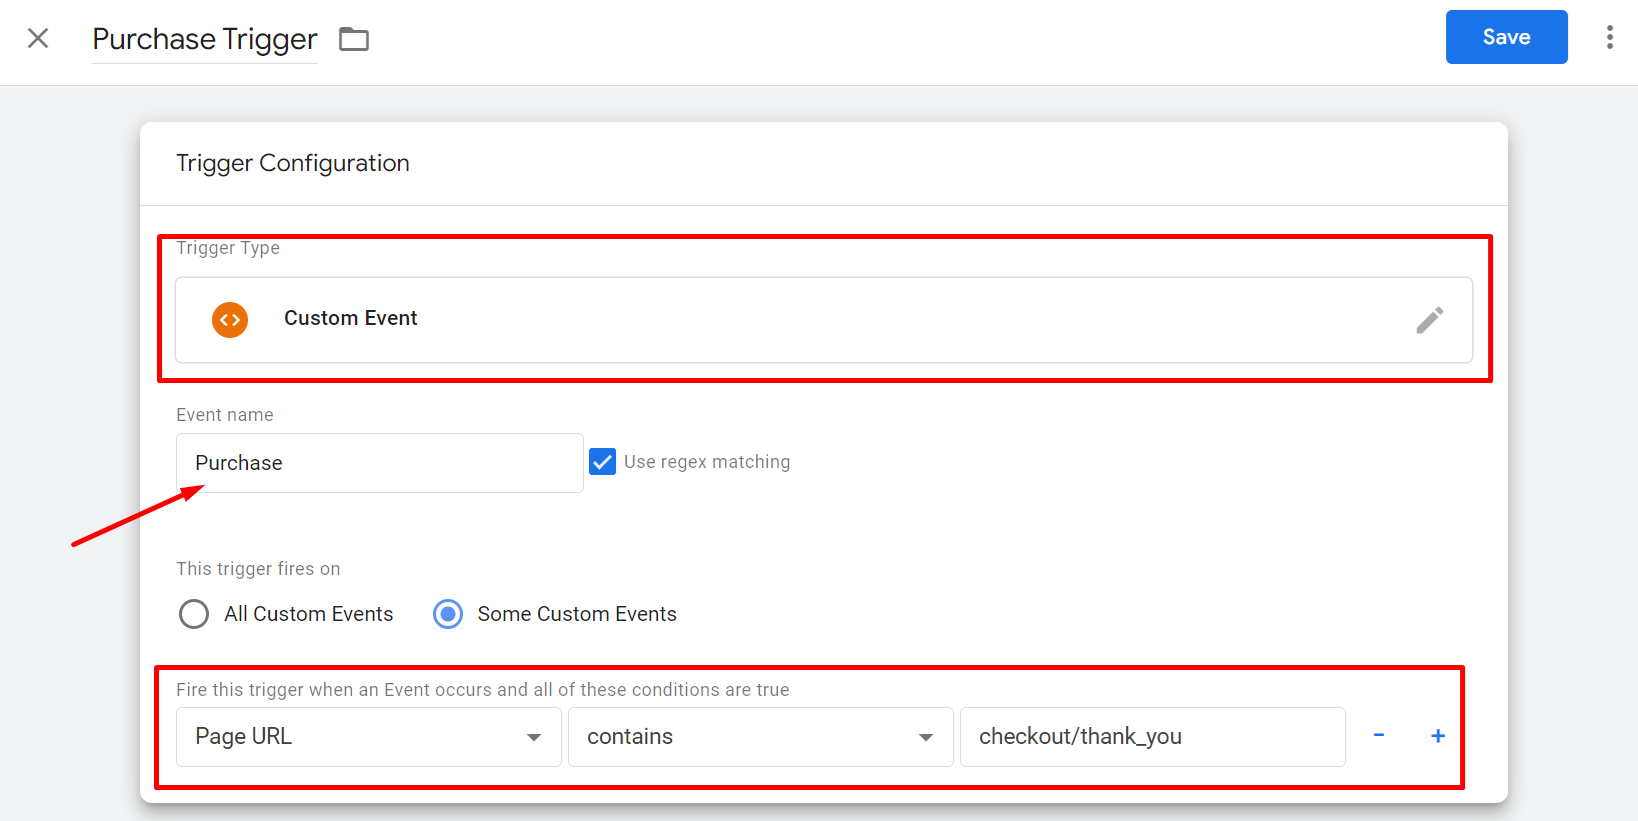
Select Custom Event as a trigger type and enter event name as a “Purchase”
Configure the trigger to fire on the purchase confirmation page.
This is typically a “Page View” trigger with a condition for the URL path containing “checkout/thank_you.”
Step 6: Implement a Data Layer for Shopify #
Ensure your Shopify checkout page pushes transaction data to the data layer. This might involve editing your theme or using apps/plugins that support data layer integration.
Step 7: Verify Your Setup #
Use GTM Preview mode to perform a test purchase and verify that the purchase event fires correctly with all parameters populated.
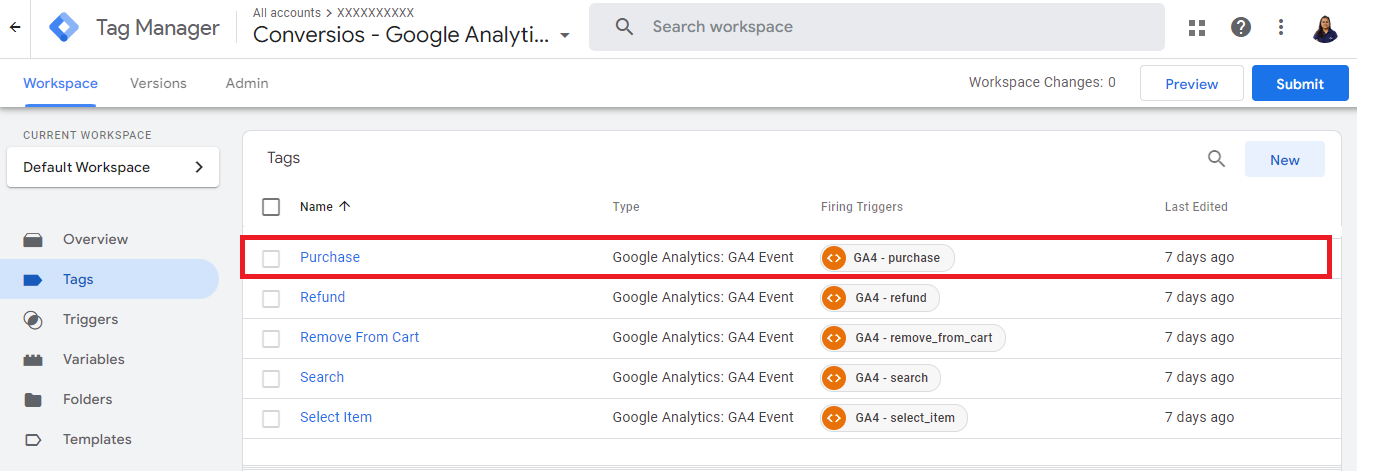
Check GA4 DebugView to confirm that the purchase event is being recorded with all relevant parameters.
Are you facing issues in Google Analytics 4 with Shopify?
Check this guide: 14 Common Google Analytics 4 Problems with Shopify: A Comprehensive Guide
By understanding these common GA4 problems with Shopify and implementing the solutions provided, you can ensure accurate data tracking and gain valuable insights to optimize your Shopify store for success. Take action today and unlock the full potential of GA4 for your e-commerce business!