Before jumping into the setup process; it’s important to understand the role. Facebook Pixel tracks the data from the browser-side tagging where FBCAPI tracks the data using server-side tagging. A well-combined use of these two will ensure you are not missing any important metrics.
How to set up Facebook Pixel using Conversios Plugin #
Step 1- Install the Conversios plugin #
1. Log in to your WordPress backend and go to plugins.
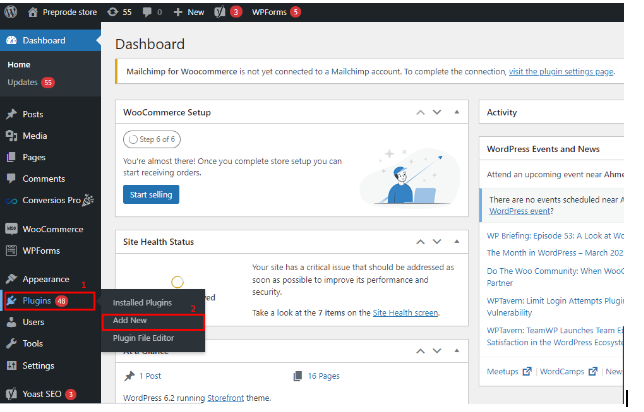
2. Go to ‘Add new’ & search for ‘Conversios’.
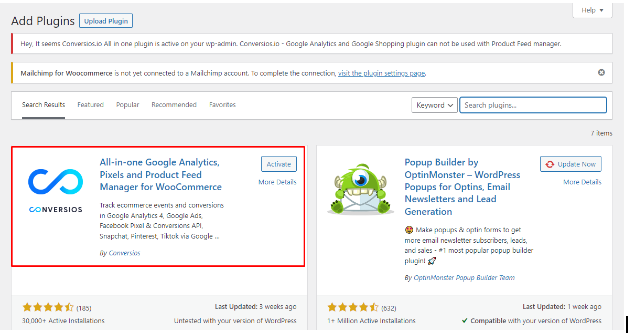
3. Install & activate the ‘All-in-one Google Analytics, Pixels & Product Feed Manager For WooCommerce’ plugin as shown in above screenshot.
Step 2- Create Facebook ( Meta) pixel from Facebook Business Manager Account #
1. Log in to your Facebook business manager account.
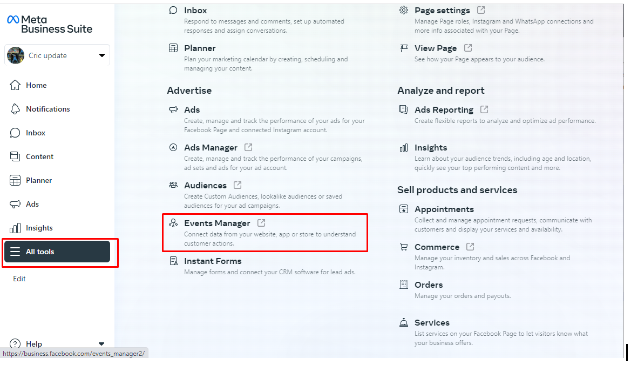
2. Now go to ‘All tools’ & look for ‘Event Manager’ in the ‘Advertise’ section.
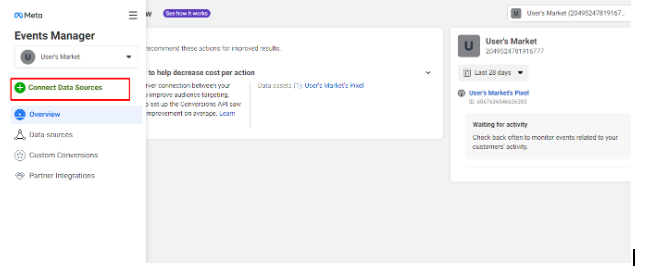
3. In the new interface, click on ‘Connect Data Sources’.
4. It will show different options, click on the ‘Web’.
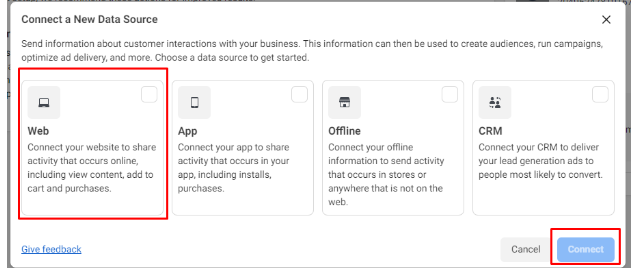
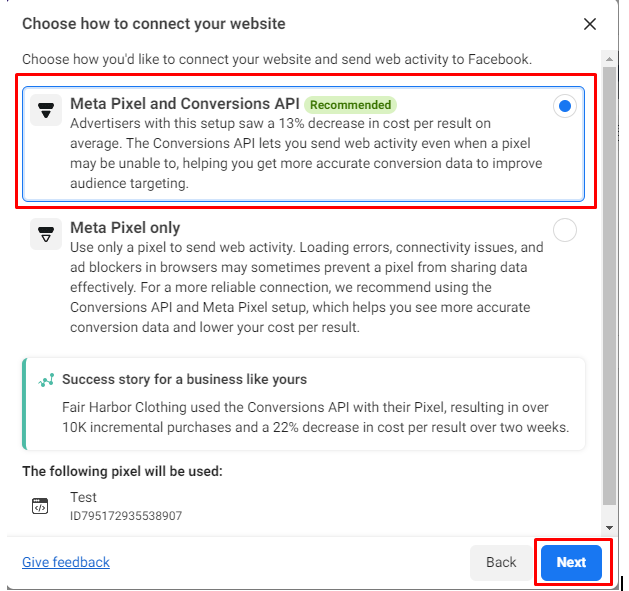
5. As you can choose how to connect with your website, go and click on ‘FB Pixel only’.
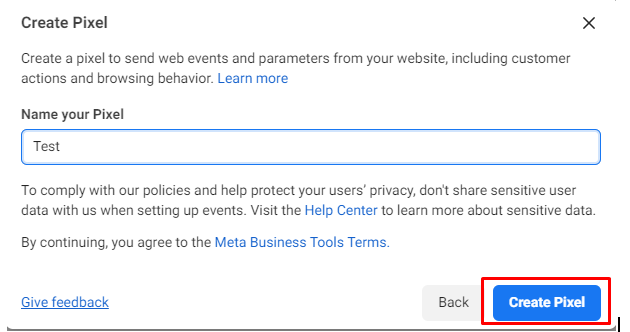
6. Give a name to your pixel and select ‘Create Pixel’.
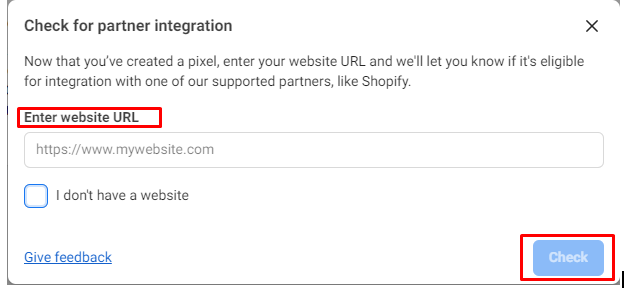
7. Now enter the website URL & click on ‘Check’.
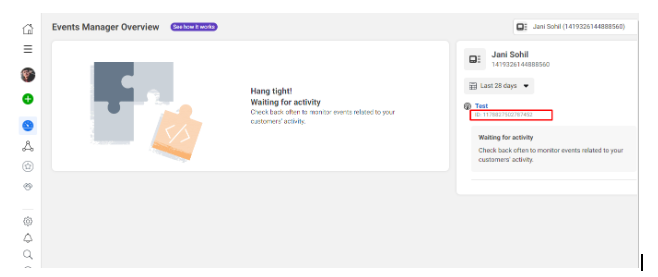
8. Again go to ‘Event Manager’ where you can find your FB pixel id. Just copy the ID.
Step 3- Integrate the Facebook Pixel ID to the Conversios Plugin #

The final step is to come to your Conversios plugin dashboard, where you can find the ‘FB Pixel ID’ section in ‘Pixel Settings’, just paste the ID here.
Congratulations, you have successfully created and integrated your FB Pixel using the Conversios plugin. Tracking important metrics and optimizing your advertisement campaigns becomes easier.
How to set up Facebook Conversion API using Conversios Plugin #
Step 1- Install the Conversios plugin #
1. Log in to your WordPress backend and go to plugins.
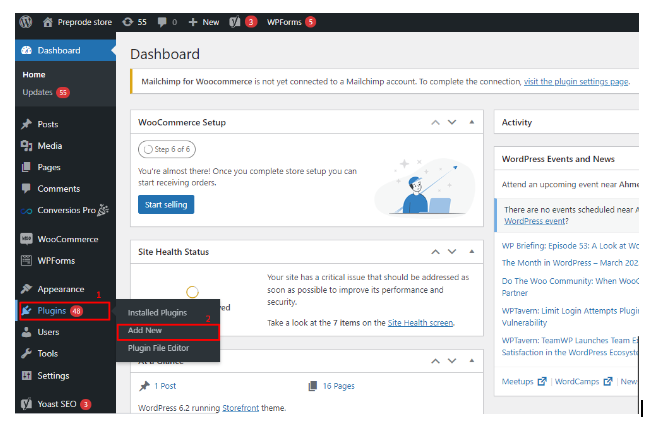
2. Go to ‘Add new’ & search for ‘Conversios’.
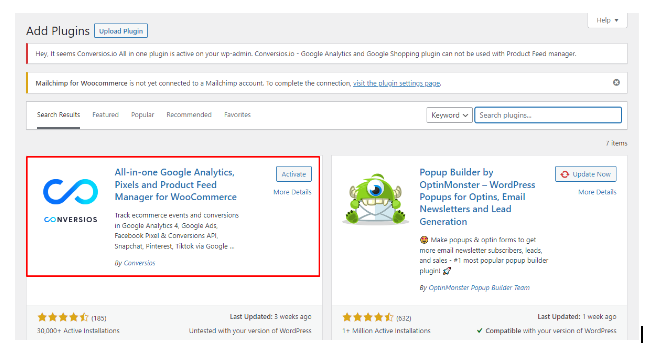
3. Install & activate the ‘All-in-one Google Analytics, Pixels & Product Feed Manager For WooCommerce’ plugin as shown in above screenshot.
Step 2- Generate Facebook Conversion API Access Token #
1. Log in to your Facebook Business Manager Account.
2. Navigate to the ‘Event Manager’ page. You will see an interface like this. You need to click on ‘Data sources’.
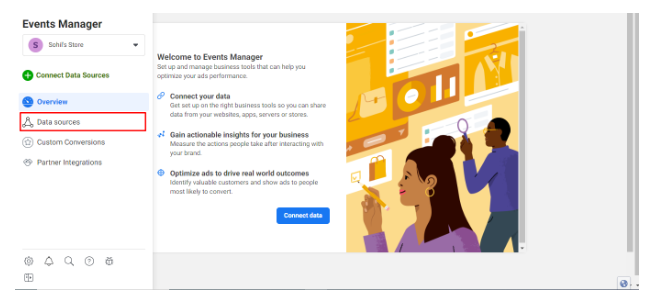
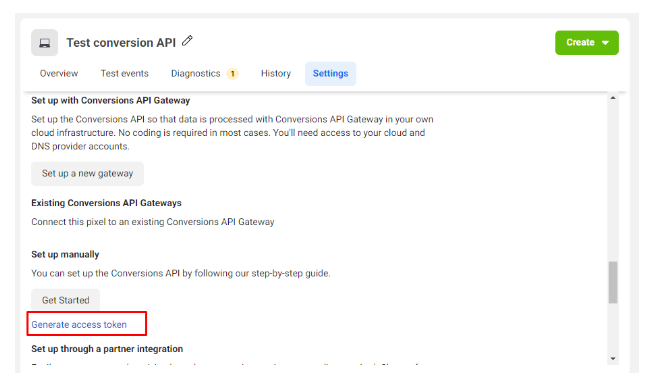
3. Now go to settings & scroll down to the ‘Conversion API’ section. You will find an option of ‘Generate access token’.
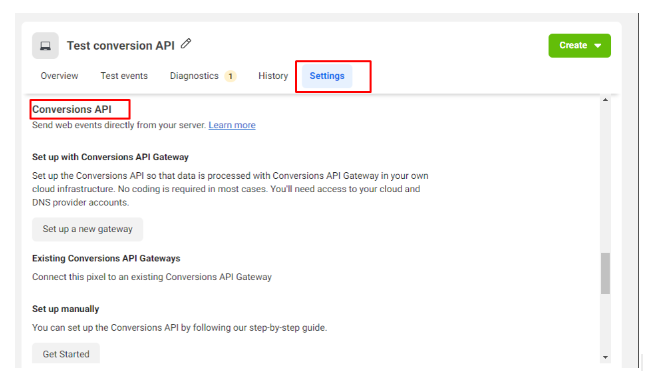
By clicking on it, you will get the access token. Copy the ID.
Step 3- Integrate the Facebook Conversion API to the Conversios Plugin #
The final step is to come to your Conversios plugin dashboard, where you can find the ‘Meta (Facebook) Conversion API Token’ section in ‘Pixel Settings’, just paste the ID here.

Congratulations, you have successfully created and integrated your Facebook Conversion API using the Conversios plugin. Tracking important metrics and optimizing your advertisement campaigns becomes easier.