Download and Activate Conversios Pro Plugin
- Install and activate the Conversios Pro plugin in your backend.
- Navigate to the Pixel and Analytics settings of Conversios and select “Server Side Tagging via GTM.” (PRO Version)
Automatic Integration
- Choose “Automatic” integration.
- Sign in with a Google account that has admin access to the Google Tag Manager (GTM) account you want to integrate.
- Grant the necessary access permissions and click “Continue.”
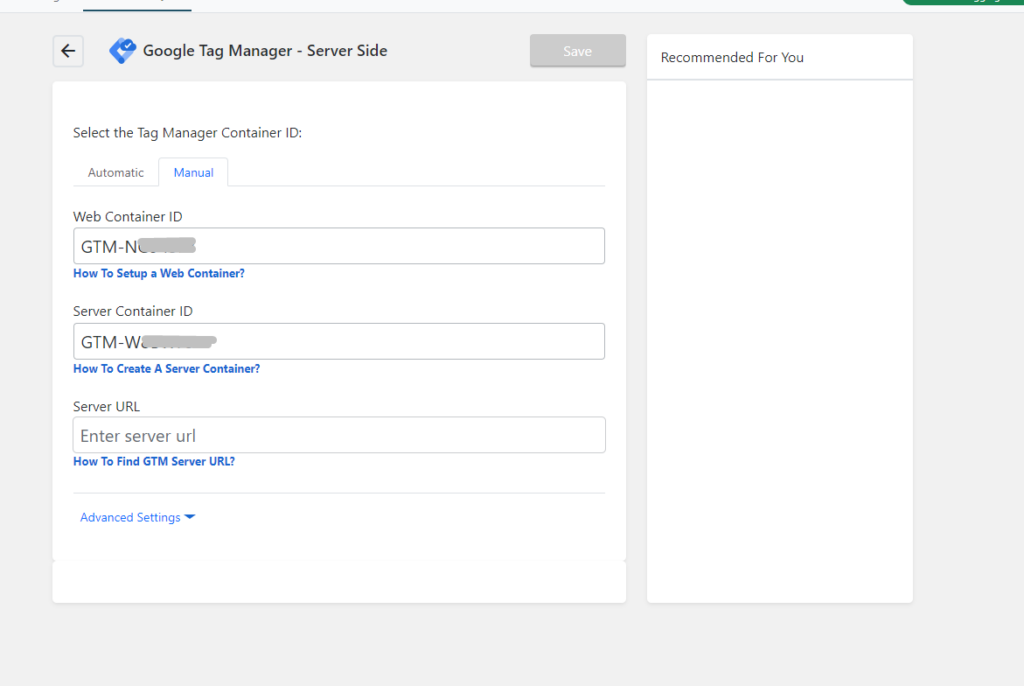
Note – For Manual integration please add the GTM Web & Server Container along the transport URL / Server URL.

Set Up Web Container
- Select an existing container or create a new one in GTM.
- Provide the necessary details such as GTM account and container Name, and click “Create.”
Set Up Server Container
- Similar to the Web Container setup, select an existing container or create a new one.
- Choose “Create a new Web Container,” provide details, and click “Create.”
Configure Server Details
- Choose either the Default Conversios Server or use your own server.
- For the Default Conversios Server, select the region and add the Container Config.
- Obtain the Container Config from GTM (Server Container >> Admin >> Container Settings >> Set up your Tagging server >> Manual Option >> Copy the Config).
- Paste the Container Config in the plugin settings and click “Import Server Details.”
Save and Complete Setup
- Click the “Save” button to save the Server Side Tagging setup.
- The setup is now complete, and Server Side Tagging is successfully integrated with Conversios.
By following these steps, you can seamlessly implement Server Side Tagging using Conversios, gaining enhanced control over your tracking and analytics tags.