Ever wonder what happens after people click your Twitter ads? Adding a Twitter Pixel to your website lets you see exactly how they interact, so you can tell if your Twitter campaigns are working. This gives you awesome insights to make your marketing even better!
Setting Up Twitter Pixel Step-by-step Process #
Step 1. Log in to a Twitter Analytics account.
Step 2. Click on More on the top-left side of the page and then click on Events Manager.
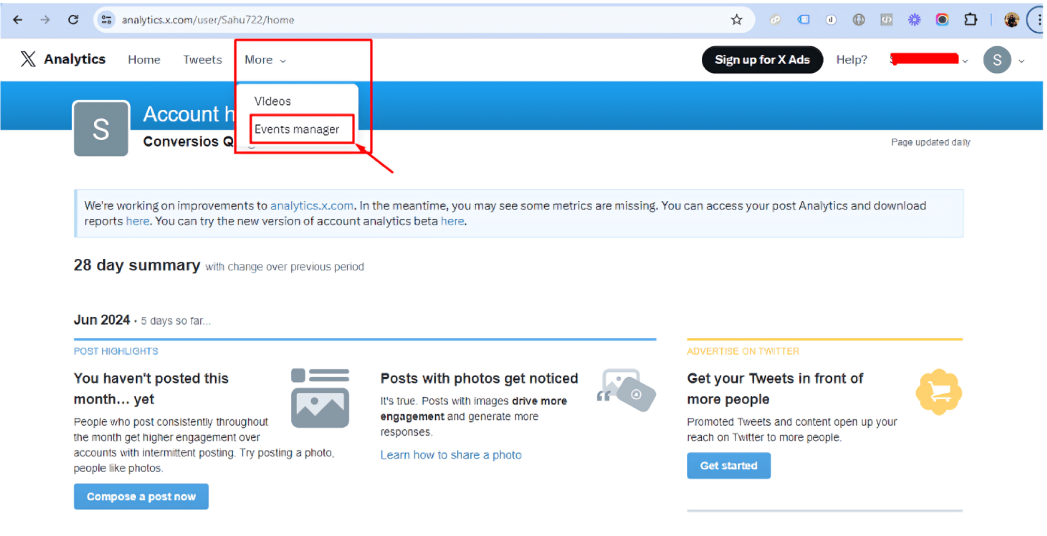
Step3. Here, you will see Twitter Pixel ID listed in two places, copy it from here.
Creating and Adding Events #
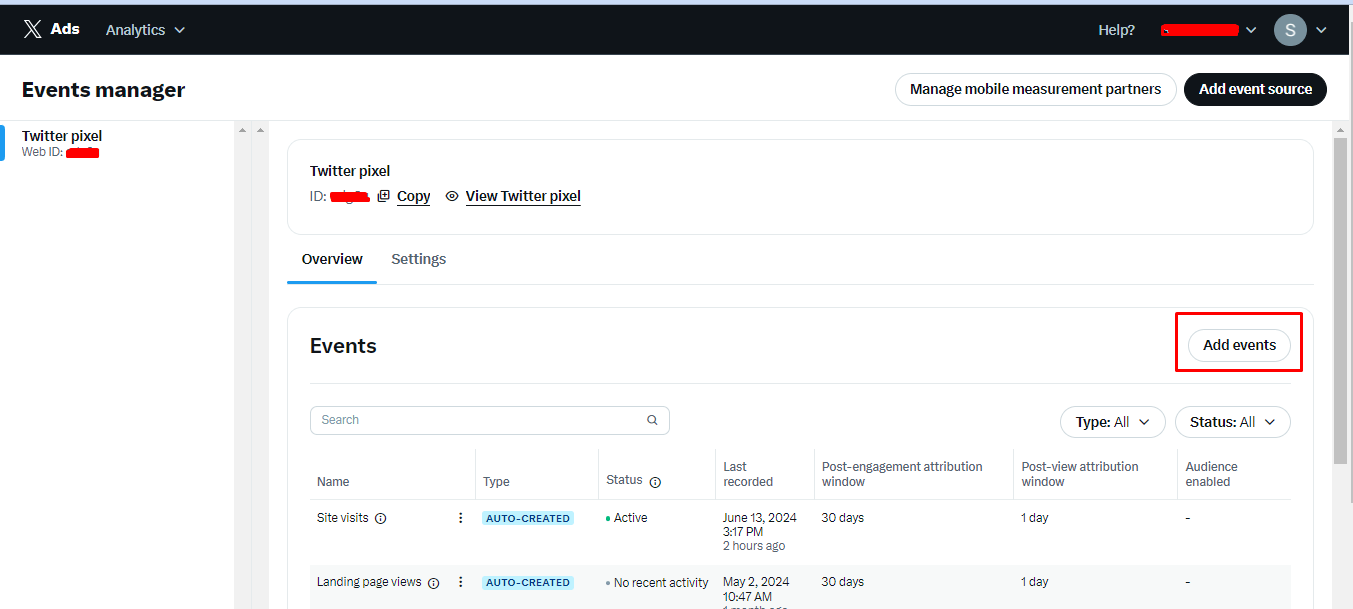
Now let’s see how you can create and add events in your Twitter Analytics account.
Step 1. Click on Add Events from the Event Manager page.
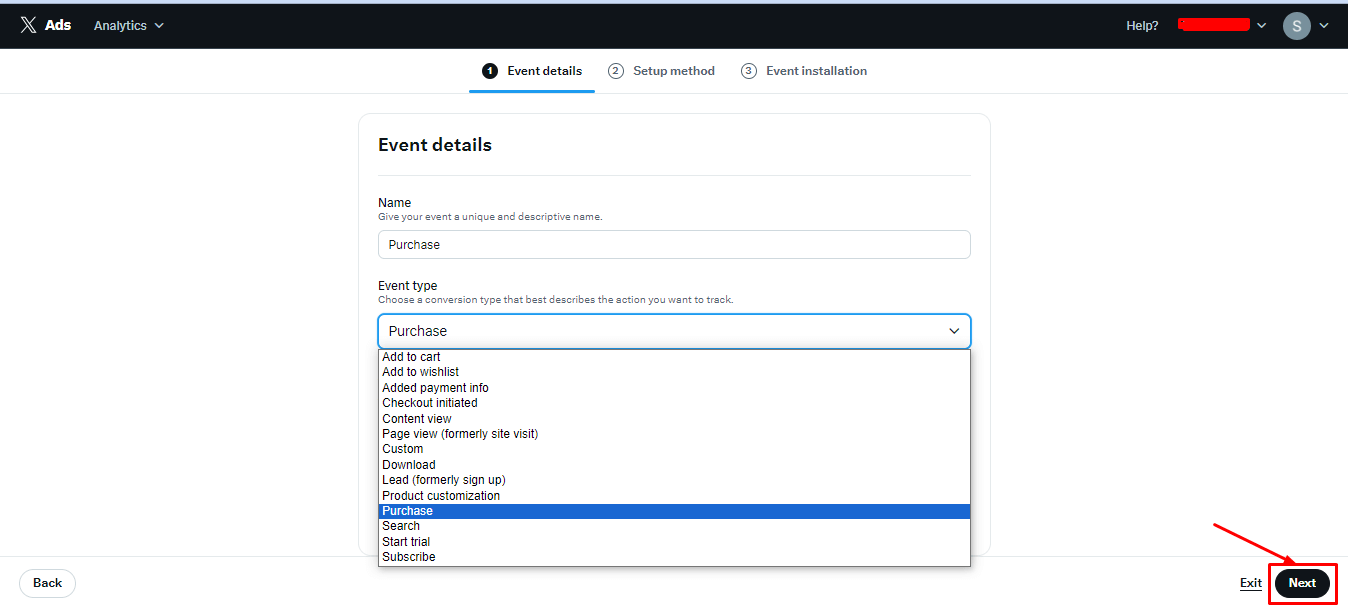
Step 2. Enter Event details according to the requirement and select the conversion type that best describes the action you want to track.
For example: let’s create a Purchase event.
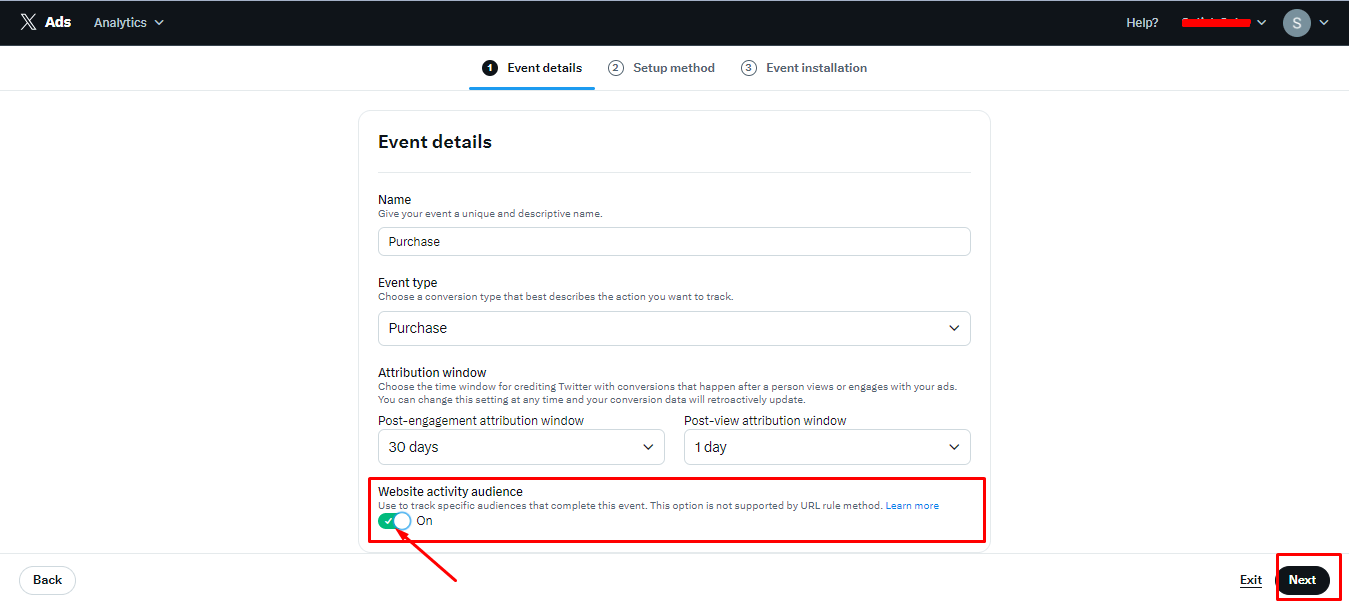
Step 3. Enable the Website activity audience radio button and click on Next.
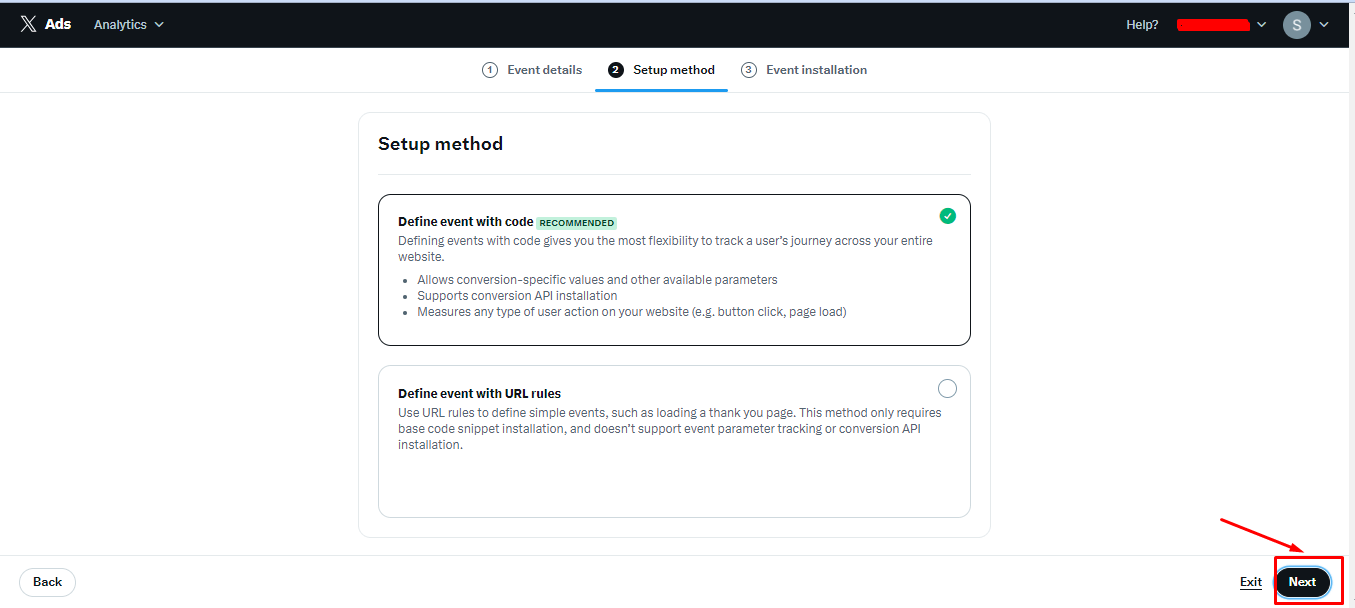
Step 4. Now you will be redirected to the Setup Method then Select Define event with code and click on Next.
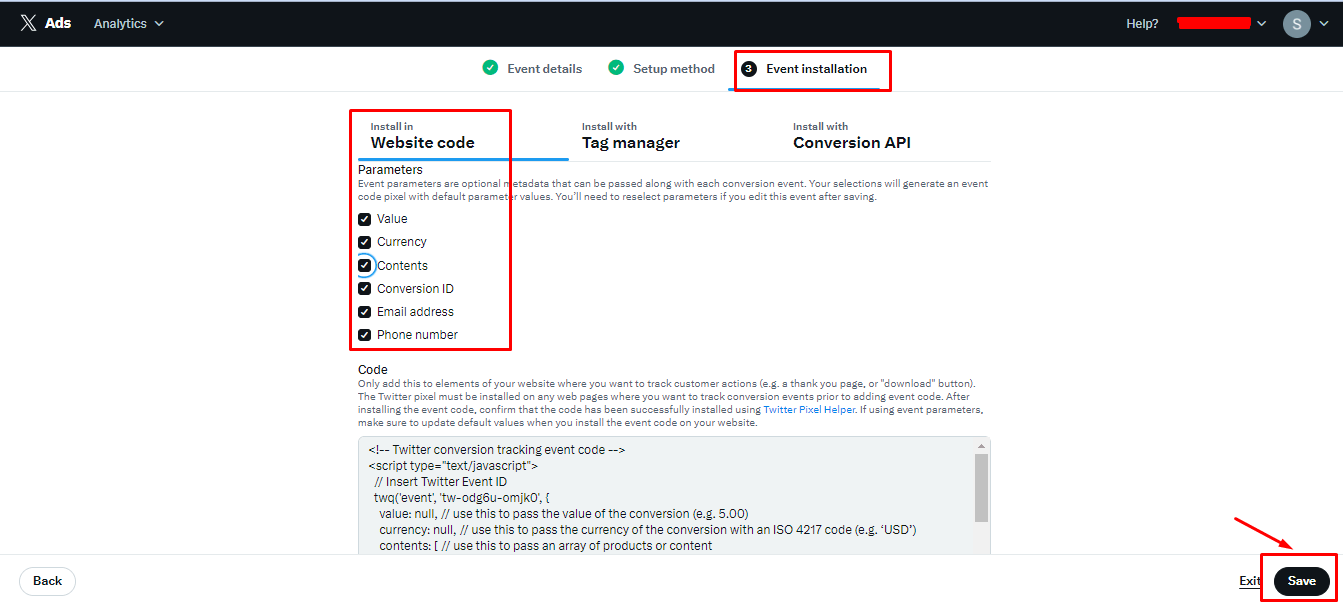
Step 5. From the Event Installation screen, the final step is to check all the boxes in the Parameters and click on SAVE and you will see the Event ID is created.
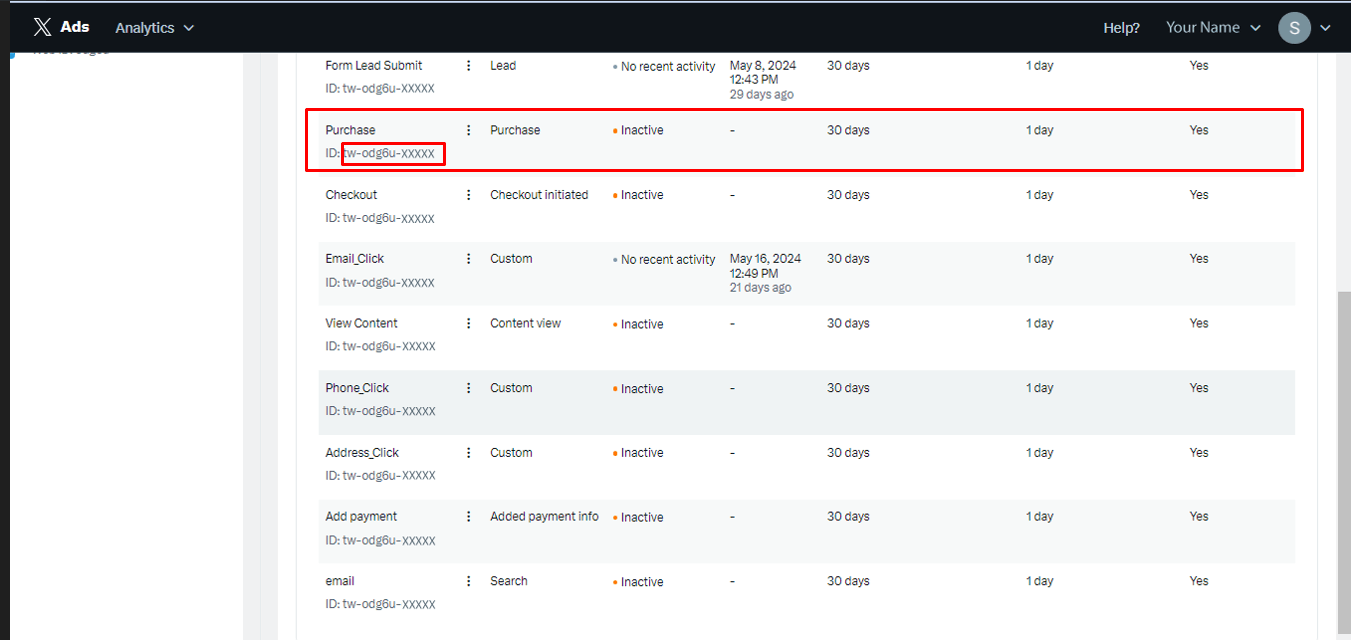
Step 6. You have now created the Purchase event for your Twitter Analytics account and you can make for all other events you need to track and copy the ID from here:
Integrate Twitter Pixel ID and its Events IDs with Conversios Plugin #
The final step is to come to your Conversios plugin,
- Go to the Pixels & Analytics tab in your Conversios plugin.
- Paste the Twitter Pixel ID and Event IDs into the respective fields.
- Hit the SAVE button to finalize the integration.
Congratulations! 🎉
You have successfully created and integrated your Twitter Pixel using the Conversios plugin. Tracking important metrics and optimizing your advertisement campaigns becomes easier.