This guide will help you integrate Microsoft/Bing Ads Pixel and Microsoft Clarity ID with the Conversios Plugin. Follow these simple steps to improve your ad tracking and gain better insights into your audience’s behavior.
Integrating Microsoft Ads (Bing) Pixel with Conversios Plugin #
Step 1: Logging into Microsoft Ads Account #
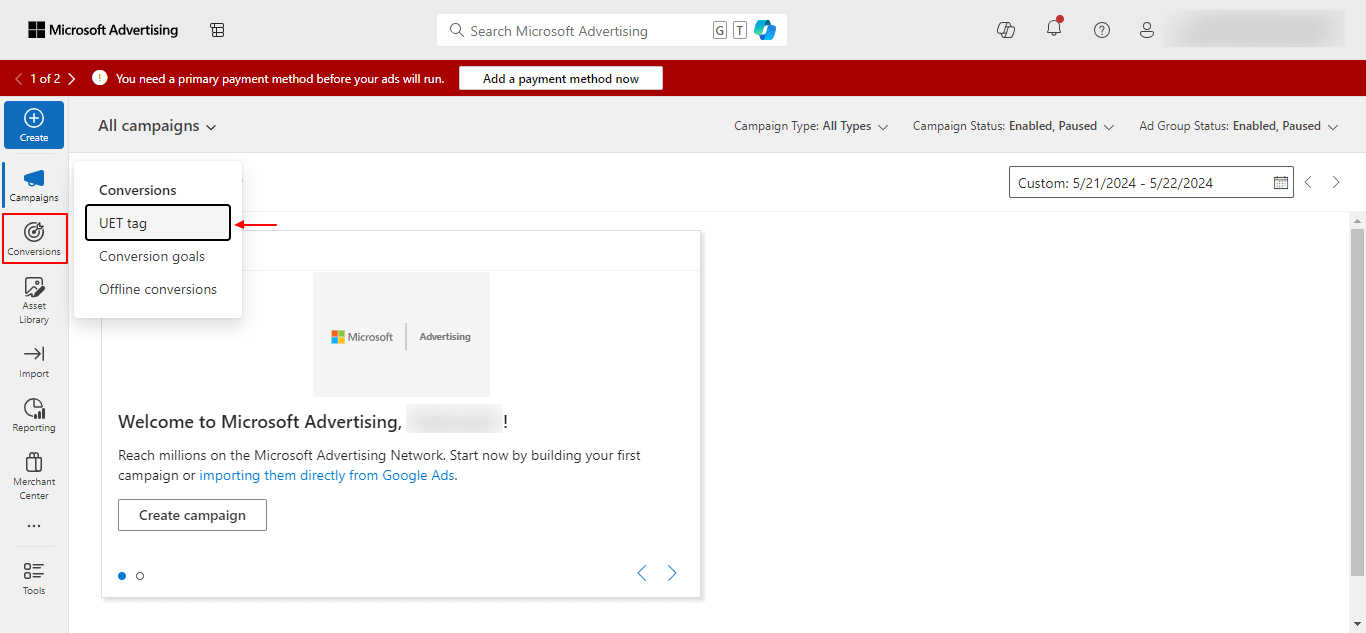
If you have already created your Microsoft Ads account, kindly login to the same and navigate the path: click on Conversions from the menu > Click on the UET tag.
Step 2: Creating or Viewing UET Tag #
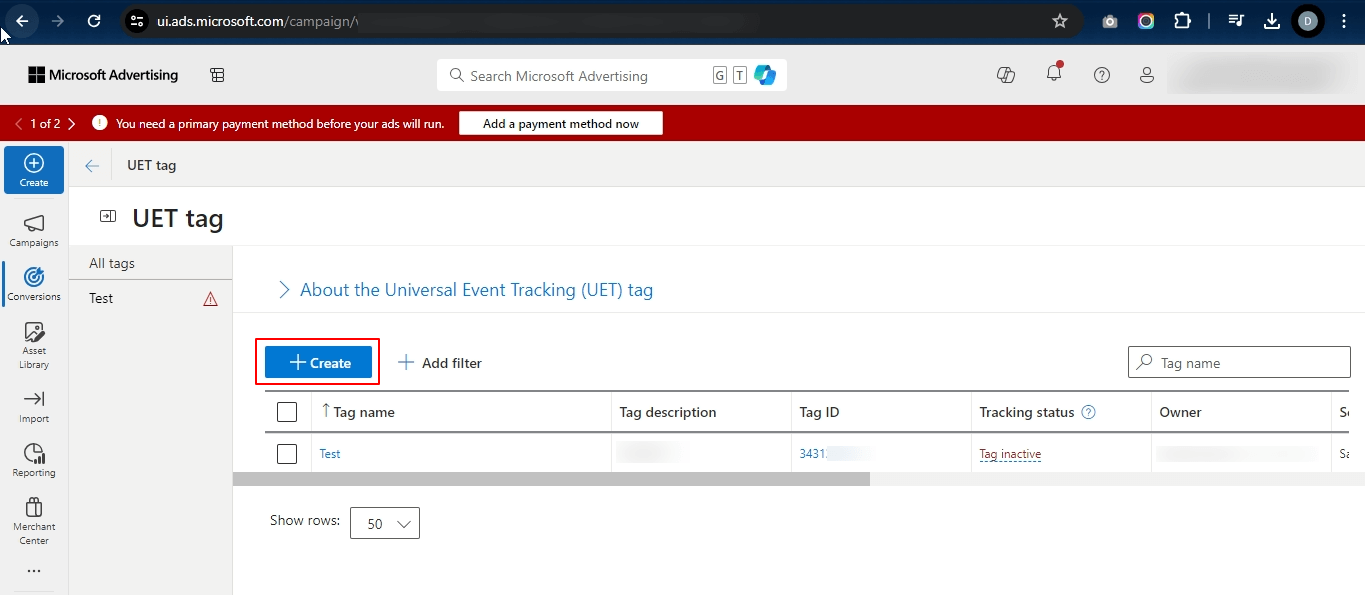
You will now be redirected to the UET tag screen wherein you will get a list of the existing UET tags. However, if you wish to create a new UET tag then you can click on the Create button.
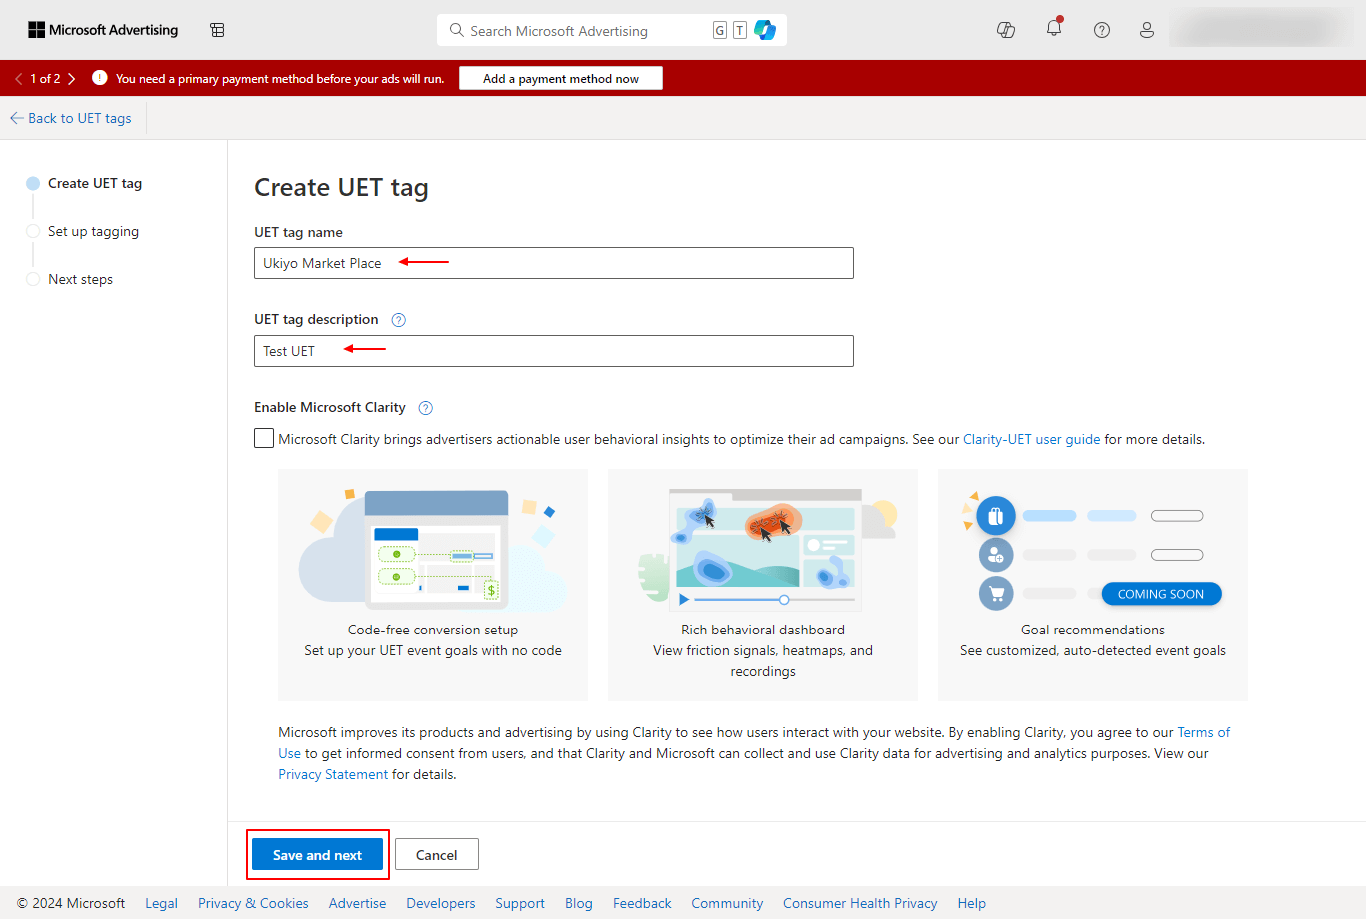
While creating the tag, mention the name and description. Once done, click on the Save and Next button to proceed ahead.
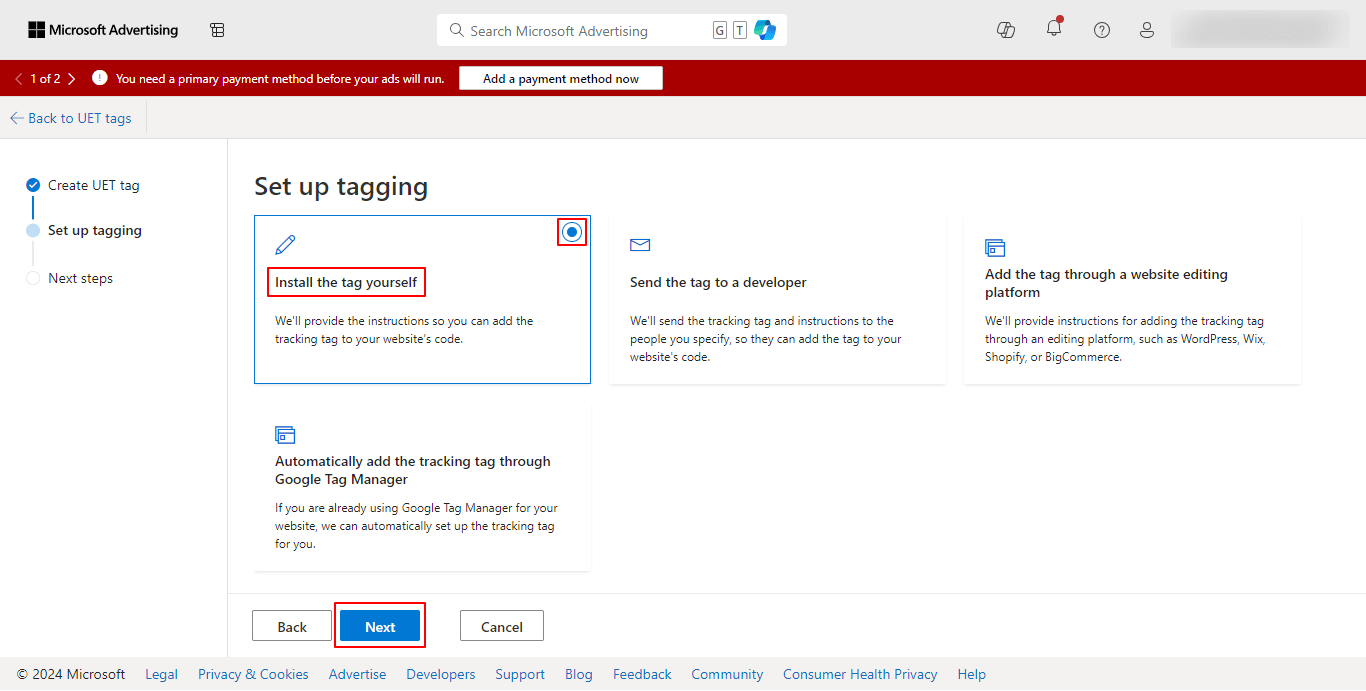
You will be redirected to the tag set-up page. Select your setup mode as the Install the tag yourself option and click on the Next button.
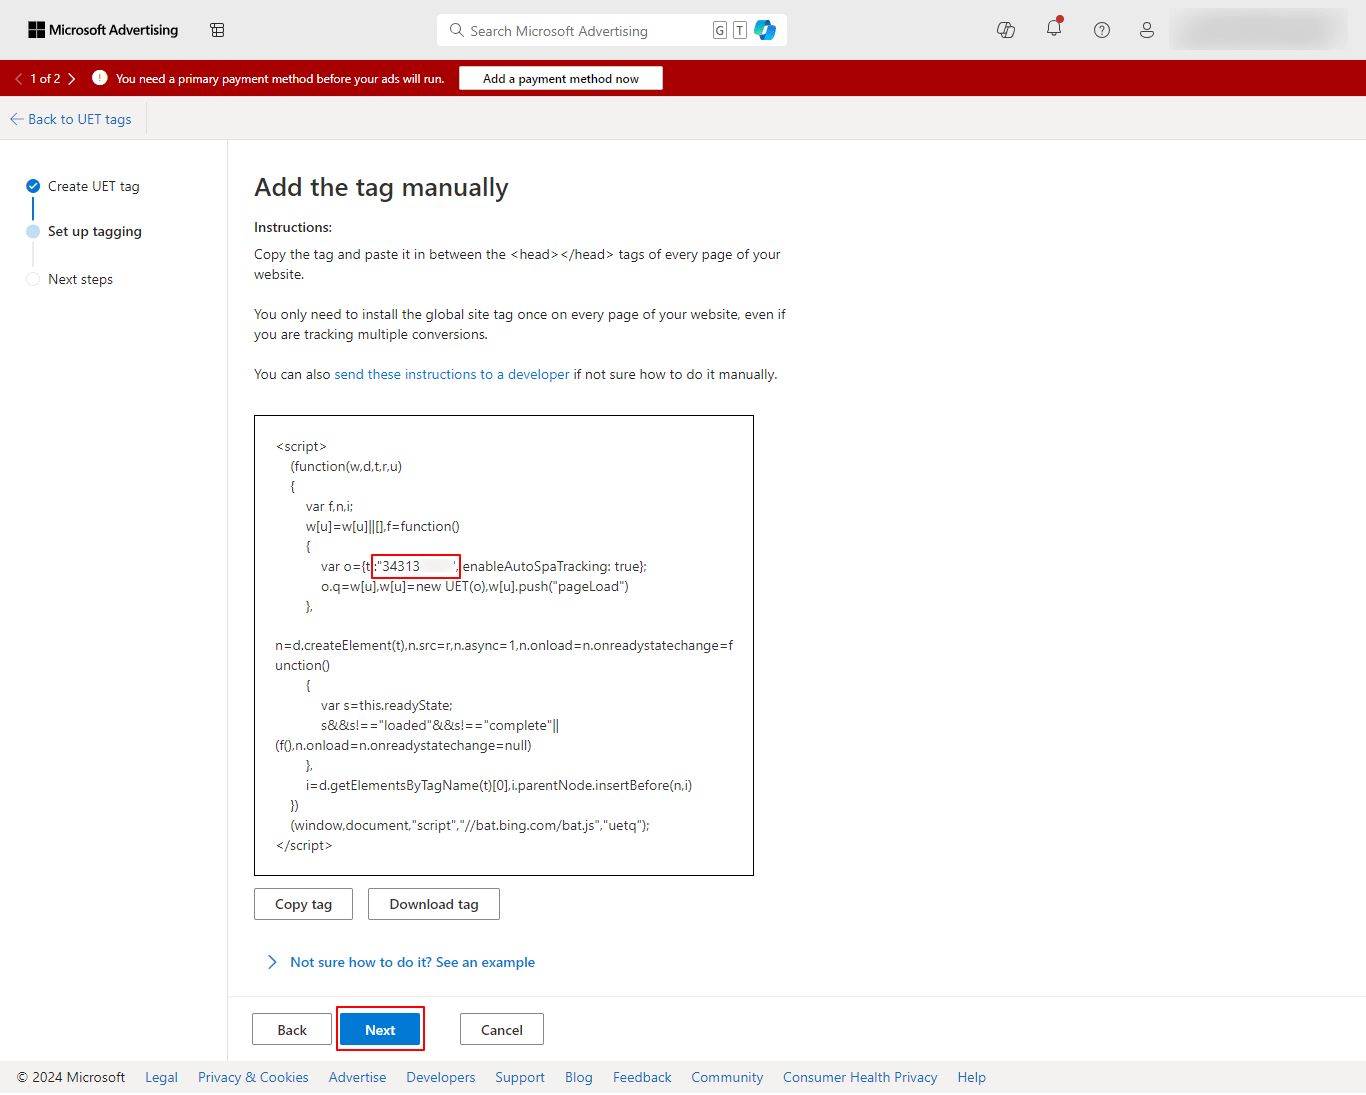
You will now be able to view the script to add the tag manually. You can copy the Microsoft Ads pixel ID as shown in the image below. Click on the “Next” button and you are done with pixel creation.
Step 3: Copying the Pixel ID #
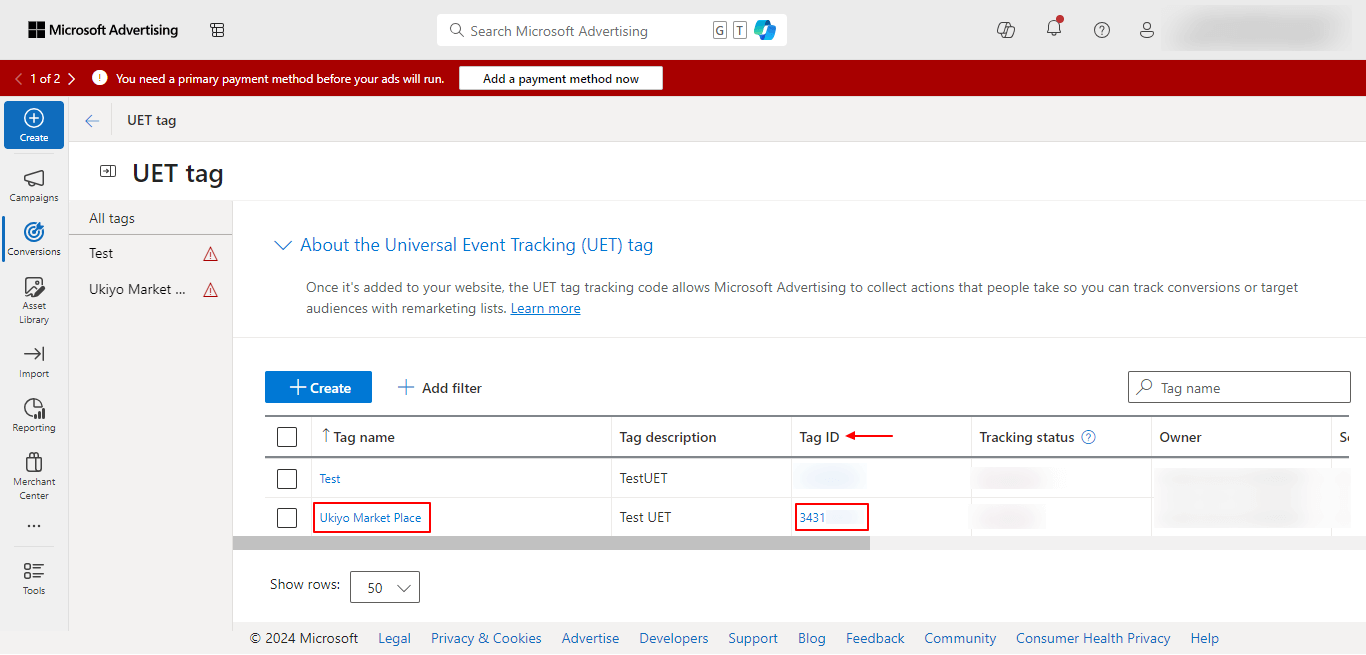
Another way to view the pixel is to navigate back to the UET tag page and you will find the list of existing tags. You can copy the pixel from the Tag ID column as shown below in the image.
Step 4: Saving the Pixel in Conversios Plugin #
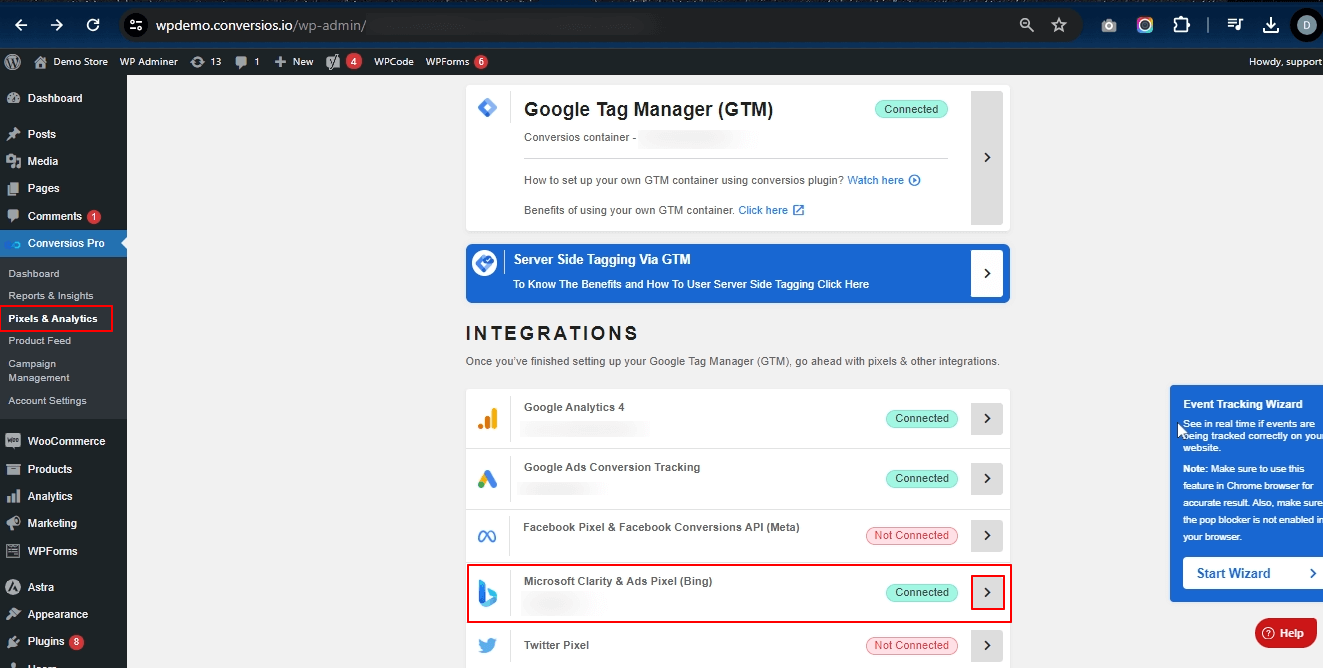
To save the pixel in the Conversios plugin, login to your WordPress backend and follow the path: Conversios Pro > Pixels & Analytics > Integrations > Microsoft Clarity and Ads Pixels (Bing).
Step 5: Finalizing the Integration #
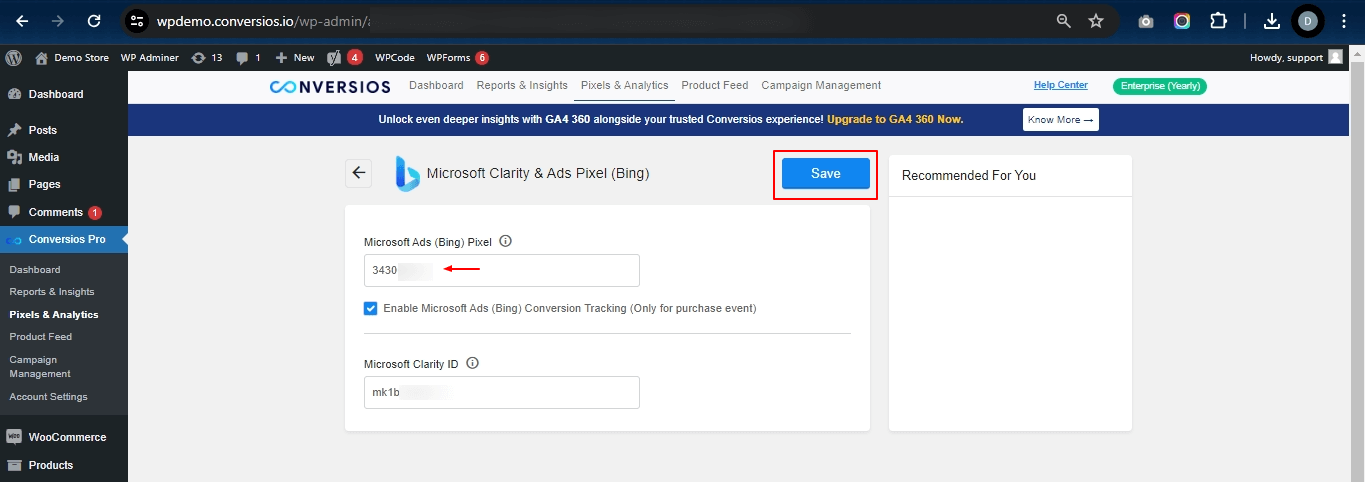
Enter the copied pixel ID and click on the Save button.
Integrating Microsoft Clarity ID with Conversios Plugin #
Step 1: Logging into the Microsoft Clarity Account #
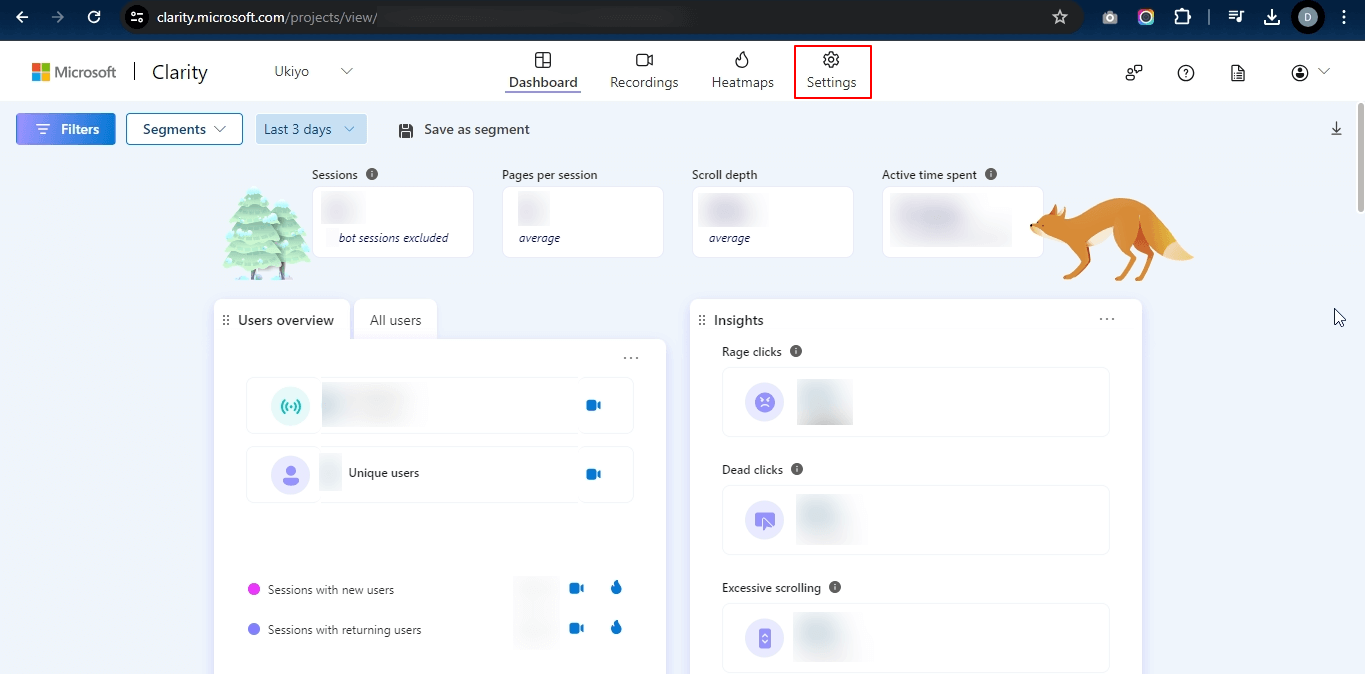
Login to your Microsoft Clarity account. You will have to create a project post logging in. Once the project is created, you can click on the Settings option from the dashboard as shown below.
Step 2: Copying the Project ID #
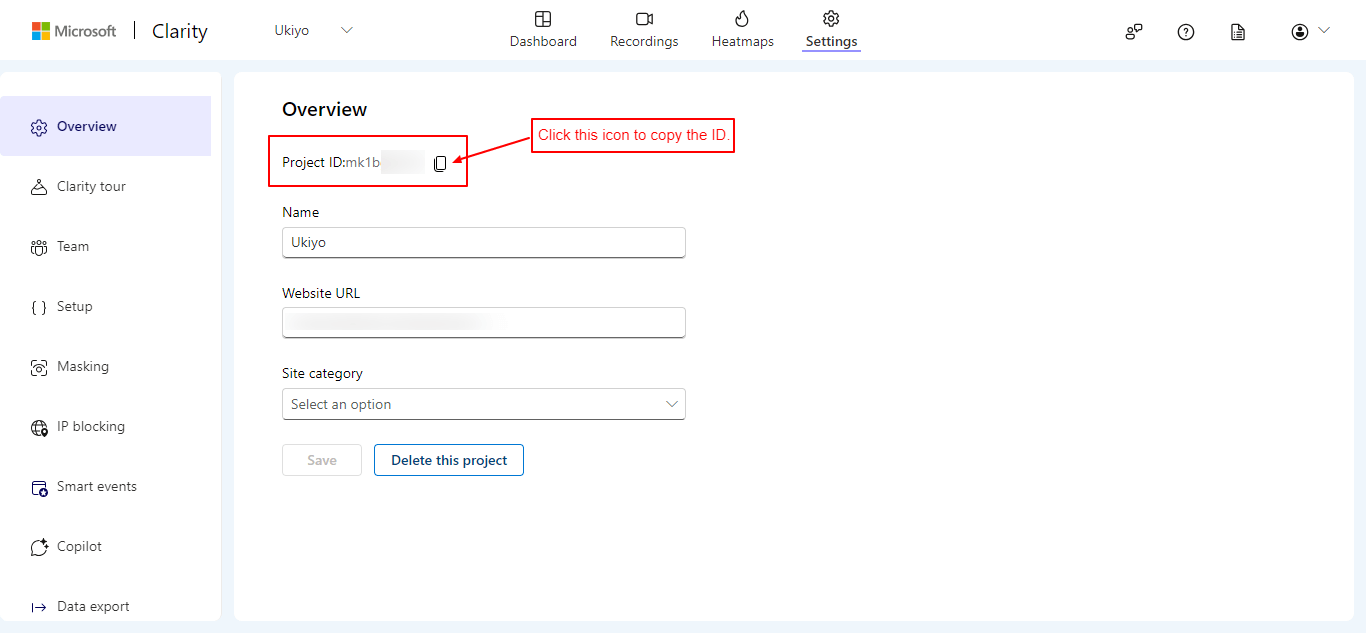
On the overview page, you will get the project ID. Copy the same using the copy option as highlighted in the image below.
Step 3: Saving the Project ID in Conversios Plugin #
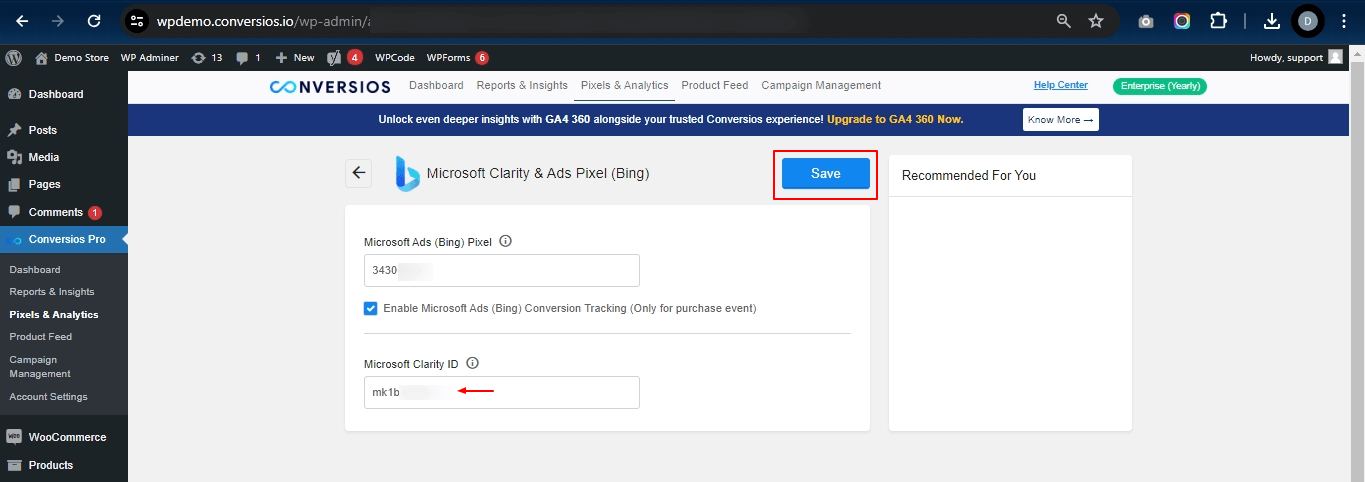
To save the pixel in the Conversios plugin, login to your WordPress backend and follow the path: Conversios Pro > Pixels & Analytics > Integrations > Microsoft Clarity and Ads Pixels (Bing)
Step 4: Finalizing the Integration #
Enter the project ID and click on the Save button.
Congratulations! 🎉
You have now successfully created and integrated your Microsoft Clarity ID in the Conversios plugin!
Notes on Bing Conversion Tracking
While integrating Bing Pixel in Conversios plugin, you will find an option to enable conversion tracking for purchase events only. If you wish to enable it then follow this guide Bing Conversion Goal Setup to make sure that events will get tracked.