How to Enable Enhanced Conversions in Google Ads? #
Following are the steps for enabling Google Ads Conversion Tracking:-
Step 1: Sign in to your Google Ads account.
Step 2: In the upper right corner of your account, click the tools icon, and under “Measurement”, click Conversions.
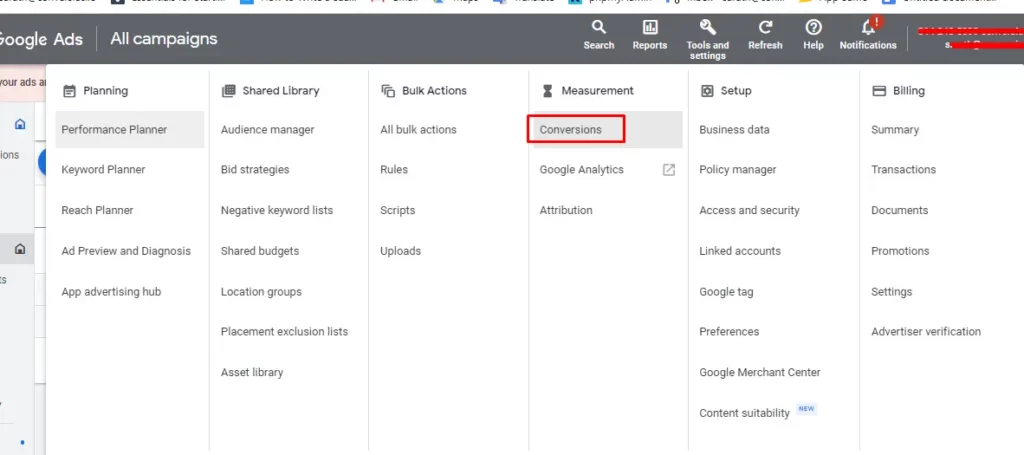
Once you click the Conversions option you can select the required conversion action (as shown in the screenshot below). In which you want enhanced conversions that needs to be tracked.

Step 3: In the “Enhanced conversions” section at the bottom, click Turn on enhanced conversions.
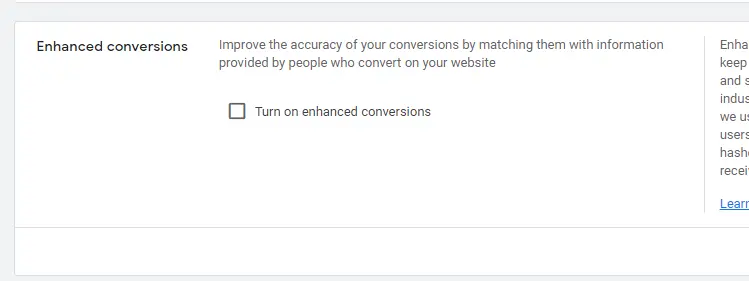
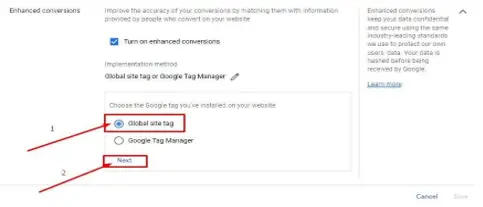
Once you have turn on Enhanced conversions you will have to click the Tag type and select Global Site tag or Google Tag Manager
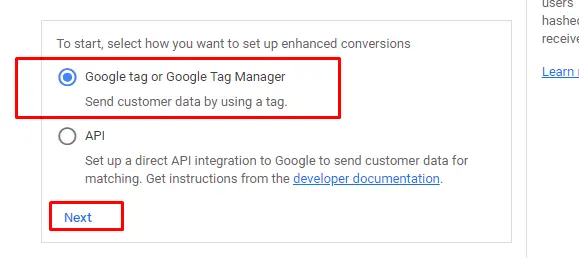
After Clicking Next, we need to click check URL and select one manually as shown in the screenshot.
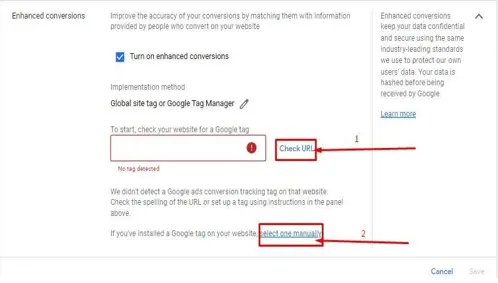
Once you have clicked select one manually, you will have to go ahead. Now select Global Site Tag and click next.
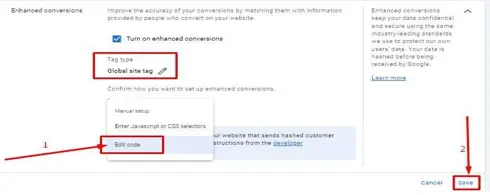
When you click next the Tag type will change to Global Site tag. Then click the drop down to confirm how you want to setup enhanced conversions and in that select Edit code as shown below once selected, click on save.
Now Enhanced Conversions is enabled in Google Ads successfully.
Now we will see how to Enable Enhanced Conversions in Conversios Plugin
● Get into the Conversios Plugin in your backend and click Google Ads.
● Enable Google Ads conversion tracking. It is mandatory to select this to enable Google Ads enhanced conversion tracking.
● Now Enable Google Ads Enhanced Conversion tracking and select the conversion ID and Conversion Label from the drop down and save the same.
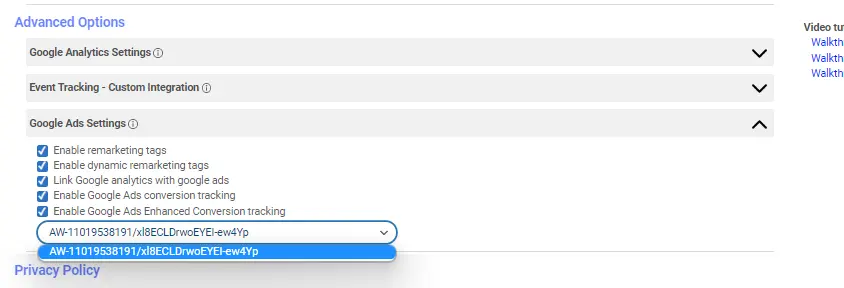
Google Ads Enhanced Conversions data will start flowing to Google Ads once all these steps are completed.