Table of Contents
This guide walks you through integrating the Snapchat Pixel and Conversion API Token with the Conversios plugin to track and optimize your ad campaigns, capturing key metrics to enhance marketing efforts in a step-by-step manner.
Step-by-Step Guide to Integrate Snapchat Pixel #
To integrate Snapchat Pixel in the Conversios plugin, kindly extract Pixel ID from your Snapchat Business Account.
Step 1: Create Snapchat Pixel from Snapchat Business Manager #
- Create & log in to your Snapchat business manager account.
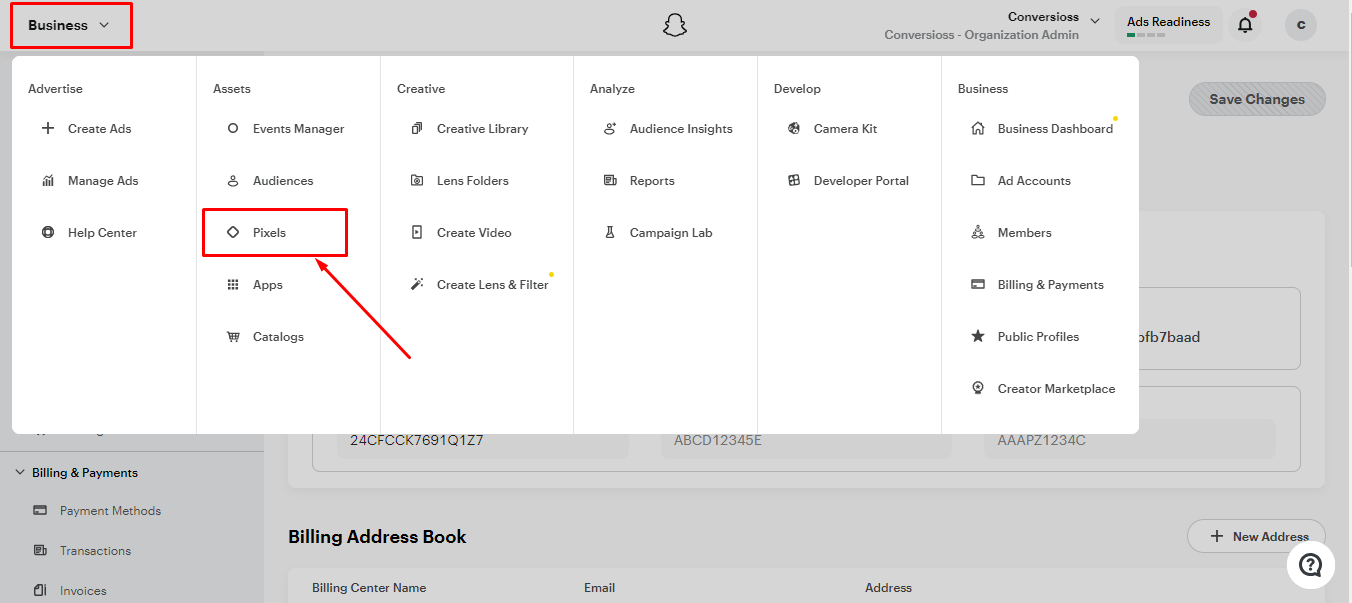
- Now navigate to the Business & You will find the Pixels under the assets, click on it.
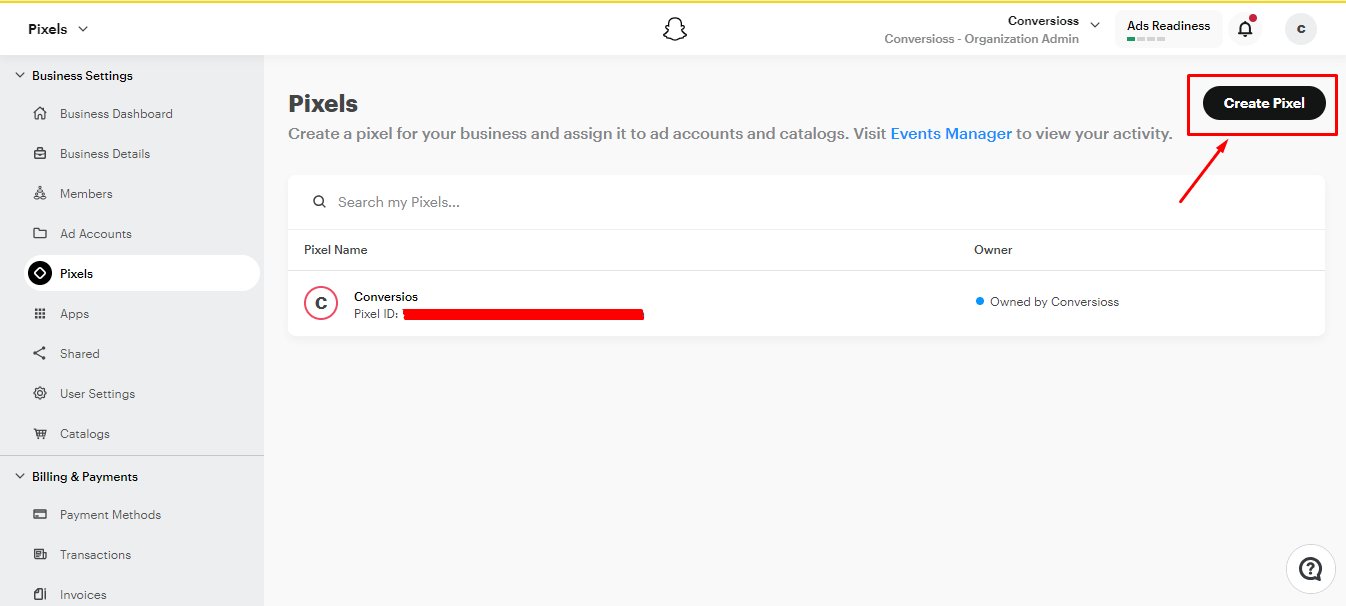
- Now select Create Pixel.
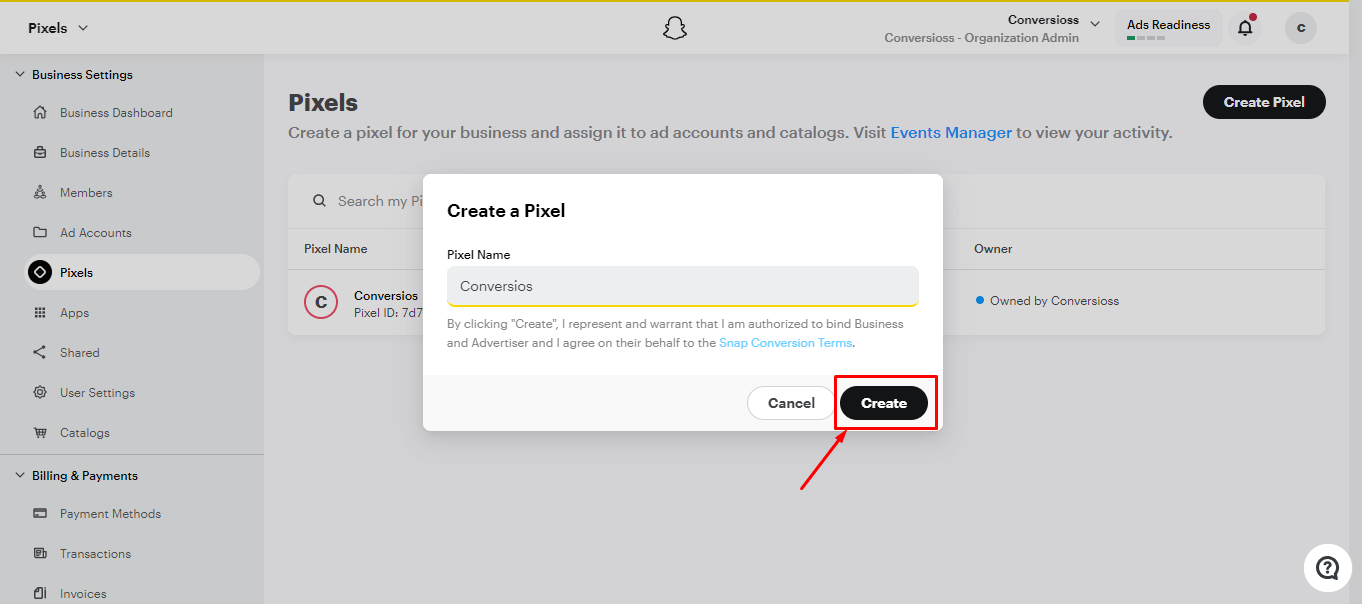
- Give a name to your Pixel & continue by clicking on Create.
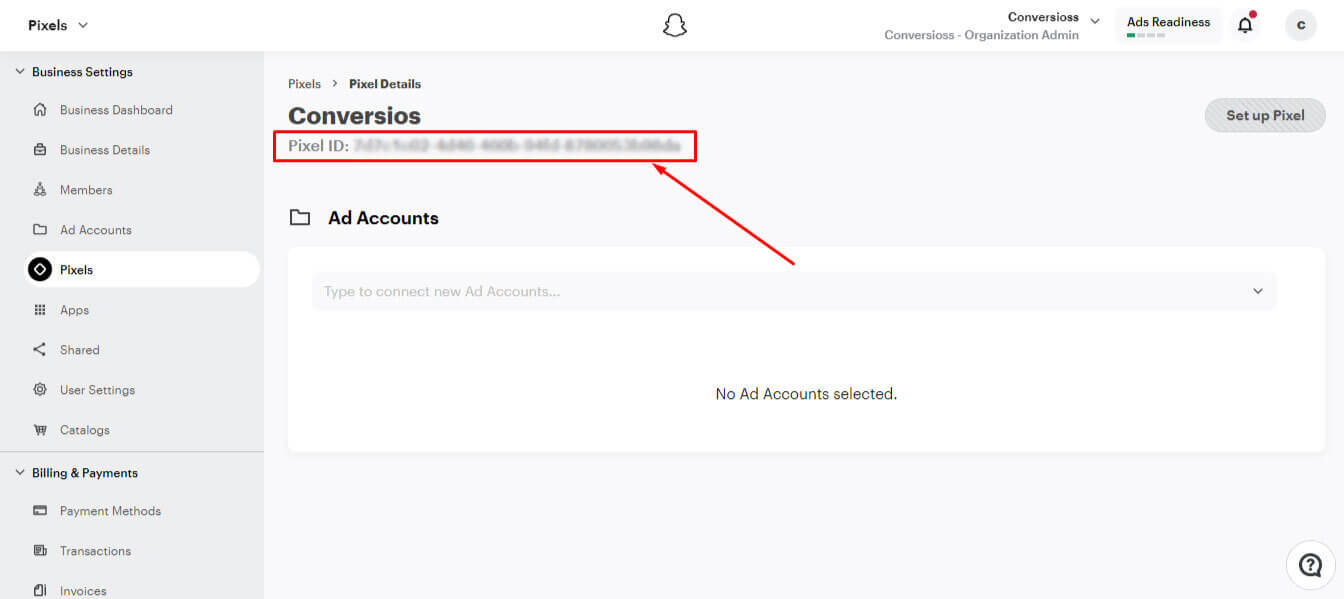
- Once you have created a pixel, you will find an interface. It has your Snapchat Pixel ID. Just copy the Pixel ID.
Step 2: Create Snapchat Conversion API Token from Snapchat Business Manager #
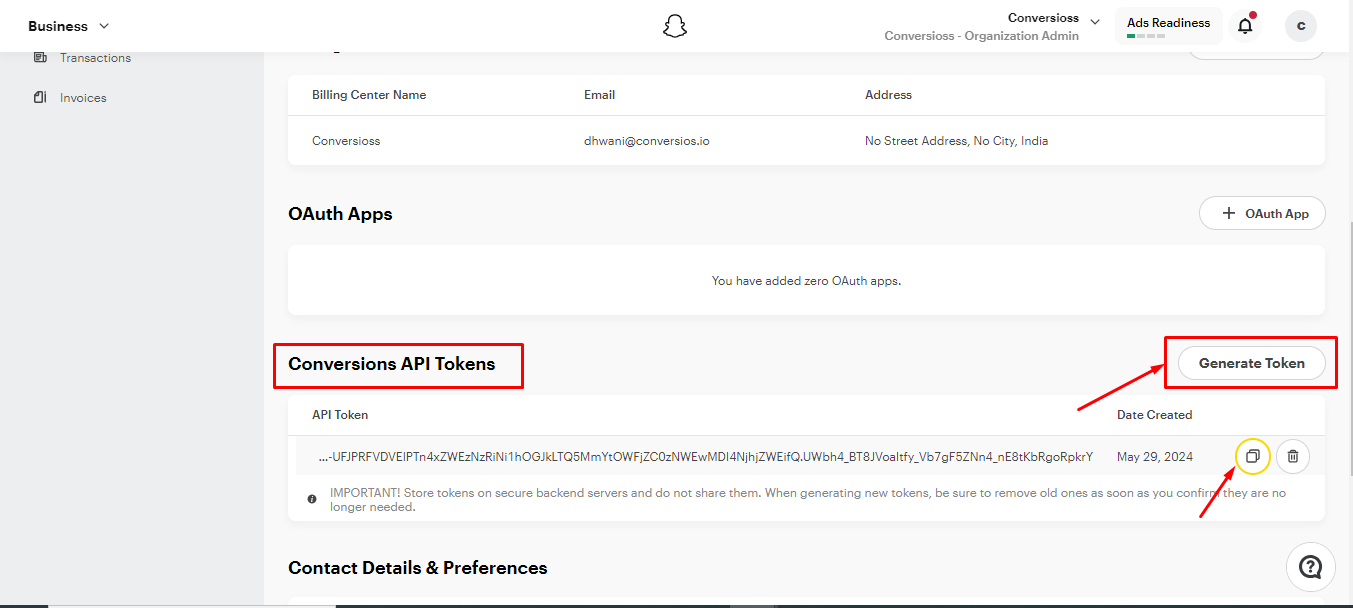
- Navigate to Business Details

- Scroll down to Conversion API Tokens, and Click Generate Token.
Step 3: Integrate the Snapchat Pixel ID and Snapchat Conversion API Token to Conversios Plugin #
Note: To integrate a Snapchat Conversion API (Only if you are using the plugin’s premium version will this be accessible)
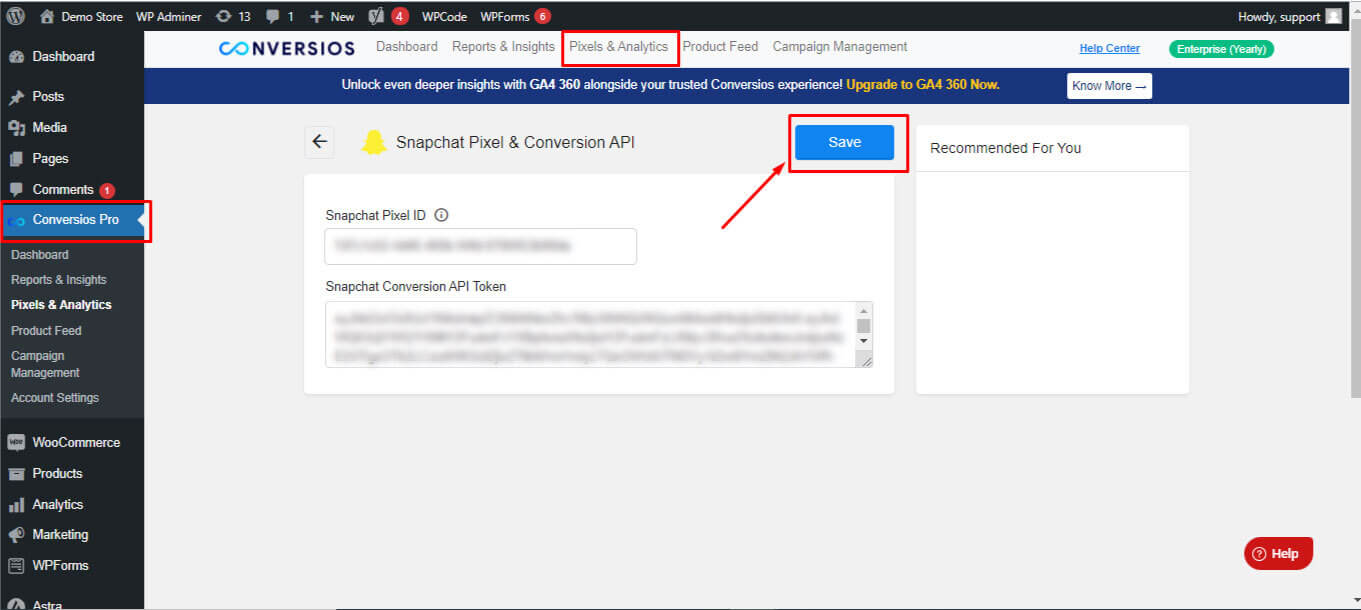
- The final step is to log in to your WordPress backend and navigate the path as Conversios> Pixels & Analytics > Click on the Snapchat Pixel & Conversion API option under Integrations.
- Just paste the Snapchat Pixel ID and Snapchat Conversion API Token here and hit the Save button.
Congratulations! 🎉
Congratulations, you have successfully created and integrated your Snapchat Pixel and Snapchat Conversion API Token using the Conversios plugin. Tracking important metrics and optimizing your advertisement campaigns becomes easier.