Table of Contents
It is an easy activity to set up and activate the Conversions Plugin on your WordPress site. Follow up downloading, installing, and activating the plugin to facilitate better services of your website.
Step 1. Downloading the Conversios Plugin #
Once you download the Conversios Plugin, Log in to your WordPress backend, from the left sidebar menu go to the Plugins section and click on Add New Plugin.

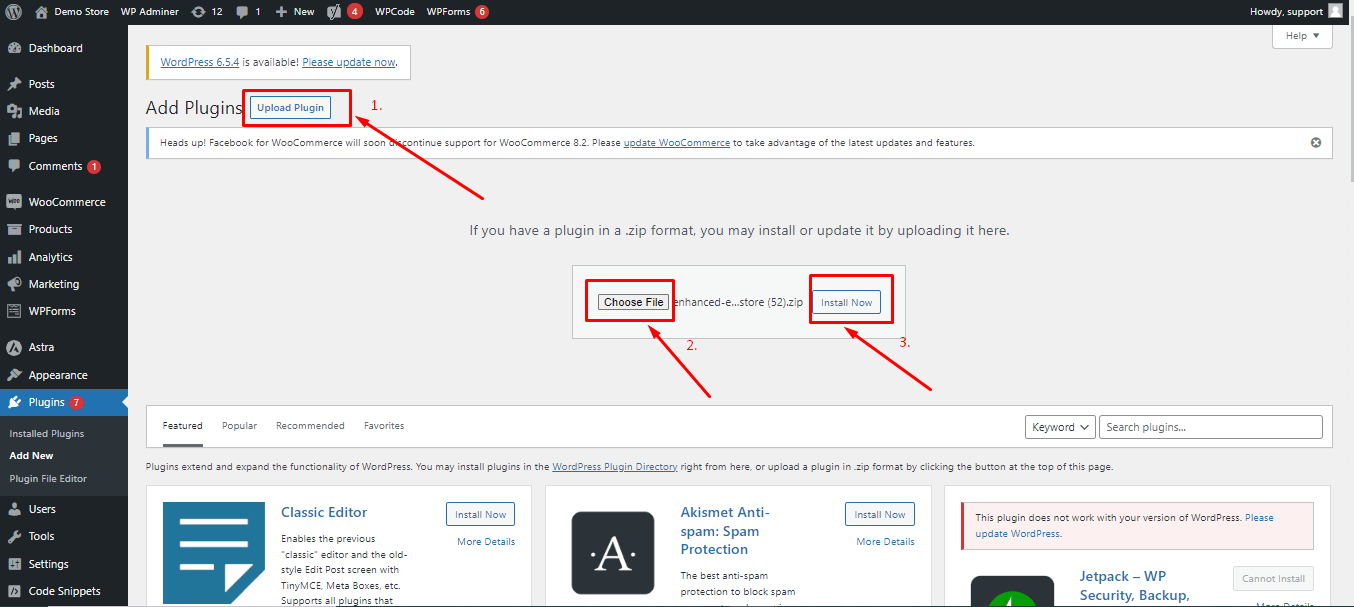
Step 2. Uploading and installing the plugin #
- Click on Upload Plugin.
- Choose the PRO Zip File from your email (check your email for the purchase confirmation. You should find a pro zip file attached.)
- Click on Install Now.
- After installation, click on Activate Plugin.
Step 3. Activating the Conversios Plugin #
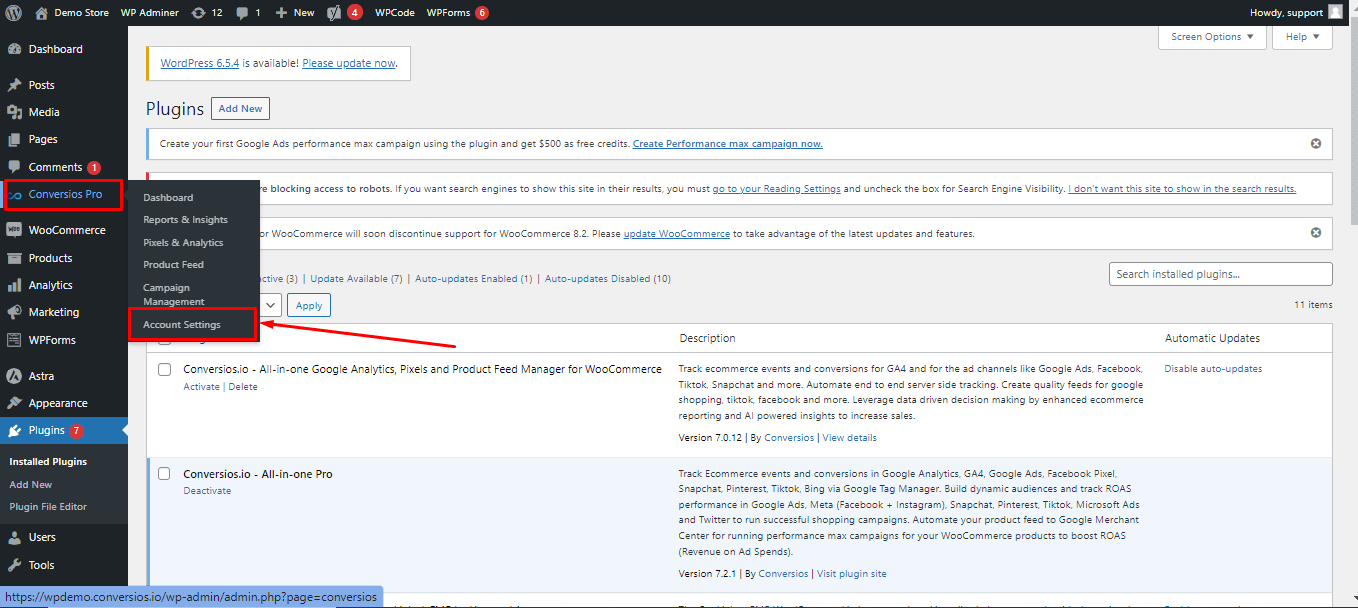
Once the file is uploaded and the Conversios Plugin is activated, you will be able to:
- Find the Conversios PRO Tab on the left-hand pane.
- Navigate to Account Settings.
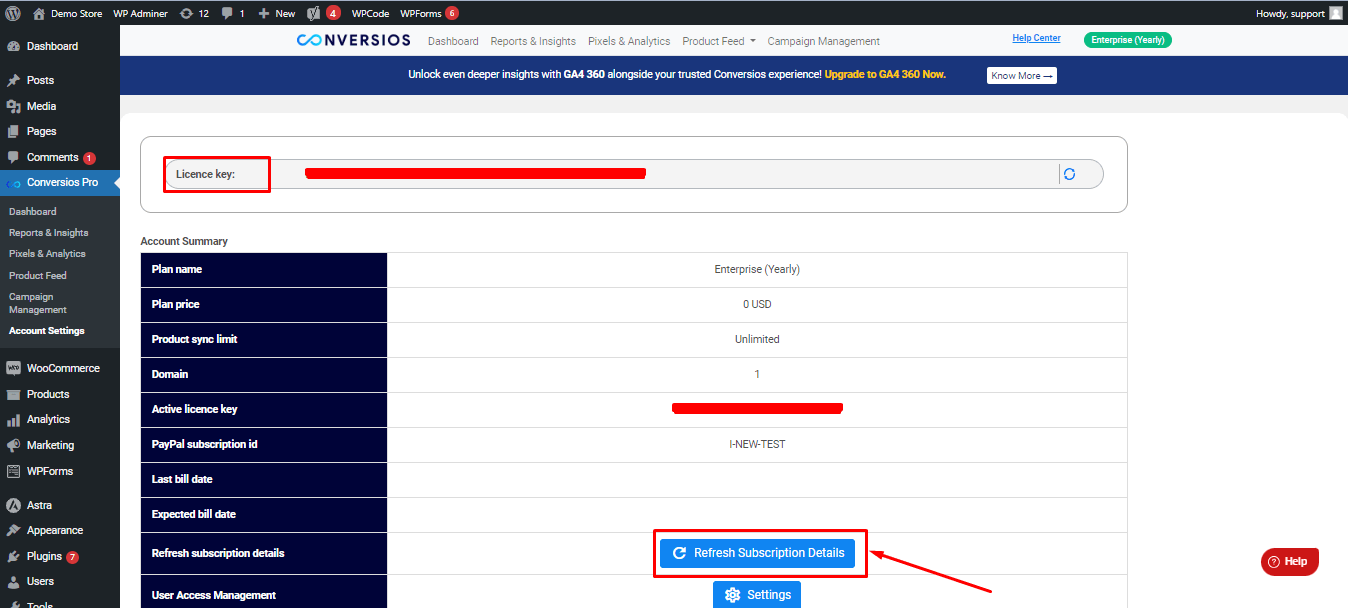
- Enter the license key to activate the subscription you received in your email.
- Click the refresh button on the right side to activate the license key.
- Click on Refresh Subscription Details to complete the activation.
Following these steps should help you in activating the license key and use the plugin effectively.
Congratulations! 🎉
You have successfully activated the Conversios plugin or the All-in-one Google Analytics, Pixels, and Product Feed Manager for WooCommerce plugin on your WordPress website.