Table of Contents
Introduction #
Let’s quickly see how we can set up the Hotjar Pixel in the Conversios plugin on your WordPress site. Follow these steps to retrieve your Hotjar Pixel ID and integrate it seamlessly.
Getting the Hotjar Pixel ID #
Step 1: Accessing Hotjar Business Manager Account #
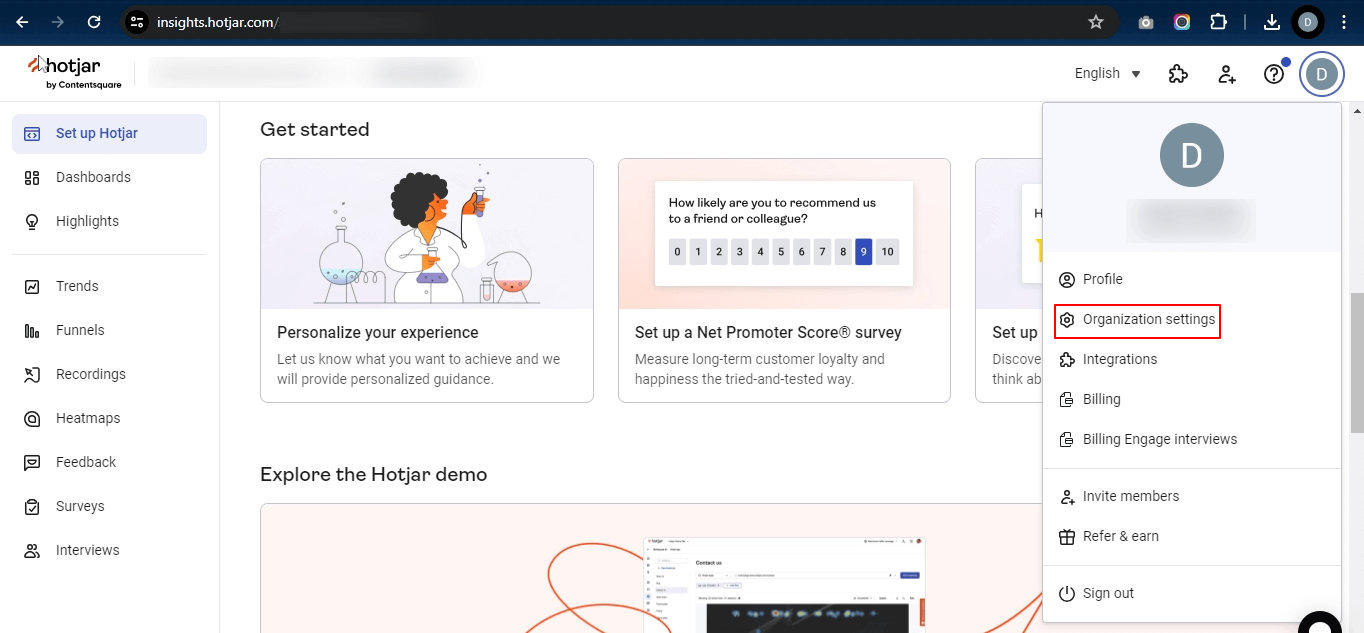
To get the Hotjar Pixel ID, kindly make sure that you have access to the Hotjar Business Manager account. Follow these steps:
- Login to your Hotjar account.
- Go to the Profile icon on the top-right corner.
- Select Organization Settings from the drop-down menu.

Step 2: Retrieving the Pixel ID #
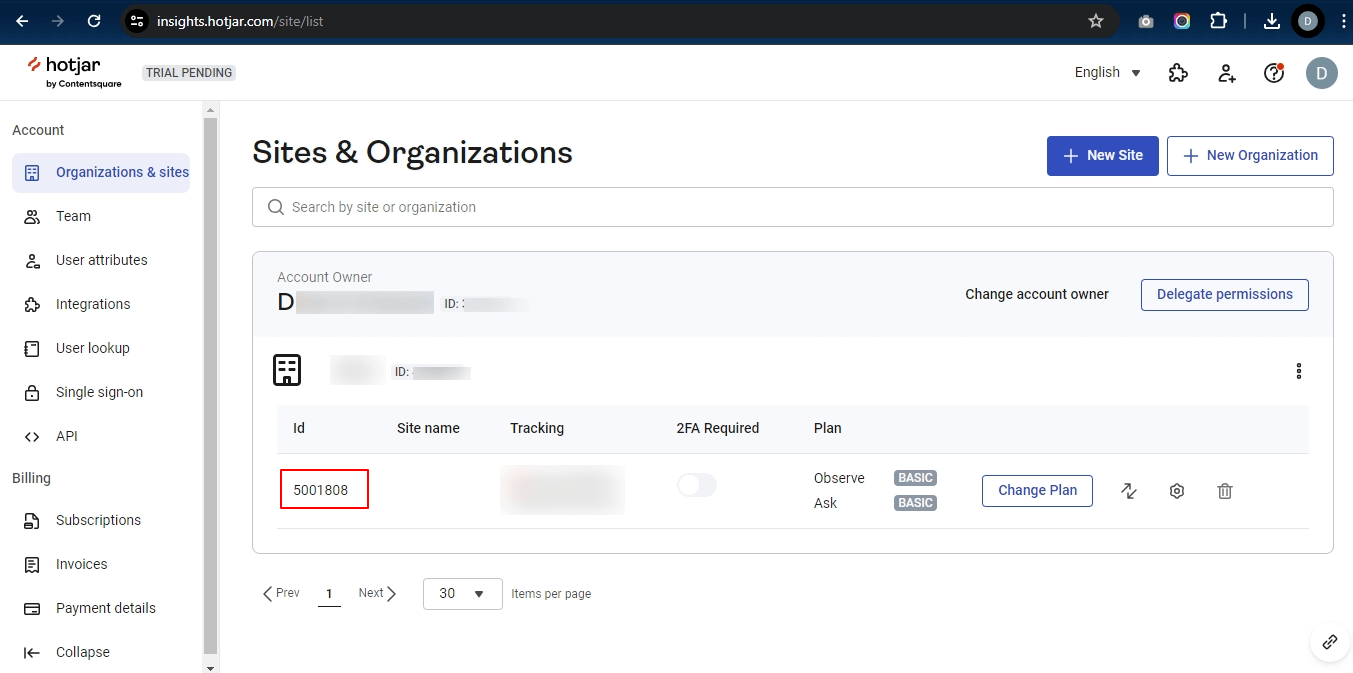
Once you are redirected to the Sites & Organizations screen, you will be able to get your Pixel ID. Follow these steps:
- Locate your site in the list.
- Copy the Pixel ID as shown in the image below.

Integrating Hotjar with Conversios Plugin #
Step 3: Logging into WordPress Backend #
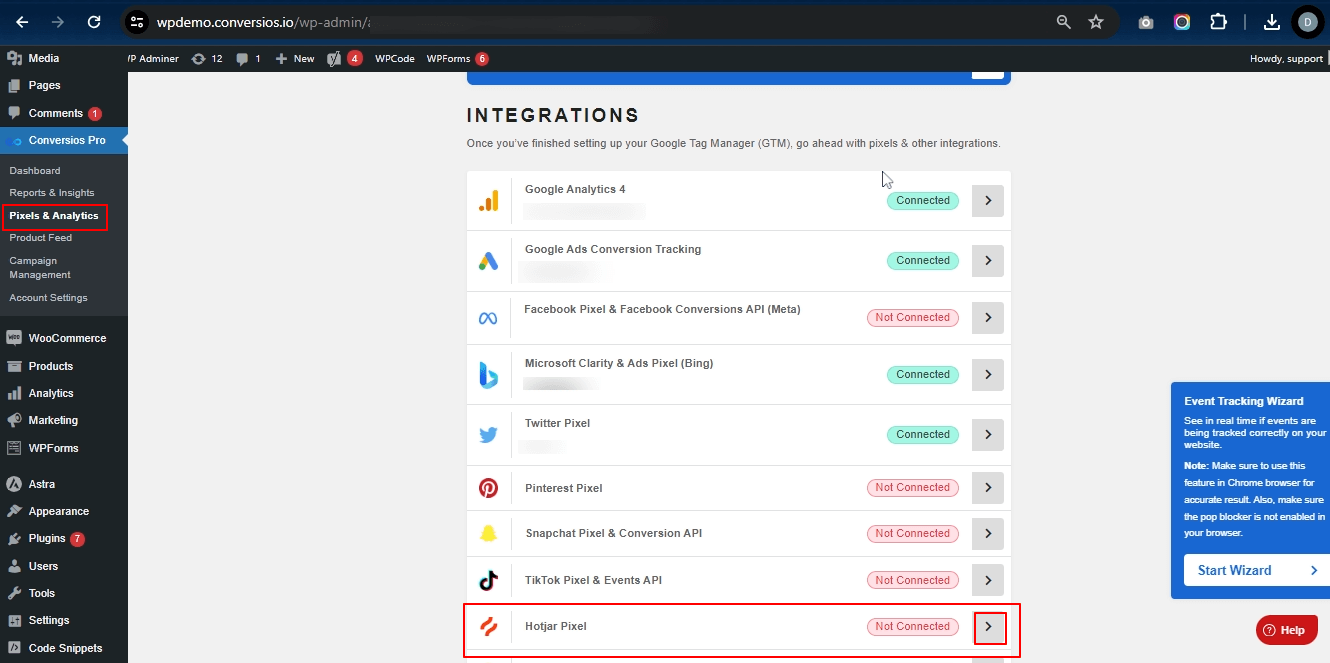
To integrate Hotjar with the Conversios plugin, login to your WordPress backend account and follow this path:
- Go to Conversios Pro.
- Navigate to Pixels & Analytics.
- Click on Integrations.
- Select Hotjar Pixel.

Step 4: Adding the Hotjar Pixel ID #
- Paste your Hotjar Pixel ID into the provided field.
- Click on the Save button.

Congratulations! 🎉
You have now successfully integrated your Hotjar Pixel ID into the Conversios plugin on your WordPress site.