Step-1: Login to your Microsoft ads account and navigate to Conversions >Conversions Goals.
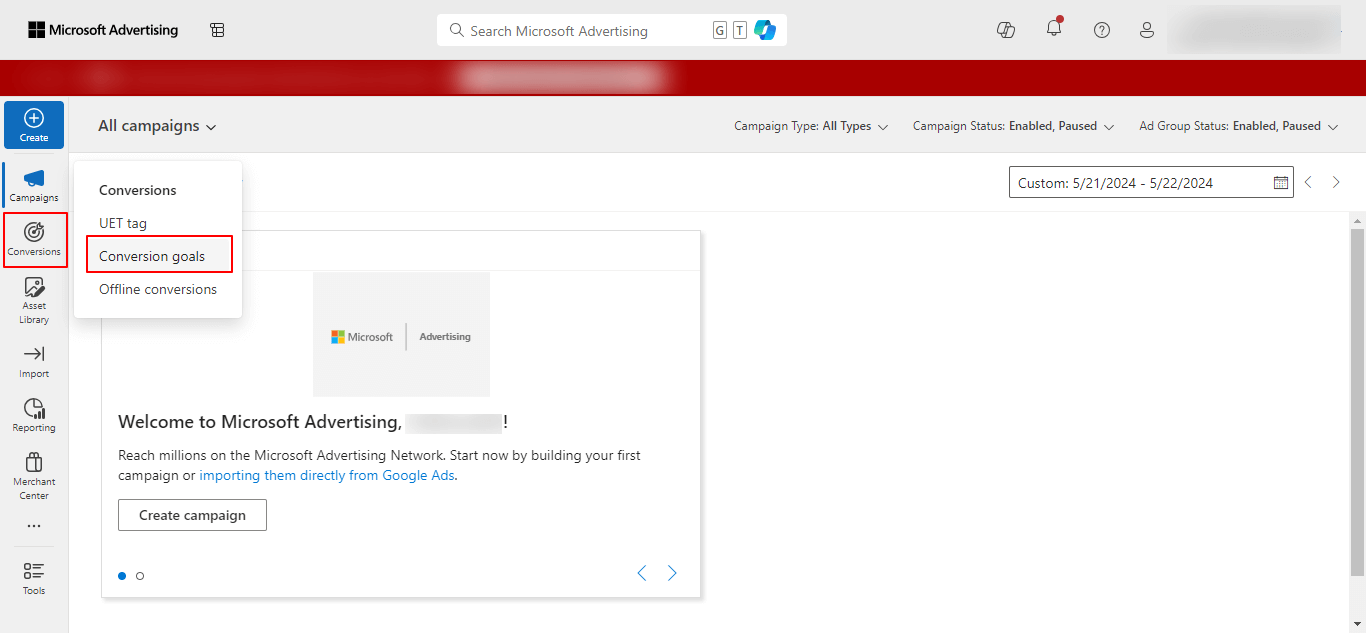
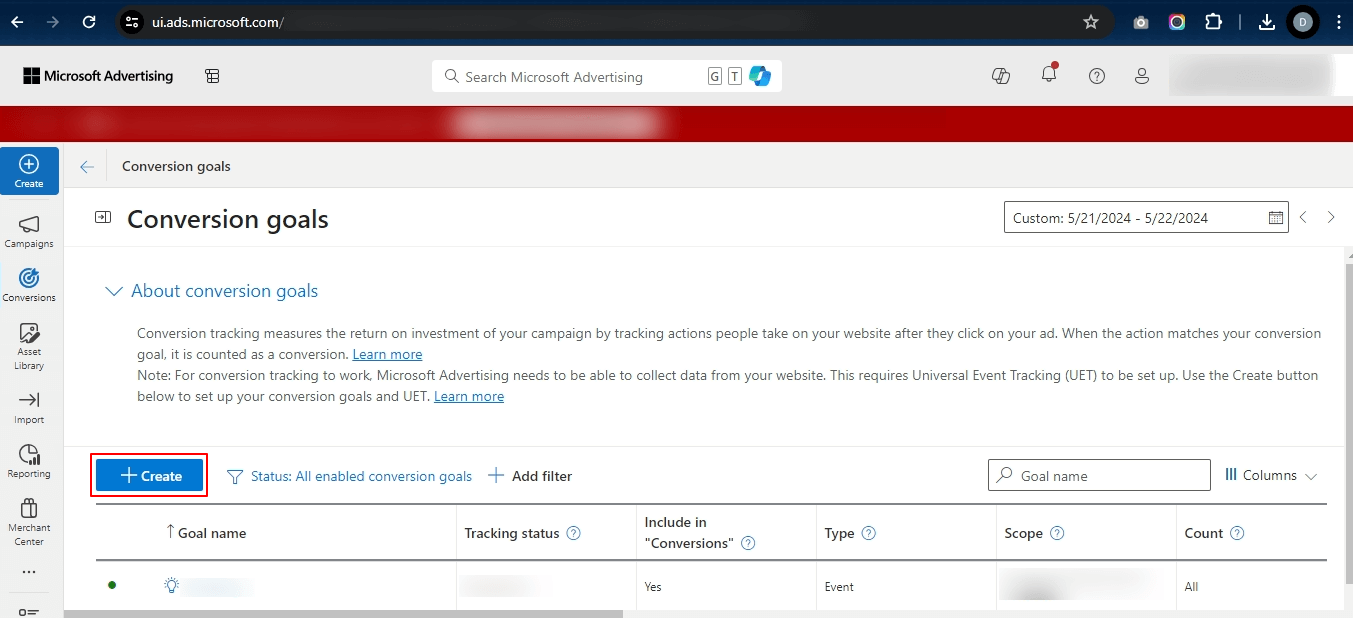
Step 2: On the Conversions Goals page, click on the option Create to create a new conversion goal.
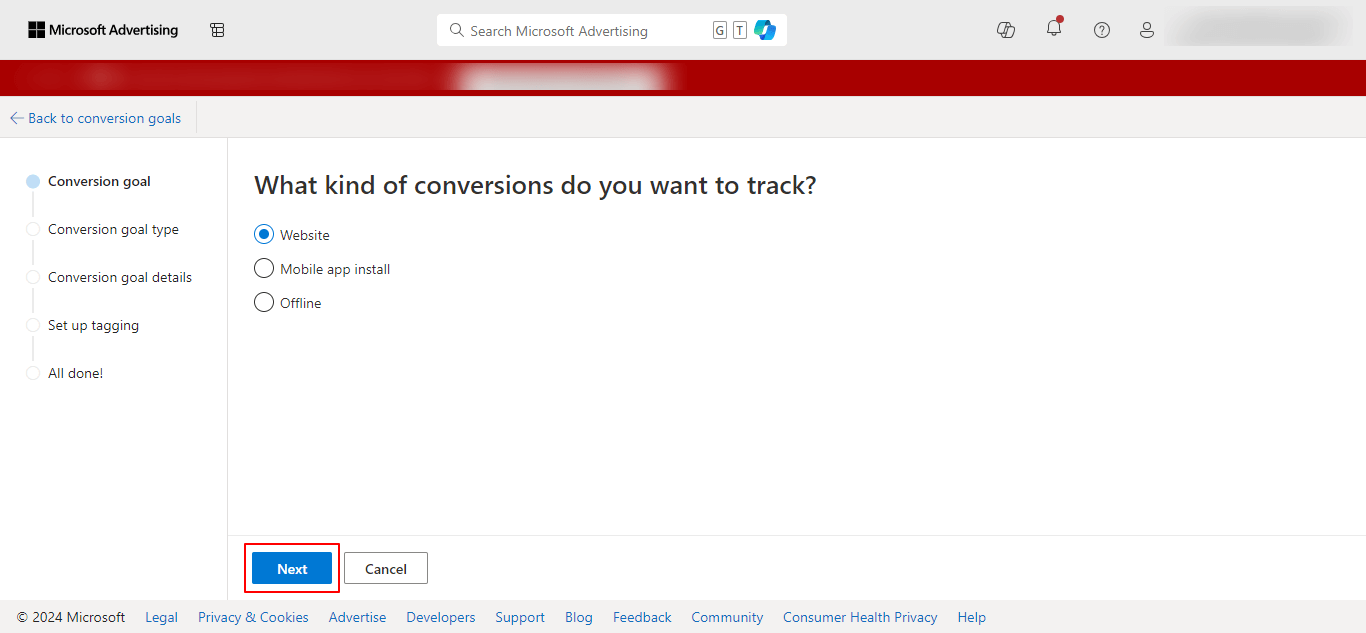
On the next page, you will have to select the type of conversion you wish to track. Go with the Website option and click on the Next button.
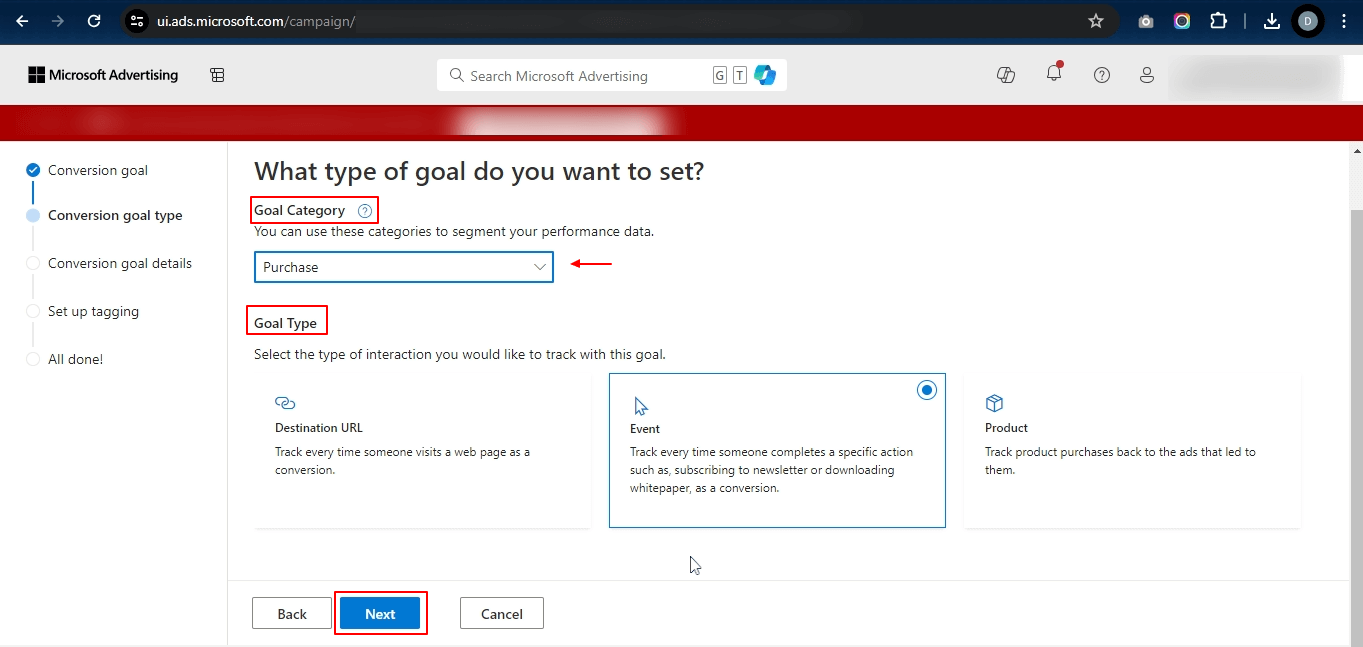
Next step, select your Goal Category and Goal Type as shown in the image below, and click on the Next button.
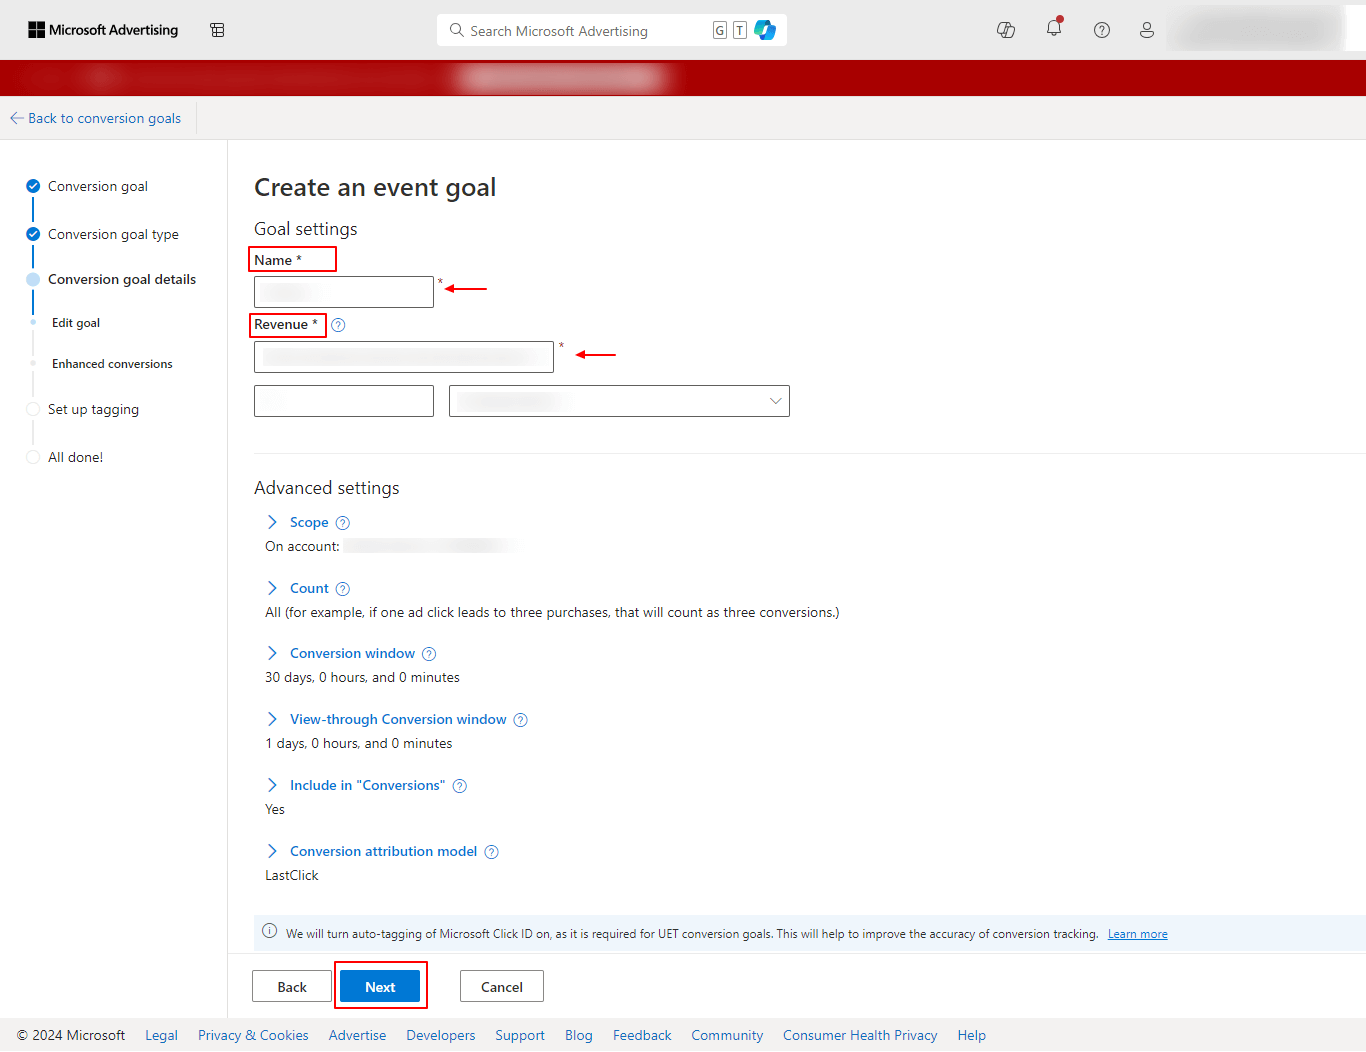
For the goal creation, mention the goal name set the goal revenue, and proceed ahead to the next step.
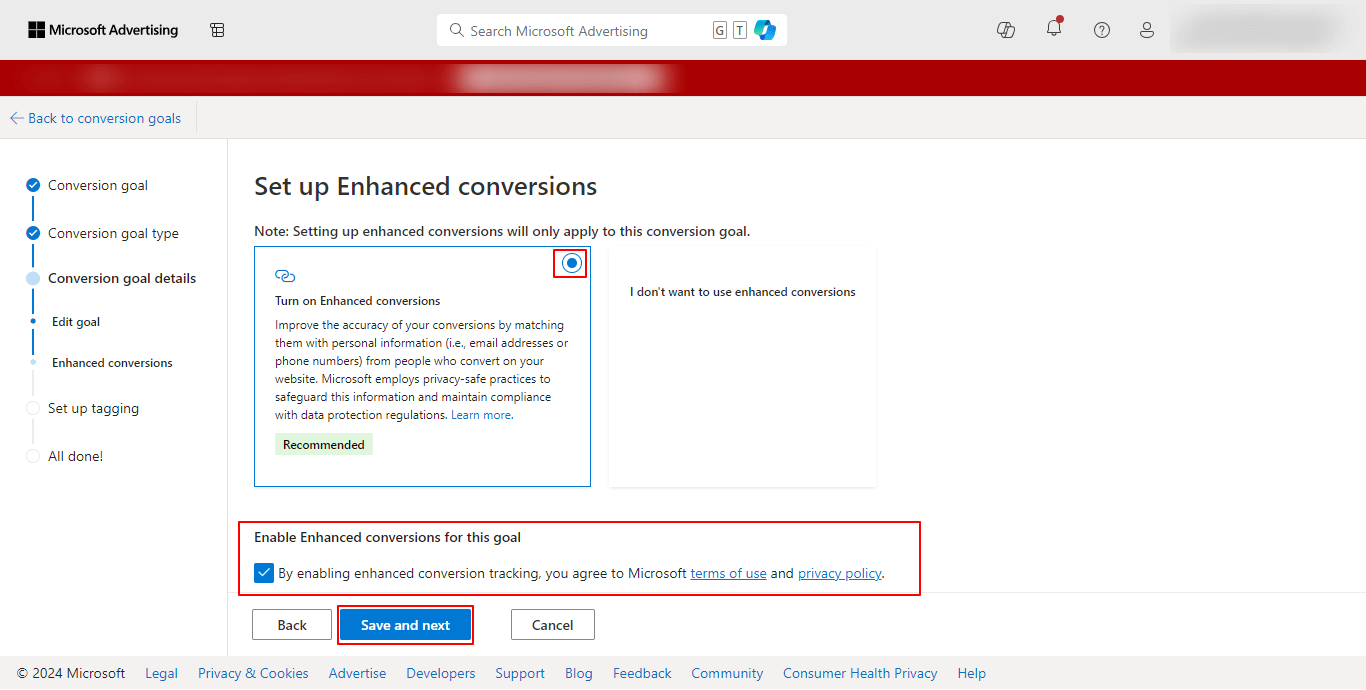
Step-3: Enable the enhanced conversions as shown in the image and please make sure to select the option Enable Enhanced conversions for this goal option. Save your settings and proceed to the next step.
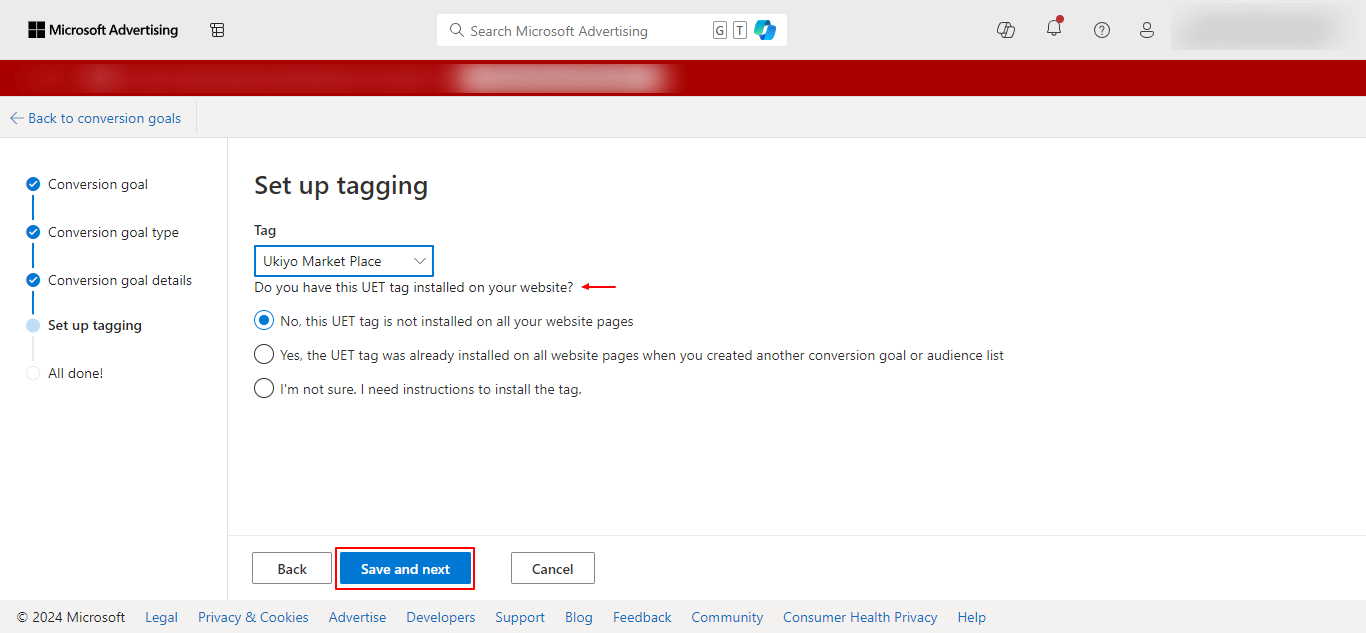
You will now be redirected to the Setup tagging page. Select the UET tag for conversion from the drop-down and select the appropriate option for the installation. Make sure to save the options and proceed ahead.
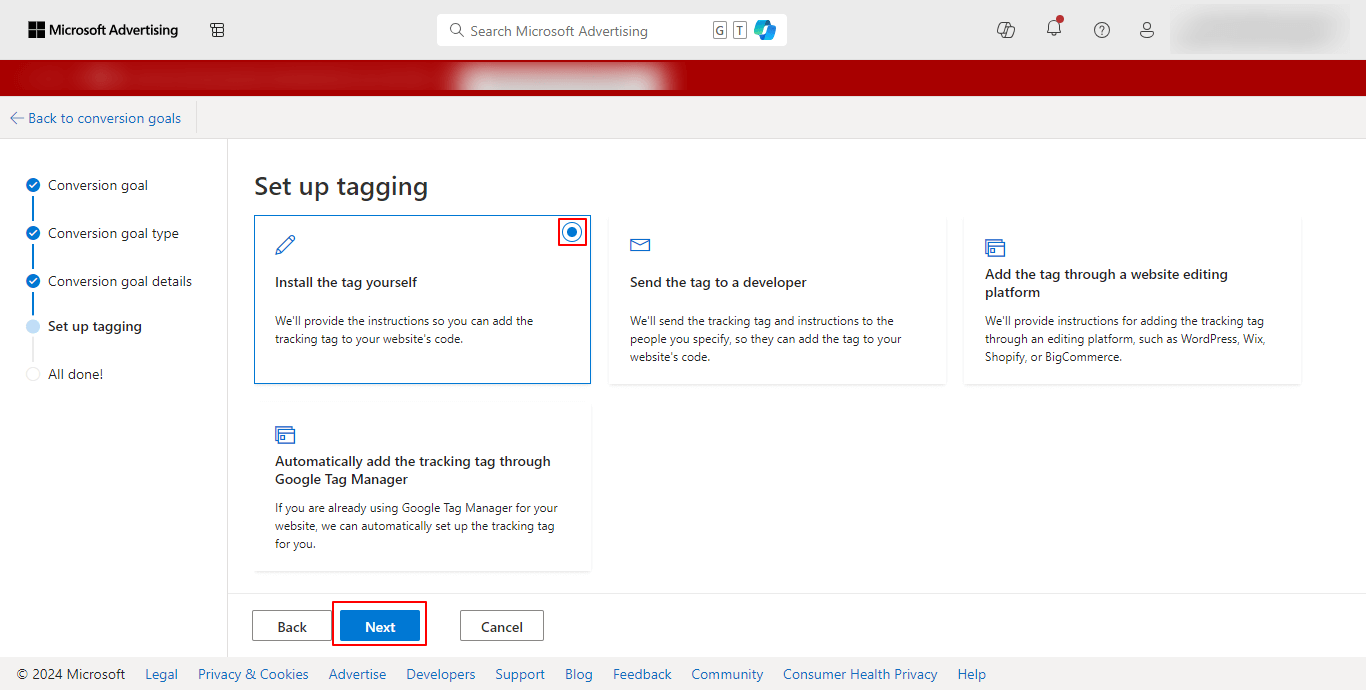
On the next page, select the option Install the tag yourself and click on the Next option.
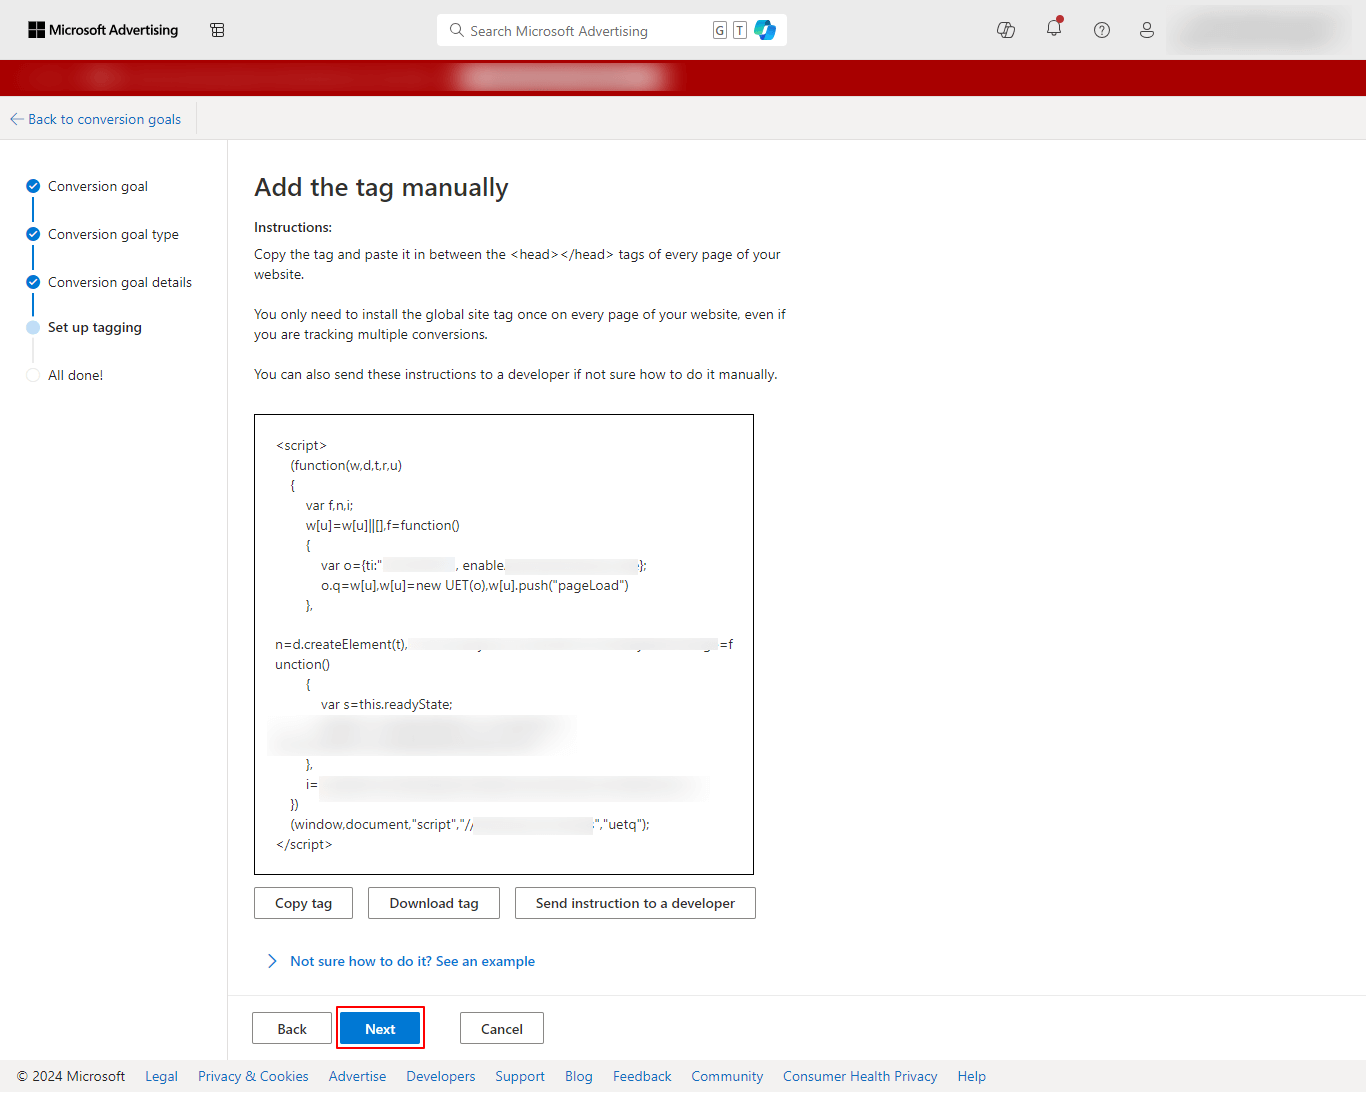
You will get the instructions to add the tag manually. You can check the details and move to the Next step.
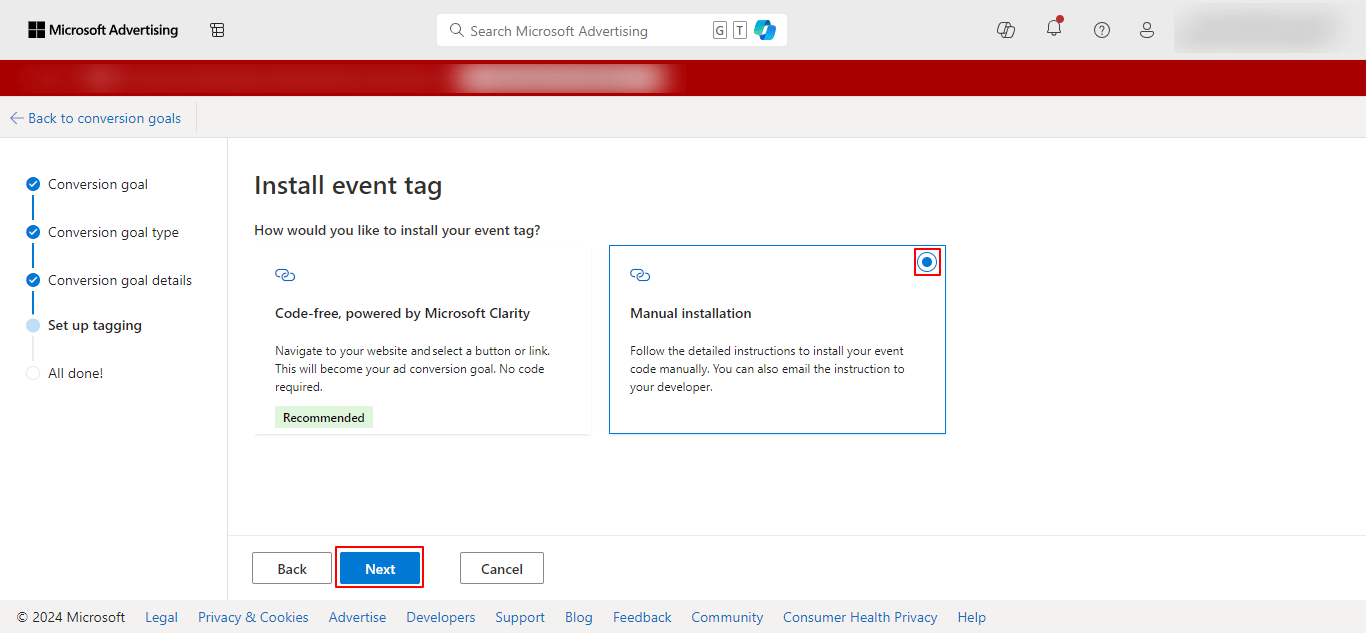
You will be required to select an option to install an event tag. Go ahead with Manual installation as shown below.
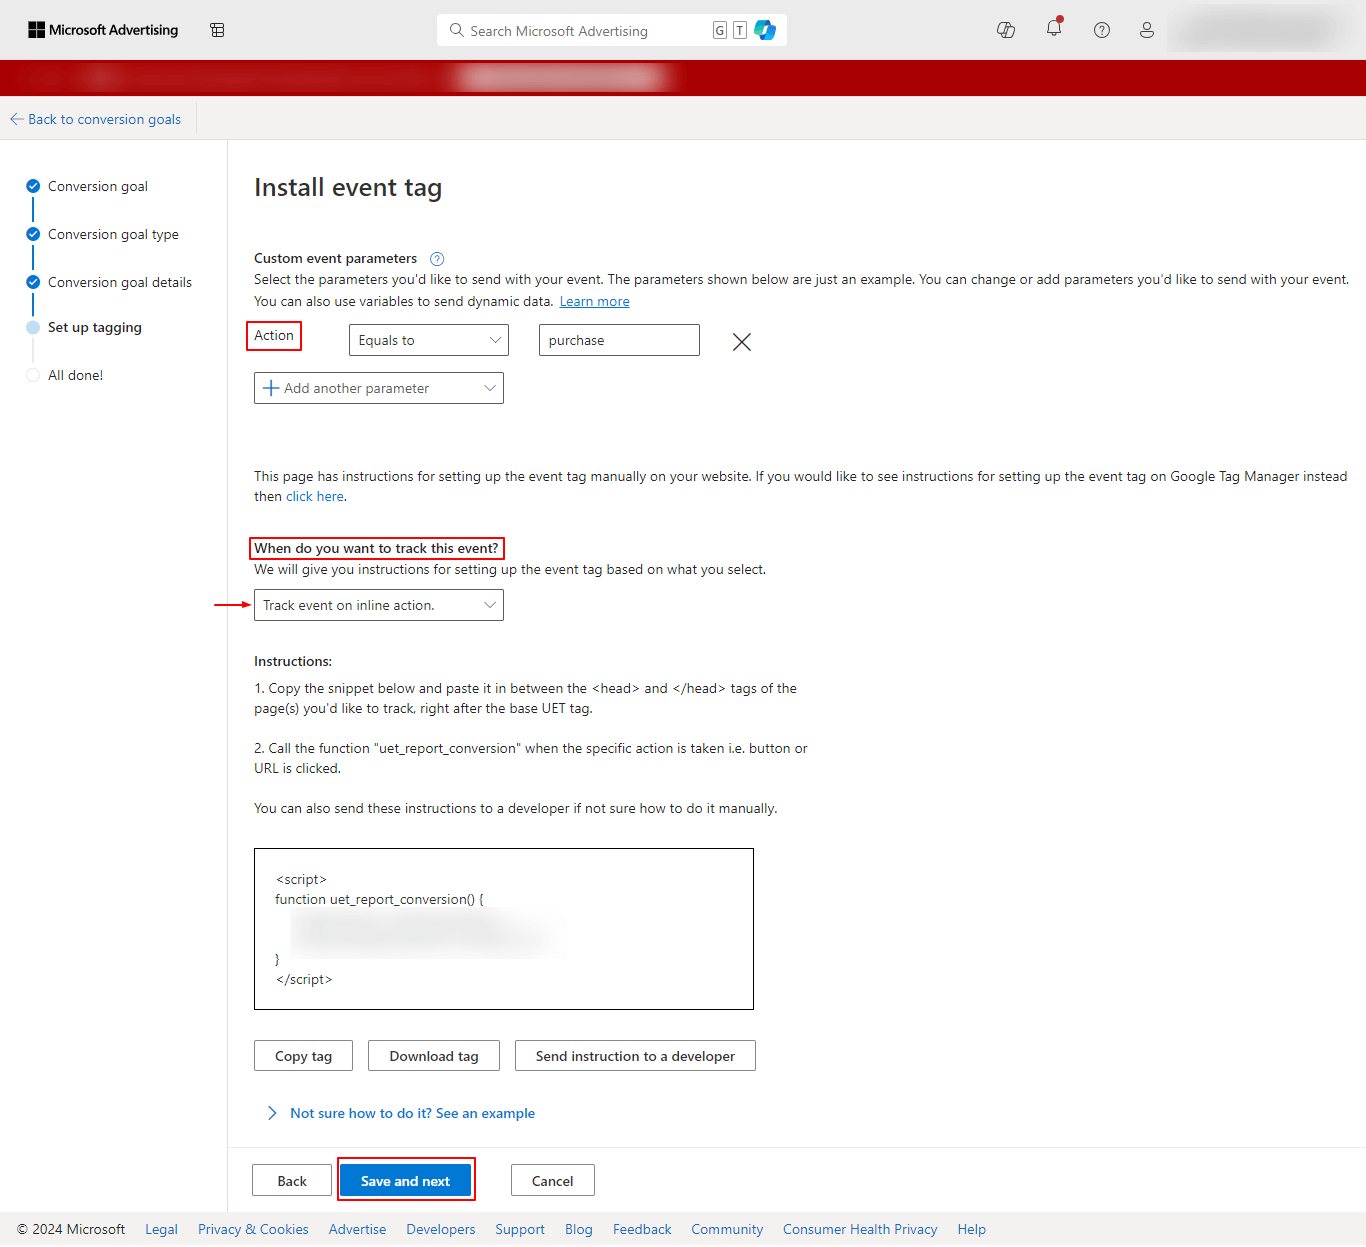
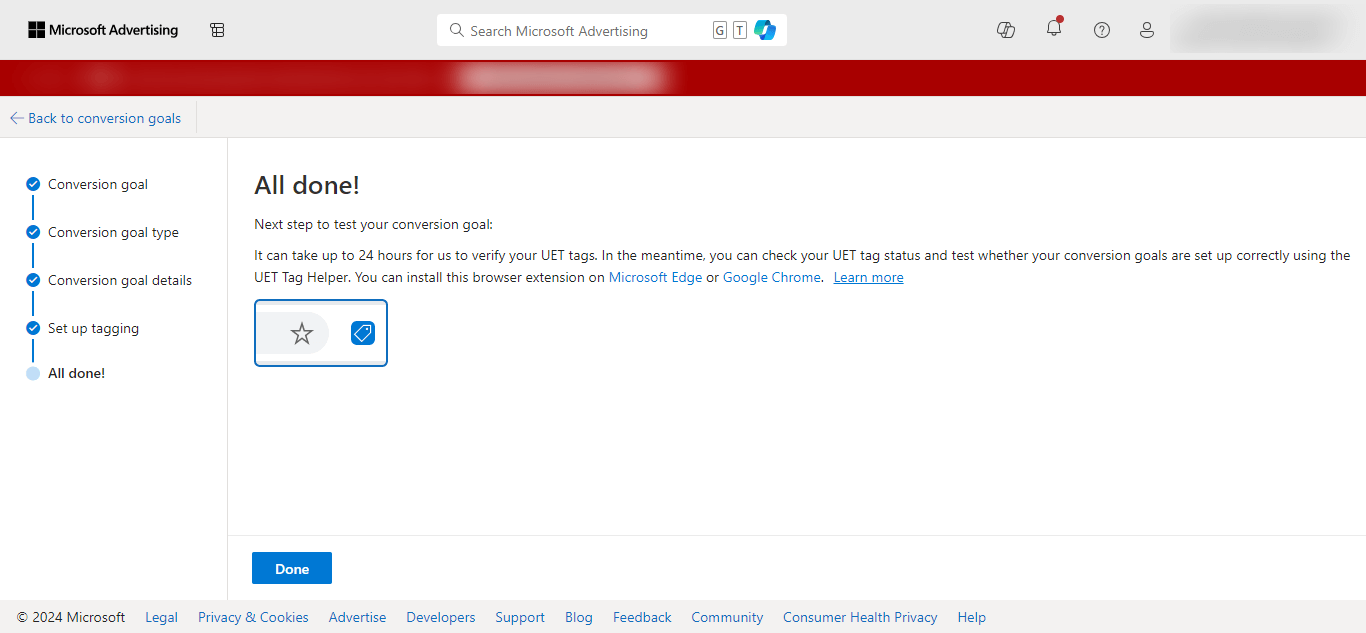
On the next page, select the Action and select the option for when you wish the event to be tracked. Make sure to save all the details and you are done with the set-up.
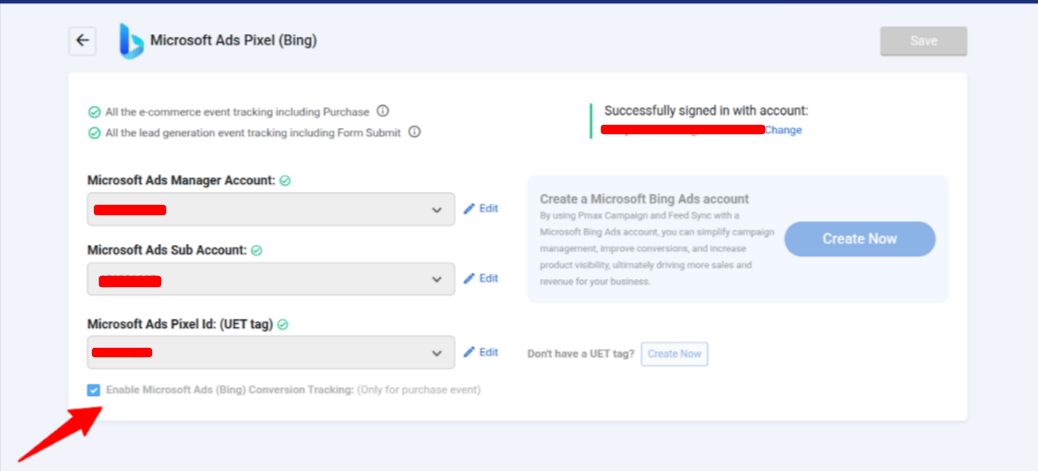
Step-4: To save the settings in your Conversios plugin, login to your WordPress backend and follow the path: Conversios Plugin > Pixels & Analytics > Microsoft Ads (Bing)> Microsoft Ads Pixel (Bing). Check the checkbox for “Enable Microsoft Ads (Bing) Conversion Tracking” and click Save.
This will enable conversion tracking for the purchase event.
Congratulations! 🎉
You are all set for enhanced conversion tracking of purchase events through Bing Pixel!