Table of Contents
Introduction #
This guide provides step-by-step instructions on how to enable and configure V2 Consent Mode using the Conversios Plugin in WordPress.
By following these steps, you can ensure proper tracking and audience building using Google Tag Manager (GTM).
Step 1. Logging in to WordPress Admin #
There are two methods to proceed with the V2 Consent Mode settings:
Step 2. Enabling V2 Consent Mode via Two Different Methods #
2.1 Using the Dashboard Wizard #
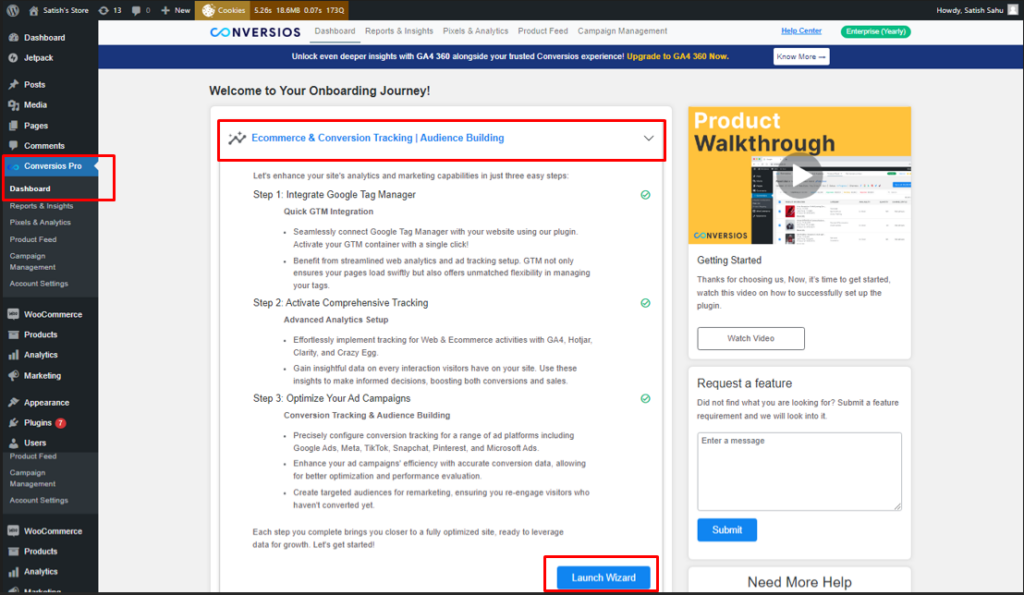
- Navigate to Conversios Plugin > Dashboard.
- Go to Ecommerce & Conversion Tracking | Audience Building.
- Click on Launch Wizard.

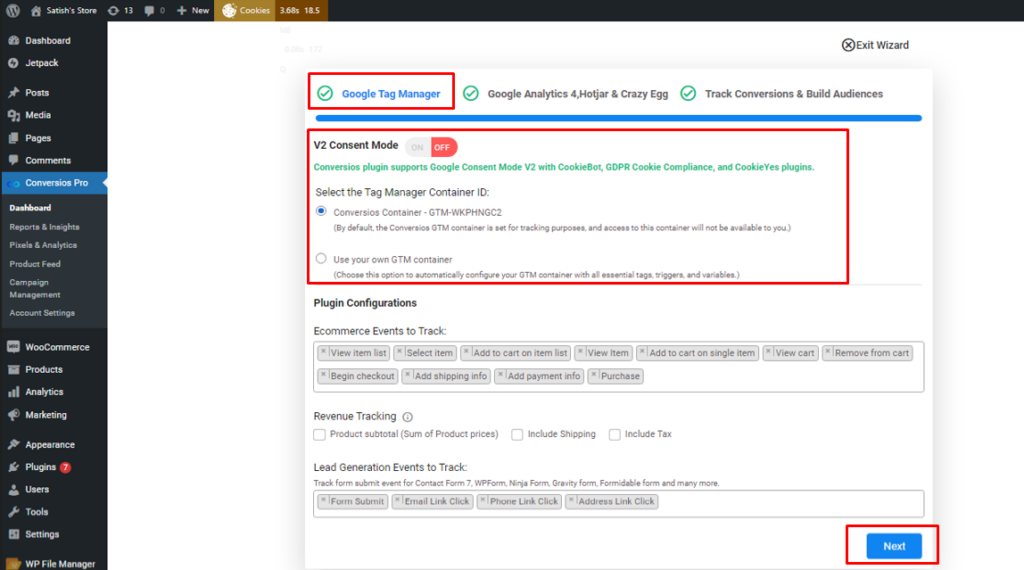
- From the wizard, you can toggle the V2 Consent Mode ON/OFF and save the settings.

2.2 Direct Method via Pixel and Analytics #
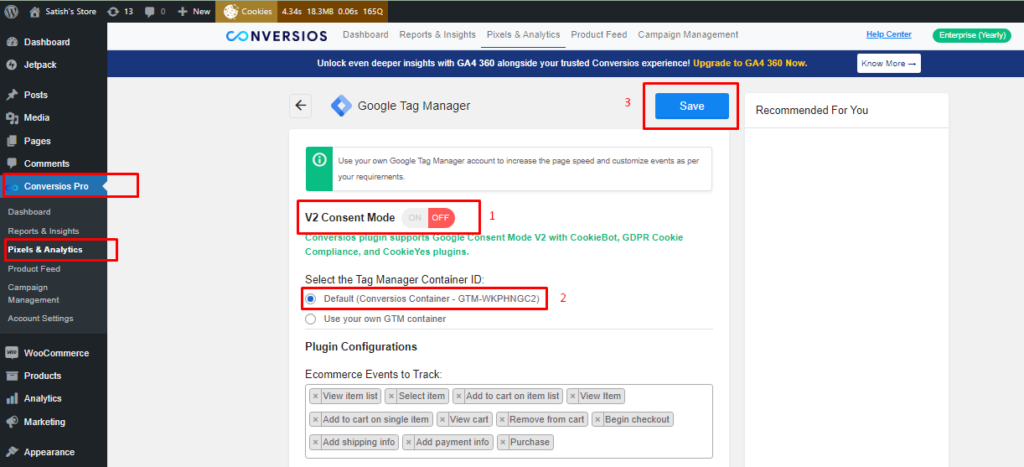
- Navigate to Conversios Plugin > Pixel and Analytics > Google Tag Manager.
- If the V2 Consent Mode is in the “OFF” status, the default GTM container will be GTM-WKPHNGC2.

Step 3. Configuring GTM Containers #
3.1 Enabling V2 Consent Mode #
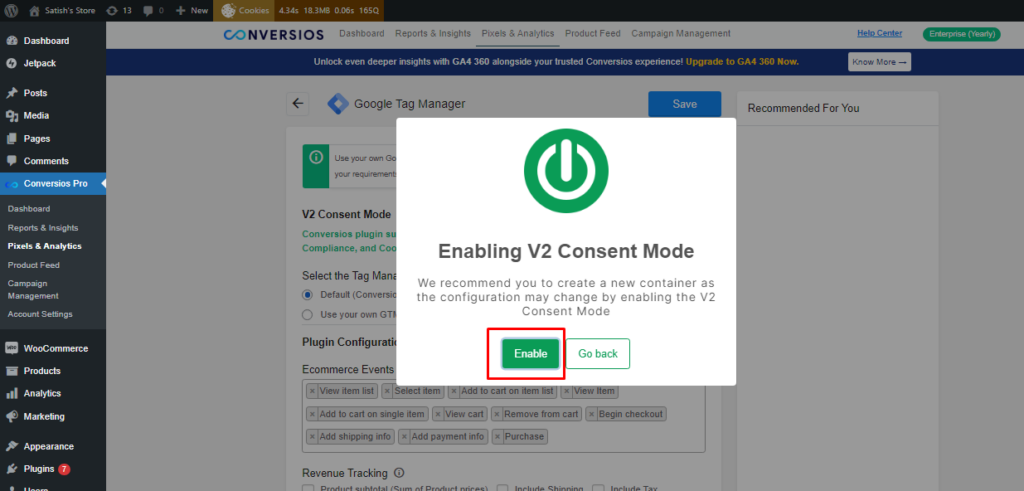
- Once you enable the V2 Consent Mode, a popup will appear.
- Click on the Enable button.
- The default GTM container will change to GTM-N36FPHQ2.

3.2 Connecting Your Own GTM Container #
- You can opt to use your own GTM container by selecting Use your own GTM container.
- You will have two connection options:
- Automatic
- Manual
- Refer to the guide on How to Set up GTM Container for more details.
5. Saving Your Configuration #
Once the GTM container is connected, click the Save button at the top right corner to complete the configuration.
6. Additional Information #
- Note on “COV – Cookie State” Tag
After enabling the V2 Consent Mode, an additional tag named “COV – Cookie State” will be added to your GTM tags.