Step 1- Navigate to the Conversios Plugin #
In the Conversios Plugin, go to the ‘Pixels and Analytics’ tab and scroll down to connect to Pinterest Pixel ID Integration.

You will be directed to an interface similar to this one, where you will be required to integrate your Pinterest Pixel ID.

Step 2- Create a Pinterest pixel from Pinterest Business Manager #
If you already created a pixel, directly follow step 3. If you are yet to create a Pinterest pixel; step 2 will make your task easier.
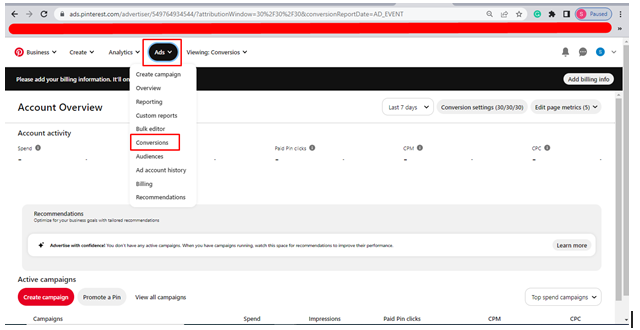
1. Create & log in to your Pinterest business manager account.
2. You will find the ‘Conversions’ option under the “Ads’. Just click on ‘Conversions’.
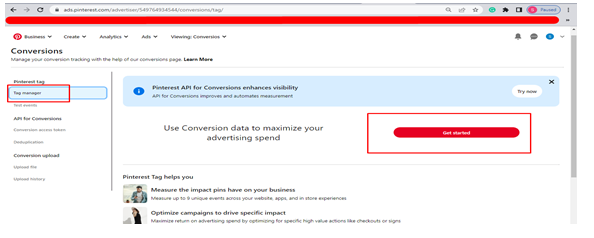
3. Once you click on it, you will find the ‘Tag Manager’ on the drop down menu on the left side. & click on ‘Get started’.
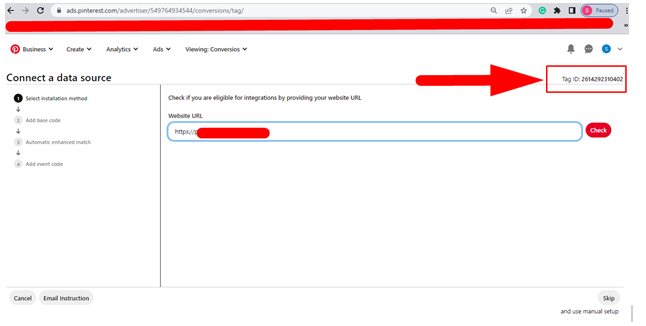
4. After clicking on get started, it will redirect you to the data source page. Here you will find your Pinterest pixel id. Now copy the Pinterest pixel id.
Step 3- Integrate the Pinterest Pixel ID to Conversios Plugin #

The final step is to come to your Conversios plugin to the Pixels & Analytics tab, where you can find the ‘Pinterest Pixel ID’ section in ‘Pixel Settings’, just paste the ID here.
Congratulations, you have successfully created and integrated your Pinterest Pixel using the Conversios plugin. Tracking important metrics and optimizing your advertisement campaigns becomes easier.