Server-side containers handle tags on your server instead of the user’s browser. This means data is sent from your website to your server, processed, and then forwarded to your analytics and marketing platforms.
If you already have Google Tag Manager account then follow these steps to create your Server Container.
Sign in to Google Tag Manager #
Open a web browser and go to https://tagmanager.google.com/. Sign in using your existing Google account credentials.
Select Your Account #
From the GTM dashboard, select the account where you want to create the server container. If you have multiple accounts, choose the relevant one from the list.

Create a New Container #
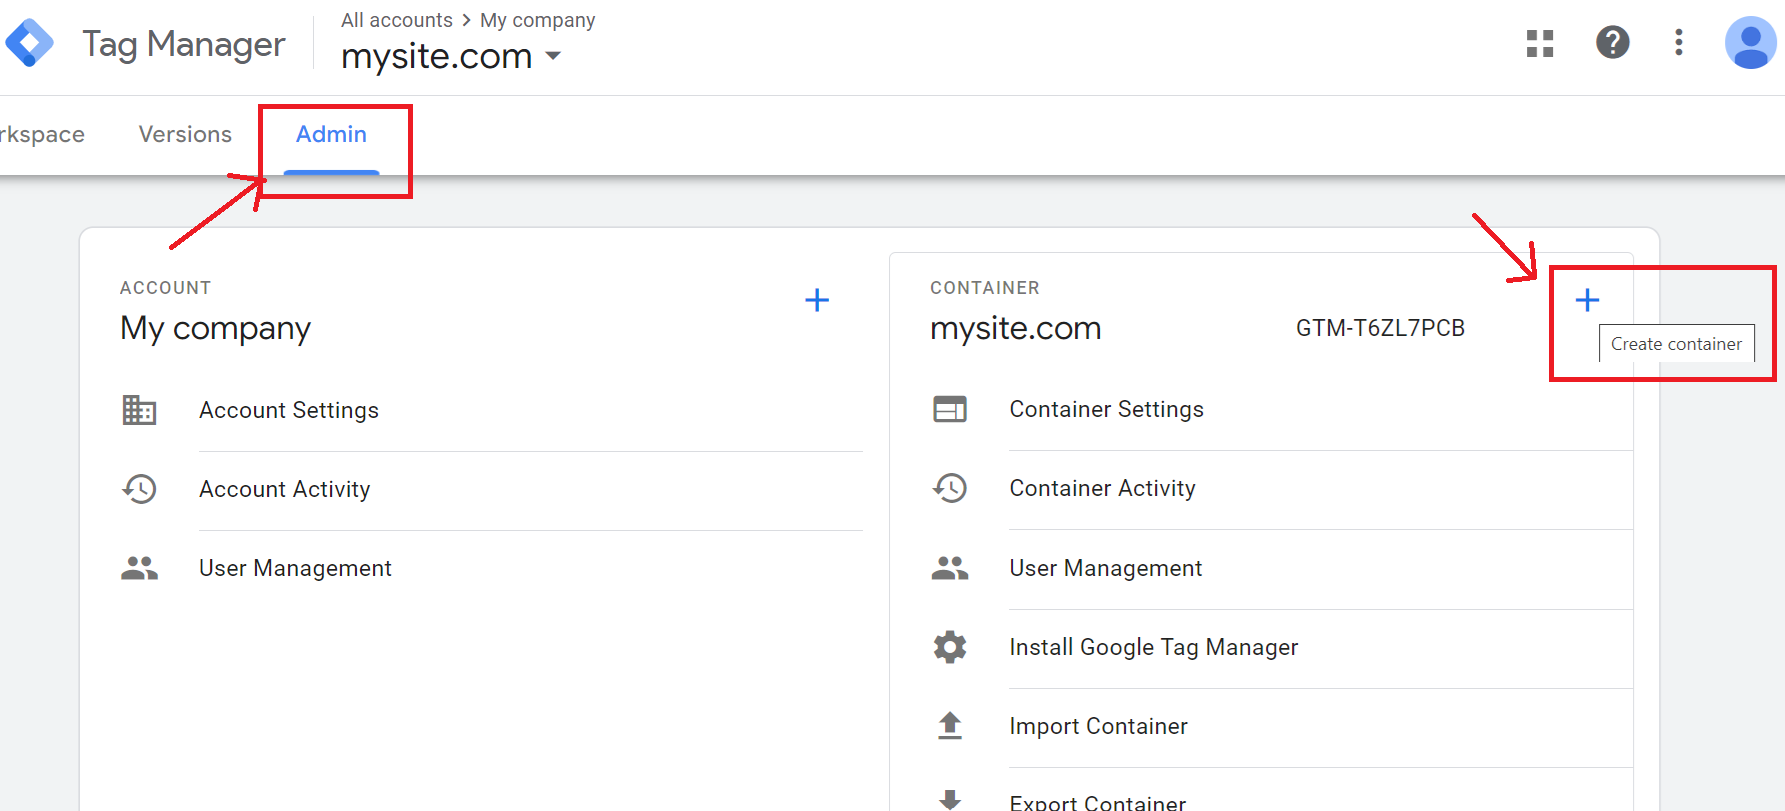
- Under the “Container” section, click “Create Container.”
- Click on the “Admin” tab located in the navigation bar.
Enter Container Details #
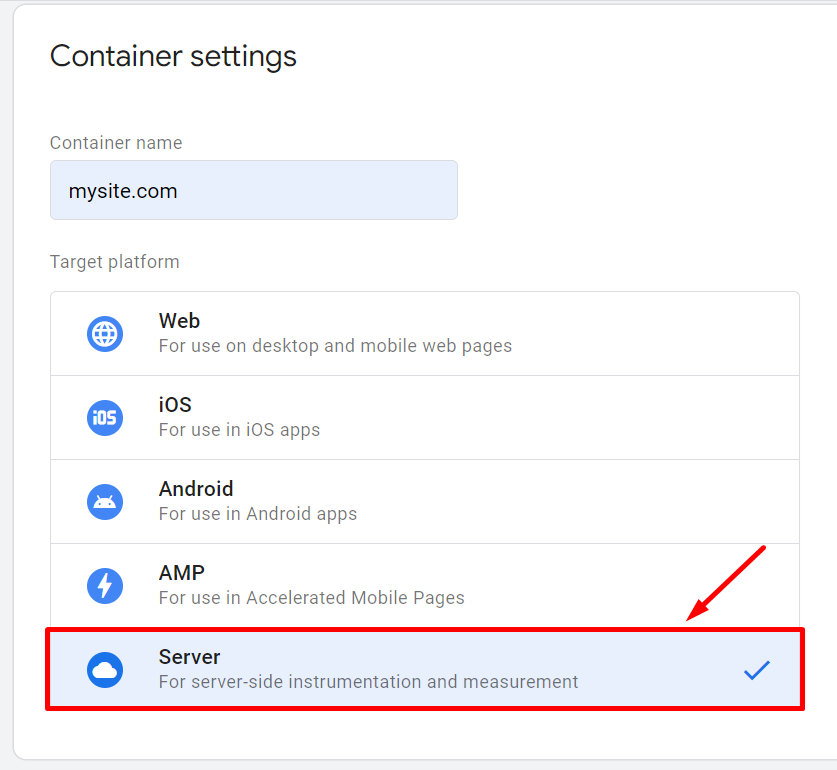
Container Name: Enter a name for your container (e.g., “Server Container for [Your Website]”).
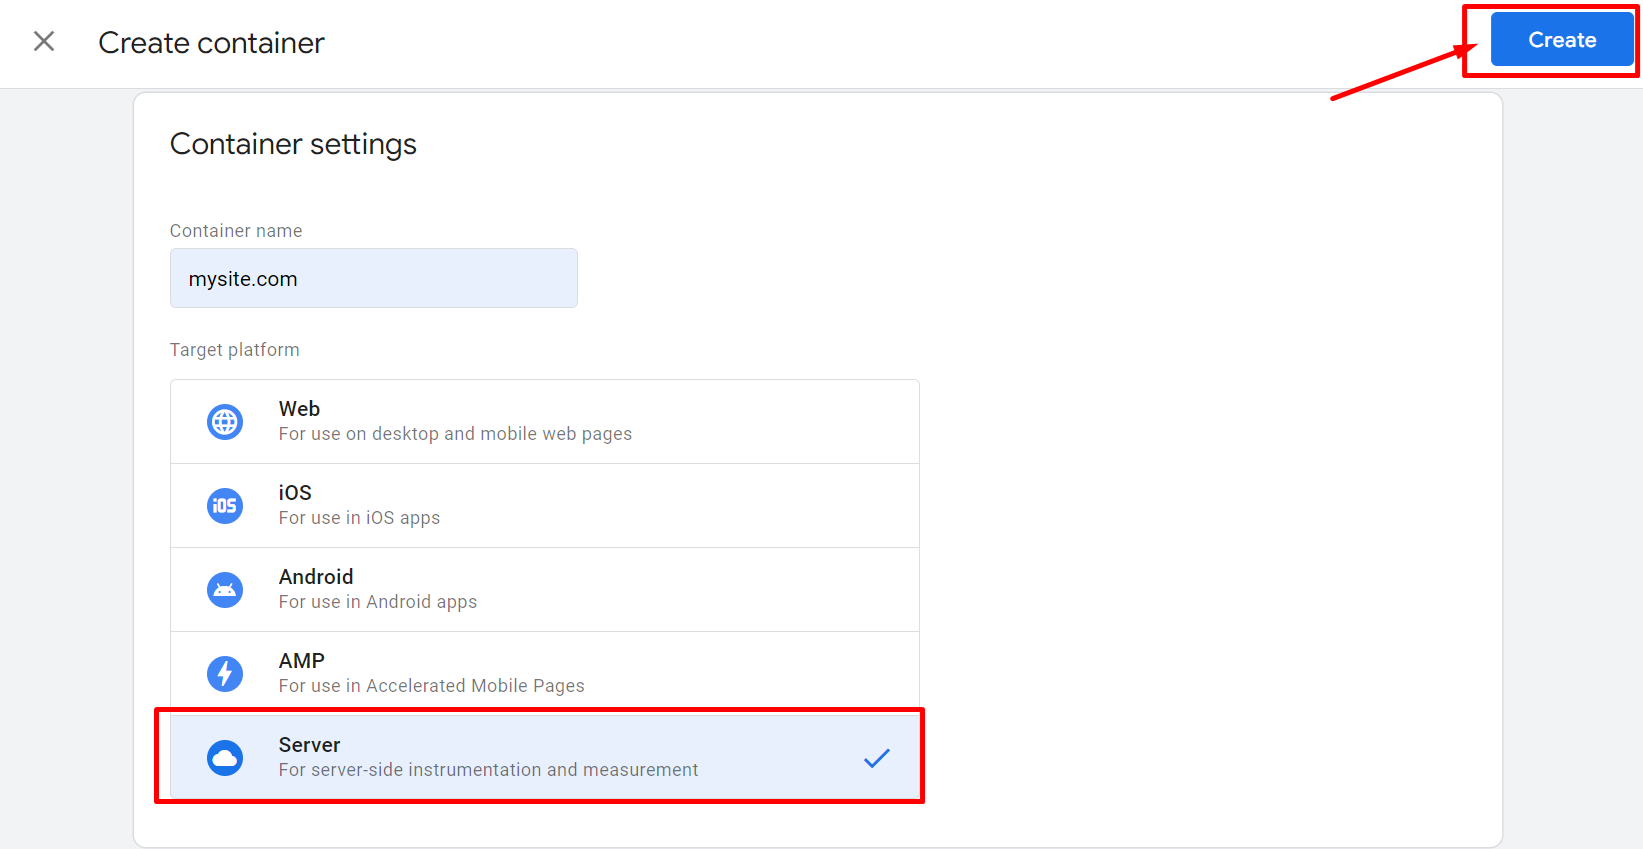
Target Platform: Select “Server” from the drop-down menu. This indicates that the container will be used for server-side tagging.
- Click the “Create” button.
- Review and accept the GTM terms of service if prompted.
Manually Provision Tagging Server #
- After creating the container, you’ll be prompted to choose how to provision your tagging server.
- Select “Manually provision tagging server.”
- Copy the container configuration provided and paste it into a text editor for future reference.
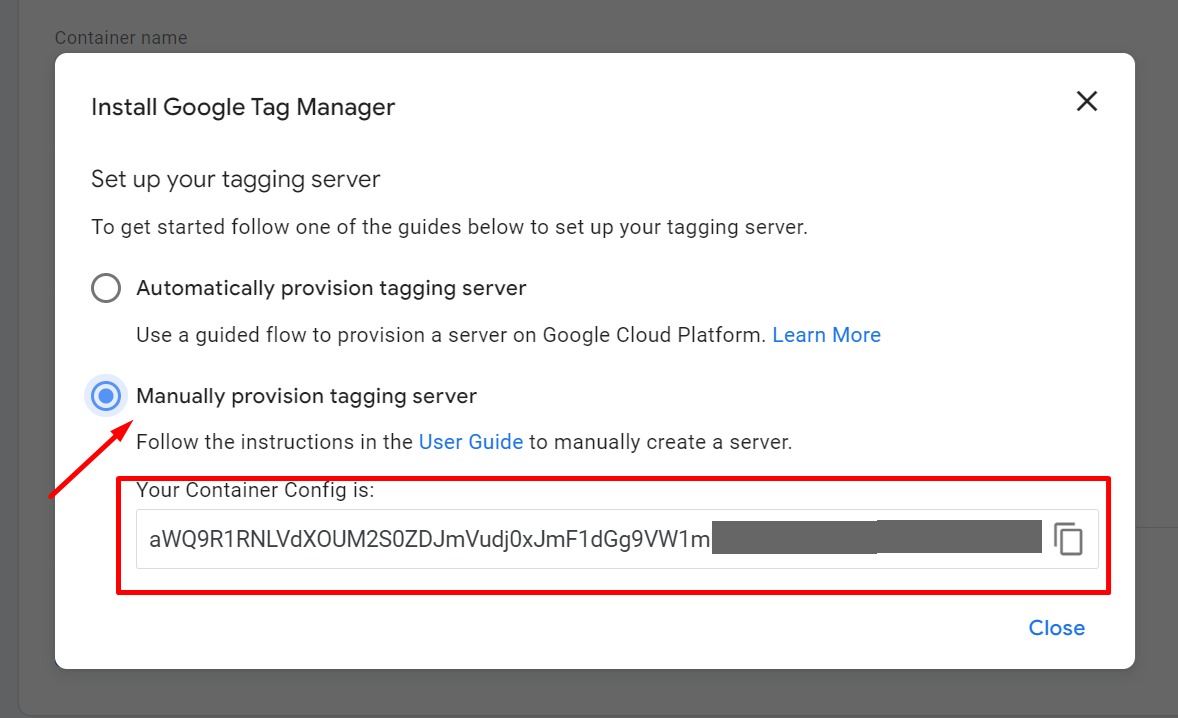
Now Click on the “Close” button to exit the configuration window.
Find Your Server Container ID #
To locate your Server Container ID, click on the Google Tag Manager logo icon in the upper left corner of the dashboard.
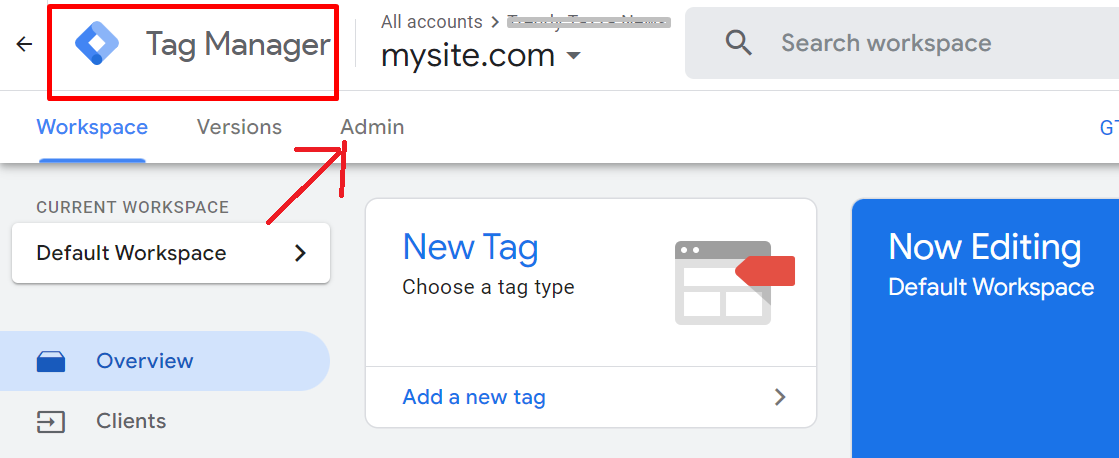
Go to the “Admin” section again and select the newly created server container. Your Server Container ID will be listed here.
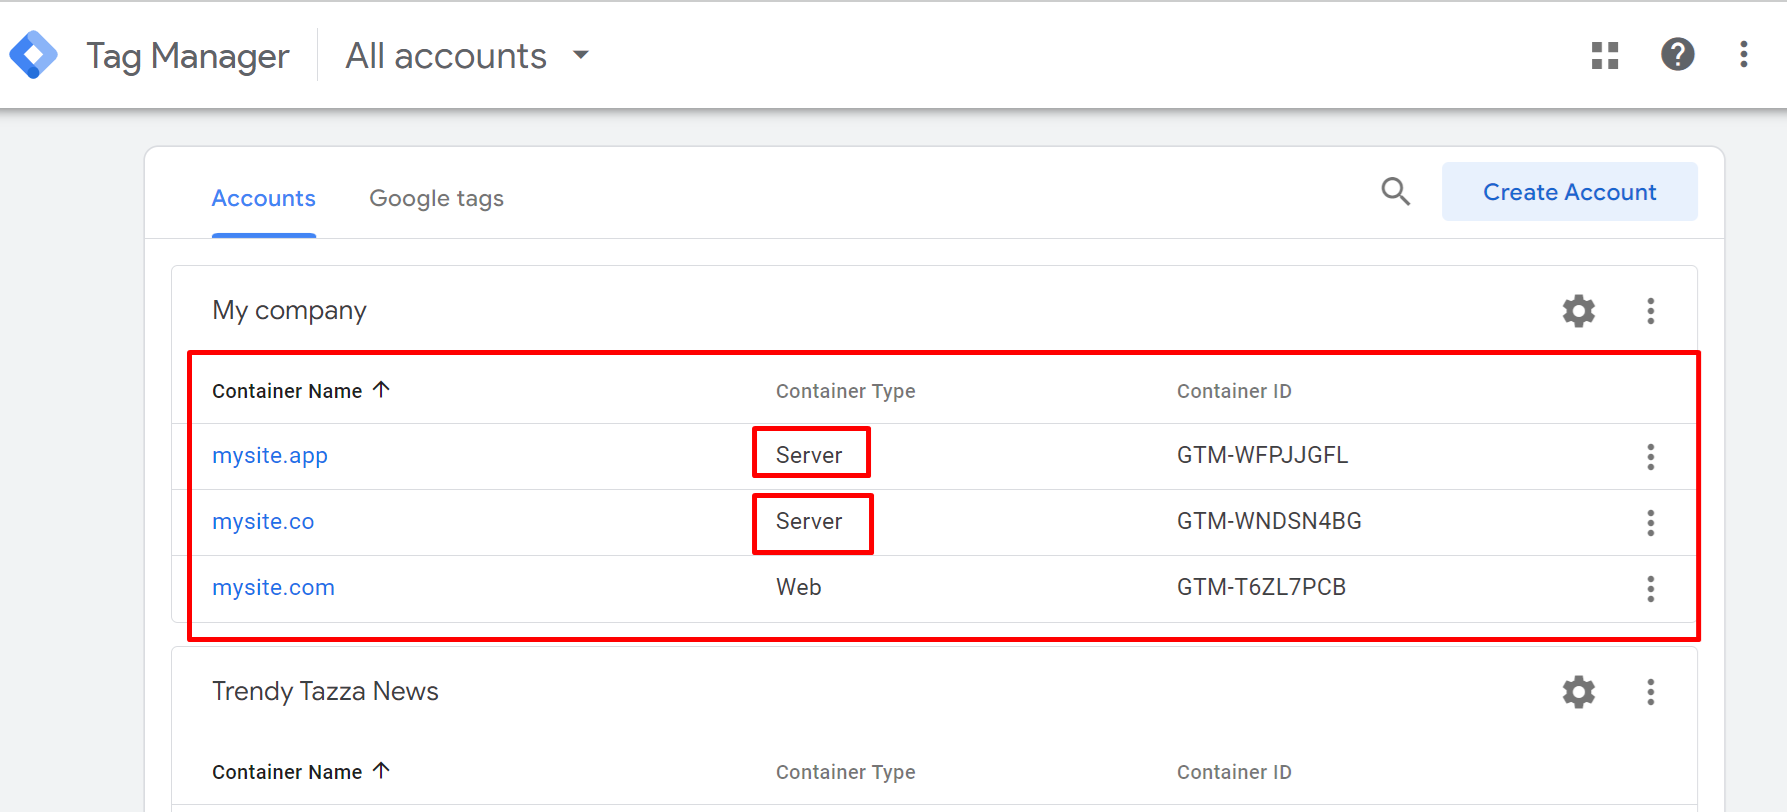
You’ve successfully set up a server container in Google Tag Manager. This allows you to manage server-side tagging and improve data tracking.
If you have questions or need help, check the Google Tag Manager documentation or contact support. Happy tracking!