Table of Contents
Sure, here are the steps to connect your website to Facebook’s Event Manager:
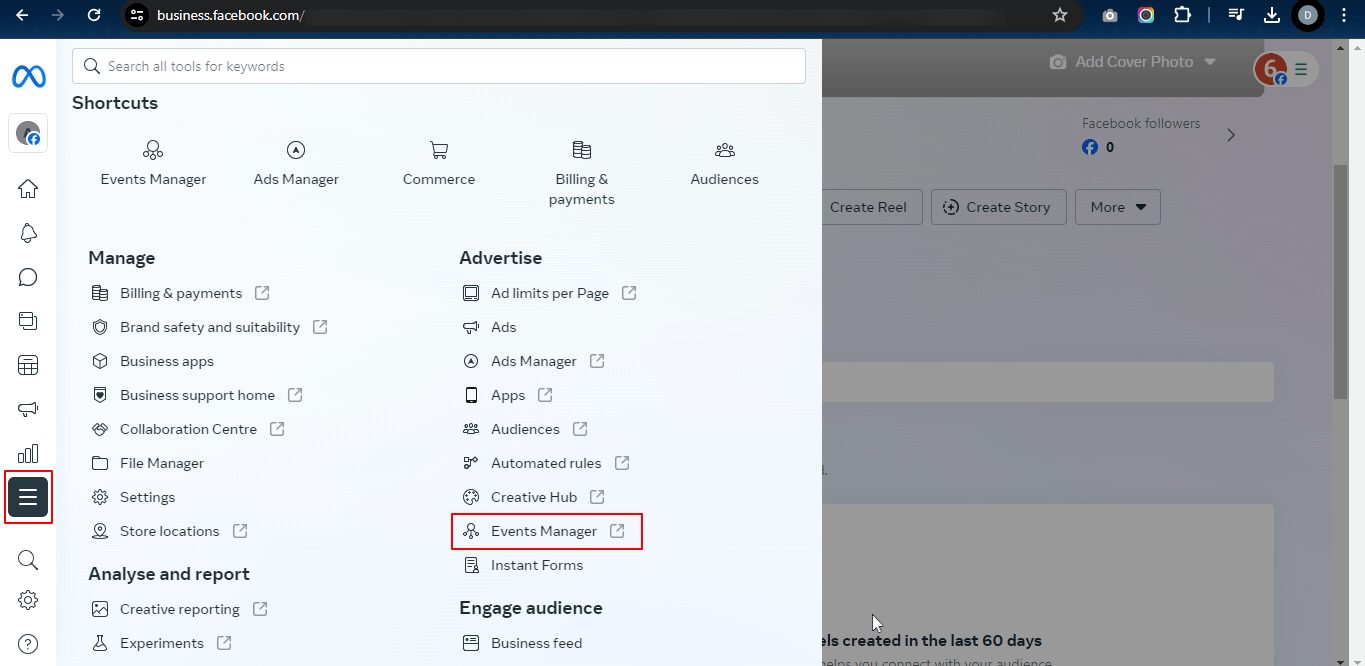
Step 1. Access Event Manager #
- Log in to your Facebook Business Manager account.
- Click on the “All Tools” option from the menu bar.
- From the dropdown menu, select “Event Manager.”
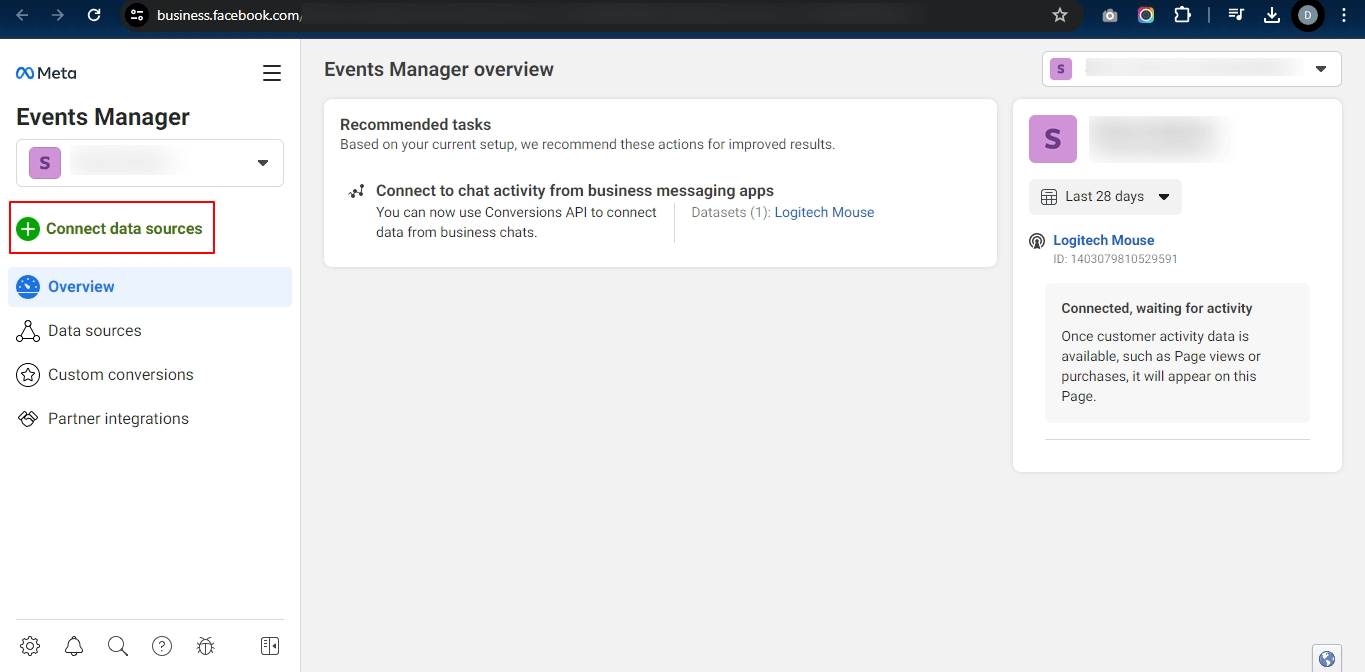
Step 2. Connect Data Source #
- On the Event Manager screen, locate the “Connect data sources” option in the menu.
- Click on it.
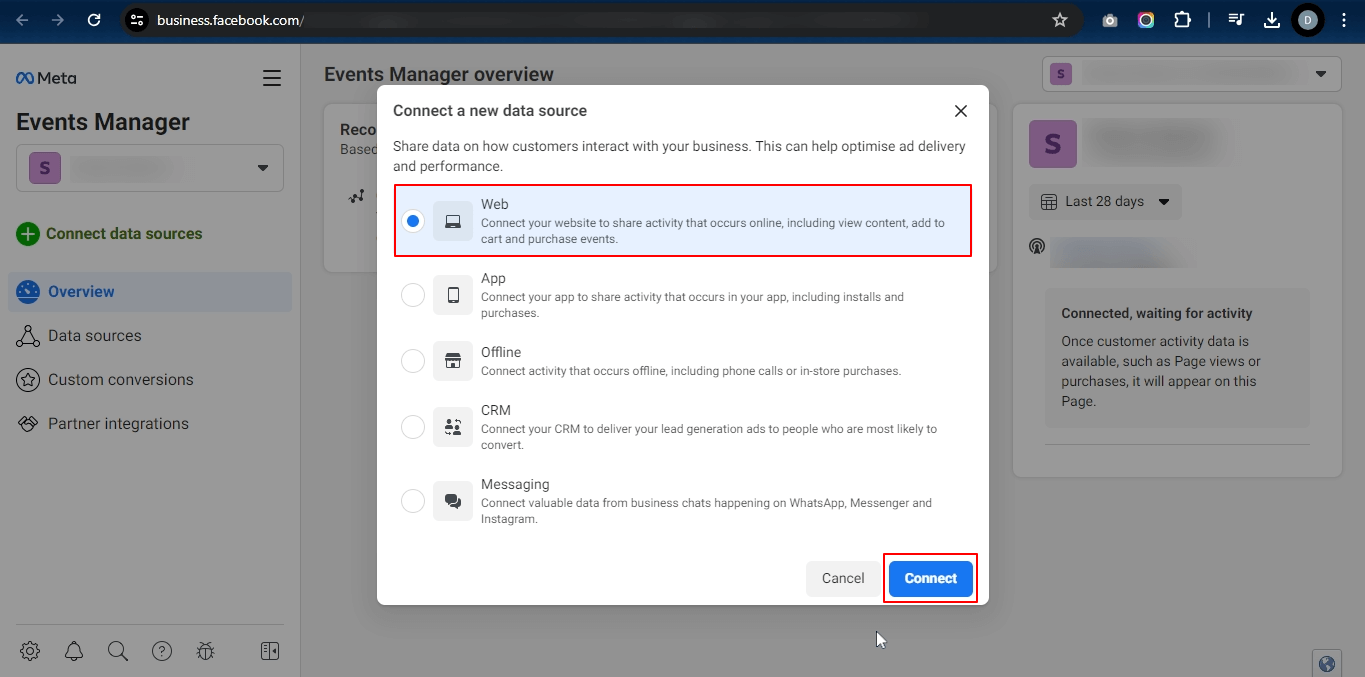
Step 3. Choose Web and Connect #
- A pop-up window will appear. Choose the “Web” option from the available data sources.
- Click the “Connect” button to proceed.
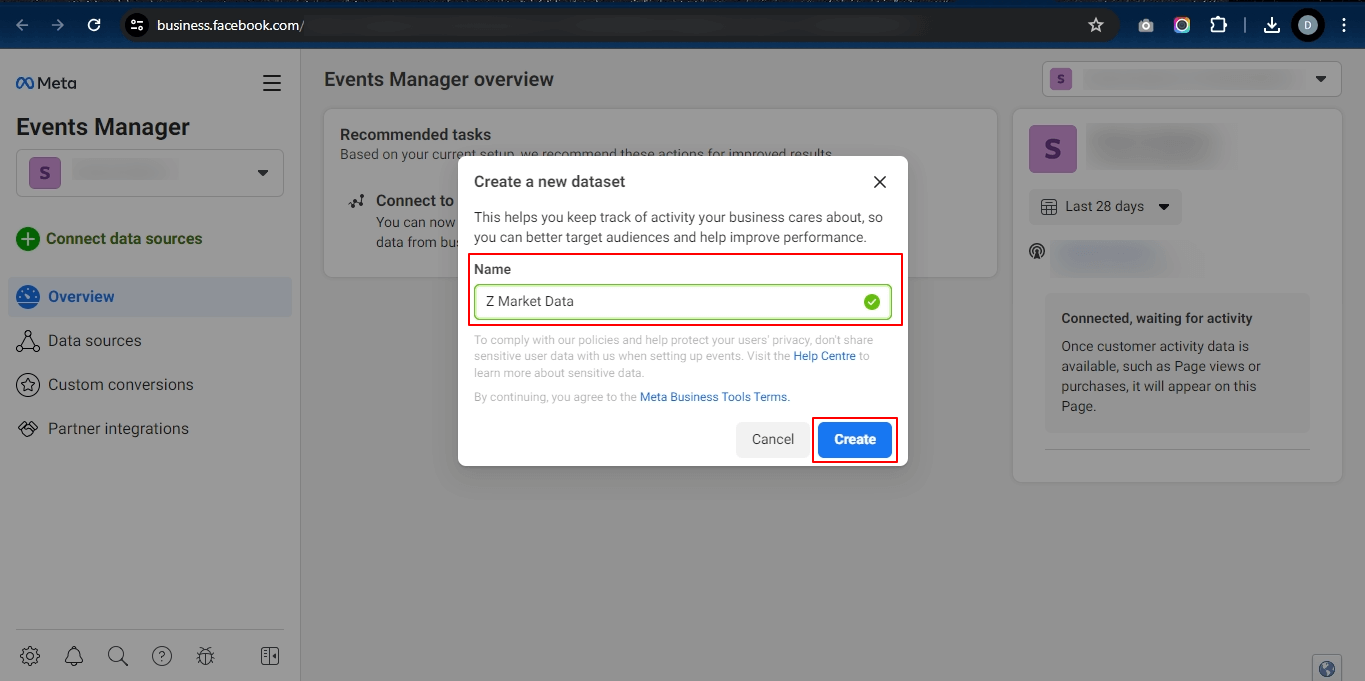
Step 4. Create a New Dataset #
- In the pop-up window, enter a desired name for your new dataset (e.g., “My Website Pixel”).
- Click the “Create” button to confirm the dataset creation.
Step 5. Enter the Website URL and Verify #
- You’ll be prompted to enter your website URL in the designated field.
- Click the “Check” button to verify the connection between Facebook and your website.

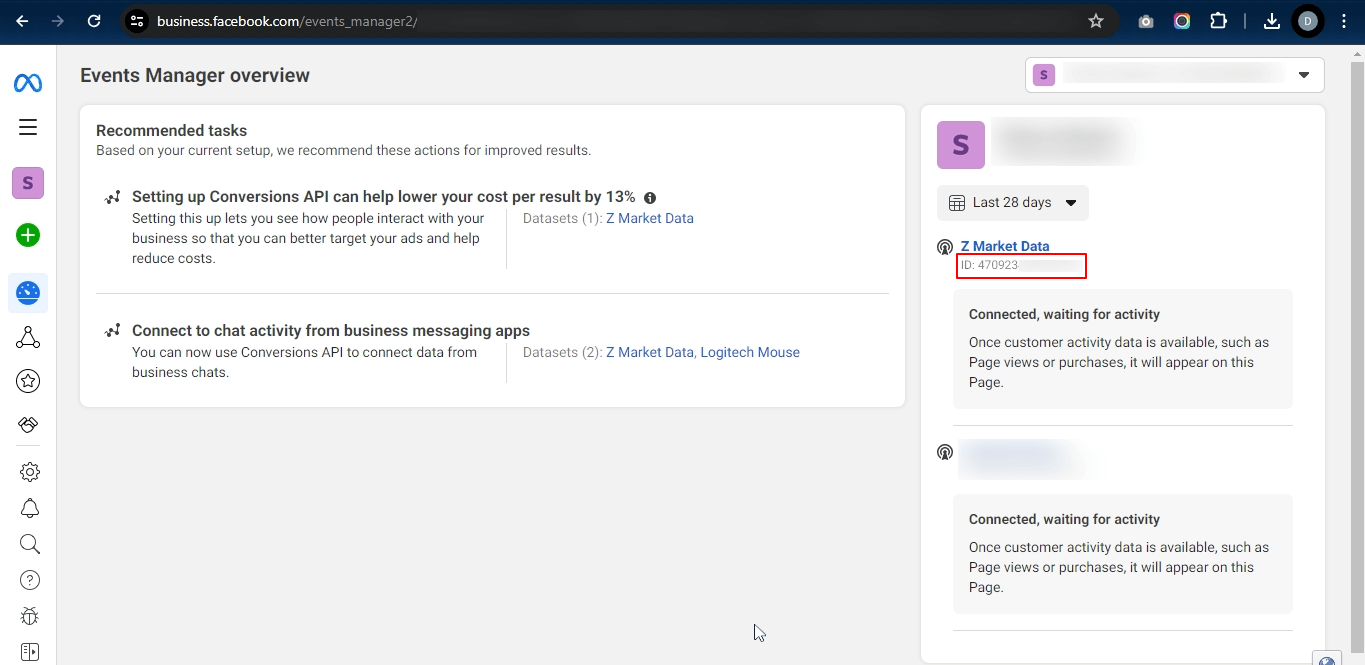
Step 6. Find and Copy Pixel ID #
- Once the verification is complete, return to the “Event Manager Overview” page.
- Locate the newly created dataset (e.g., “My Website Pixel”).
- You’ll find the Pixel ID displayed within the dataset details.
- Copy this Pixel ID for future use.
You have successfully created a new Facebook dataset with a Facebook Pixel ID. Now you can integrate the Pixel ID with the Conversios WordPress Plugin and Shopify Apps that you are using for tracking.
If you further wish to generate a Facebook conversion API access token.
Please refer -How To Generate Facebook Conversions API Token.