To get started, first, let’s create a Google Tag Manager account.
Go to Google Tag Manager #
Open a web browser and navigate to https://tagmanager.google.com/.
Sign in to your Google Account #
You’ll need a Google account to access and manage your GTM account. Click “Sign in” and use your existing Google account to log in.
Create an Account #
Click “Create Account” if you don’t have a GTM account already.
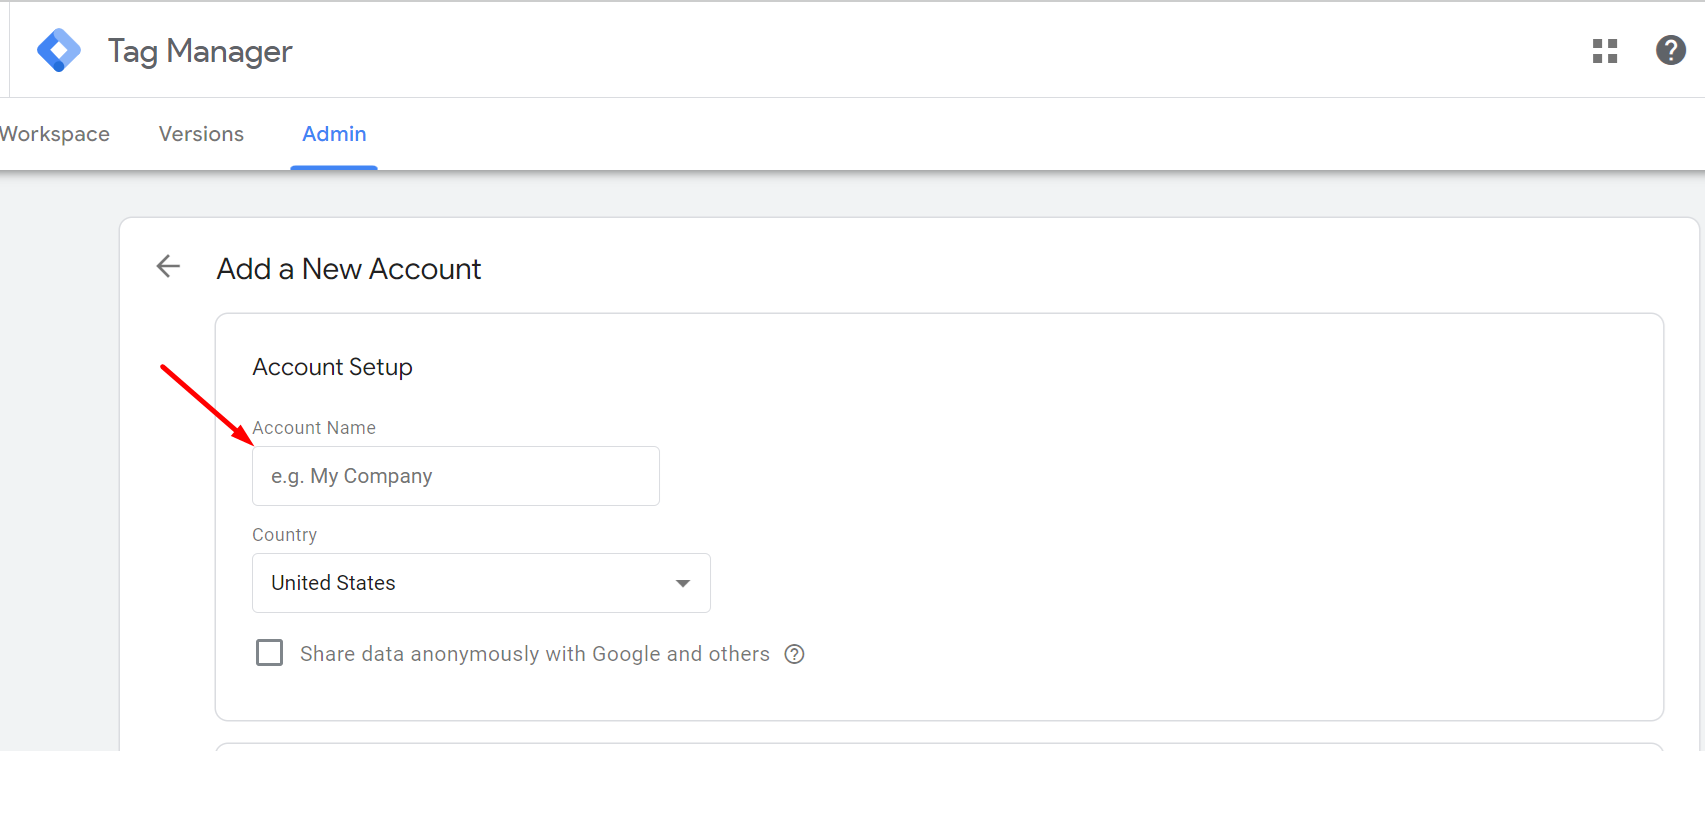
Account Details #
Enter an Account Name (e.g., your website name) and choose a country location.
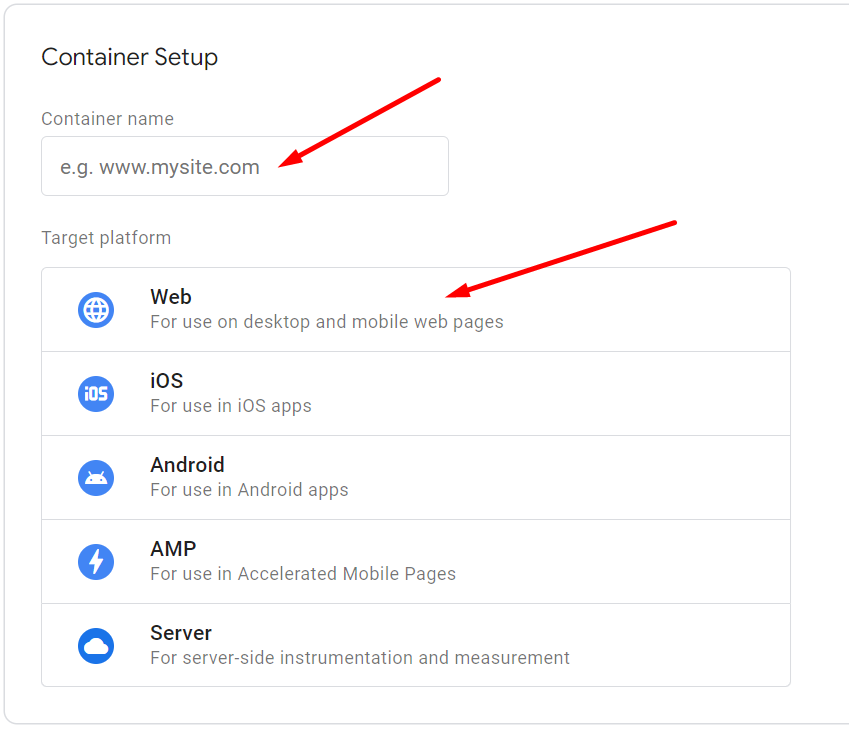
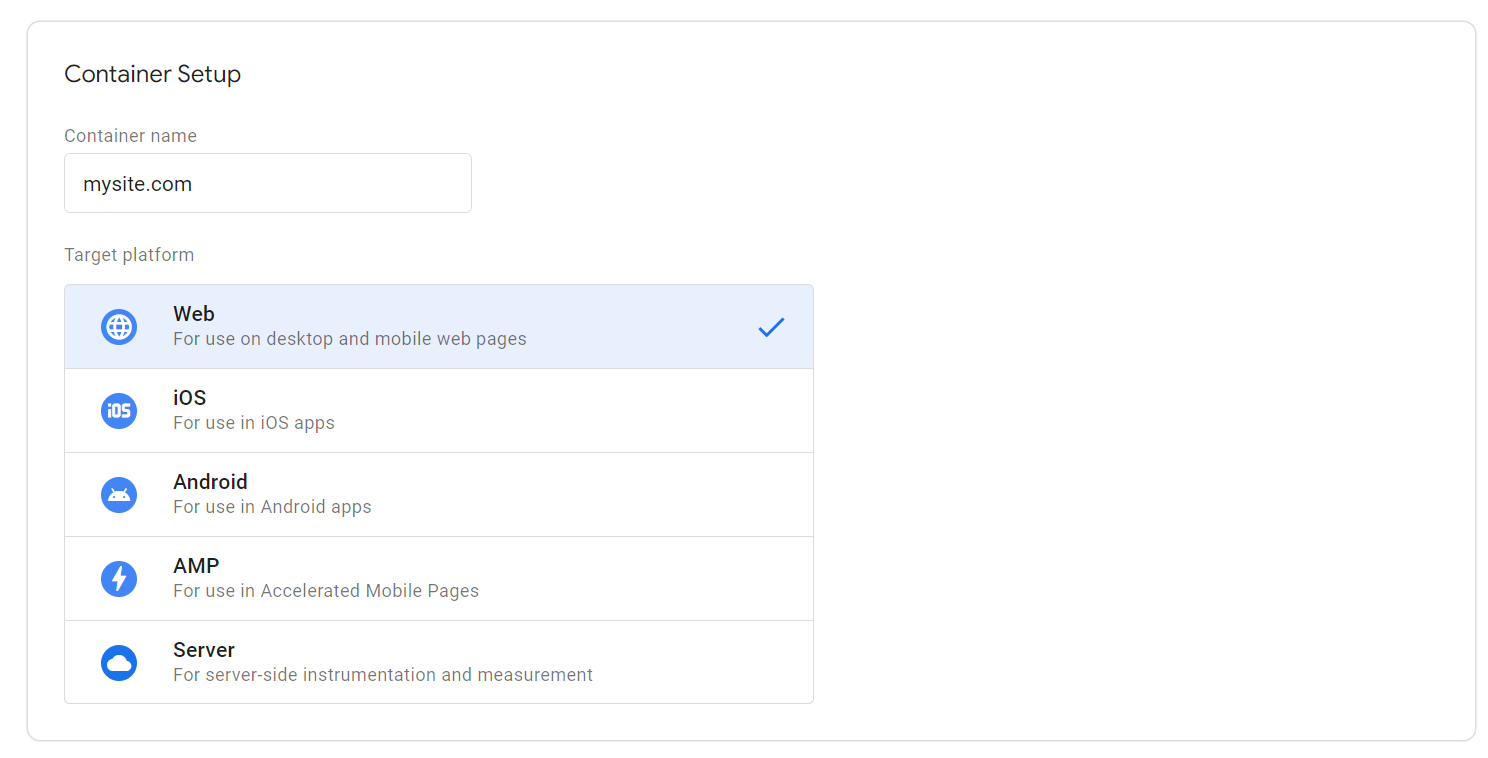
Container Setup #
Enter the name of your container. A container is where you’ll store all your tracking codes (tags) and manage them for a specific website or app.
Choose the platform where you’ll be using this container. Typically, it will be “Web” for website tracking.
Once you’ve filled in the details for Account Setup and Container Setup, click the “Create” button.
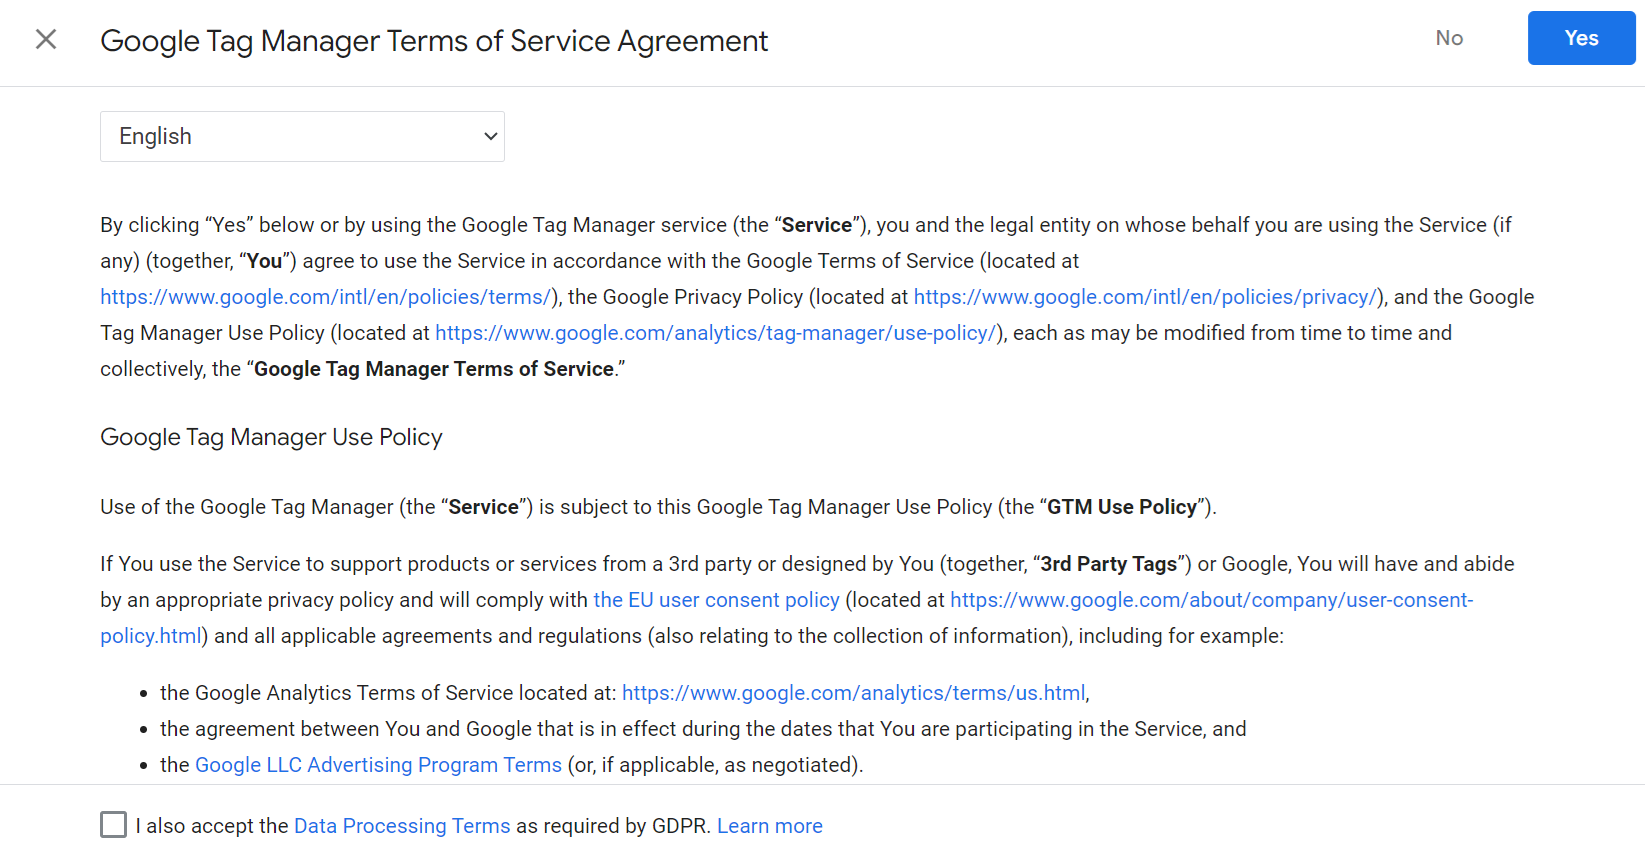
Agree to Terms of Service #
A pop-up window will appear displaying the Google Tag Manager Terms of Service. You’ll need to review and agree to the terms before proceeding.
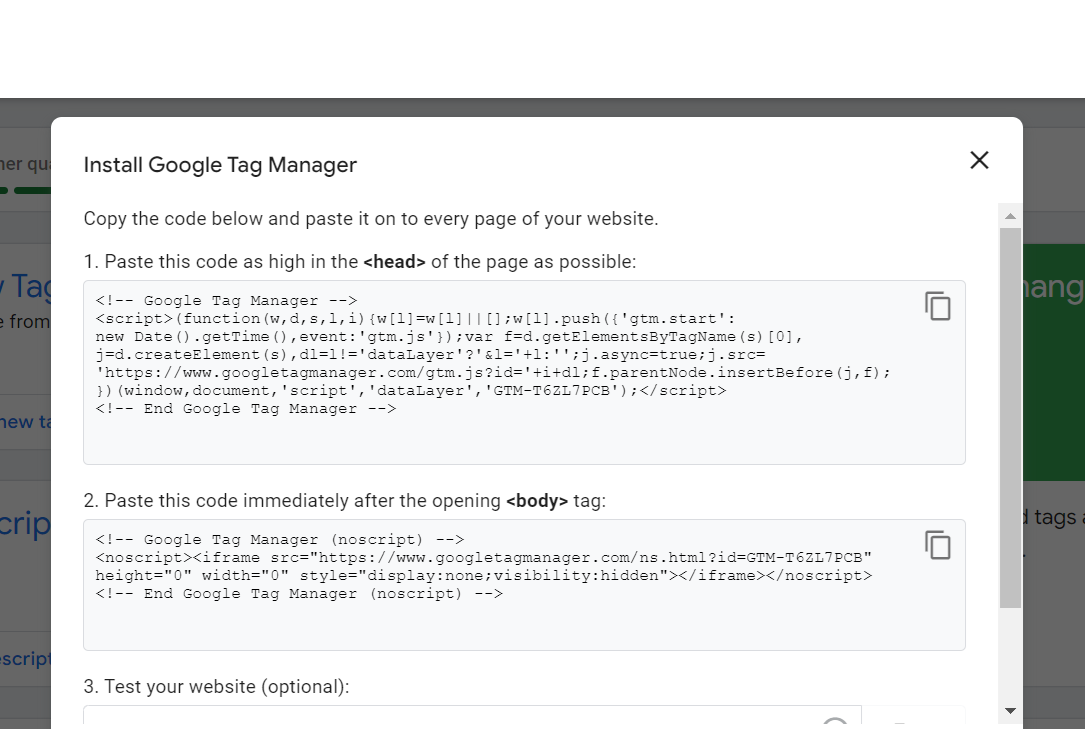
After agreeing to the terms, you’ll be presented with your new Google Tag Manager account and container details. This will include the container snippet code that you’ll need to install on your website to start using GTM.
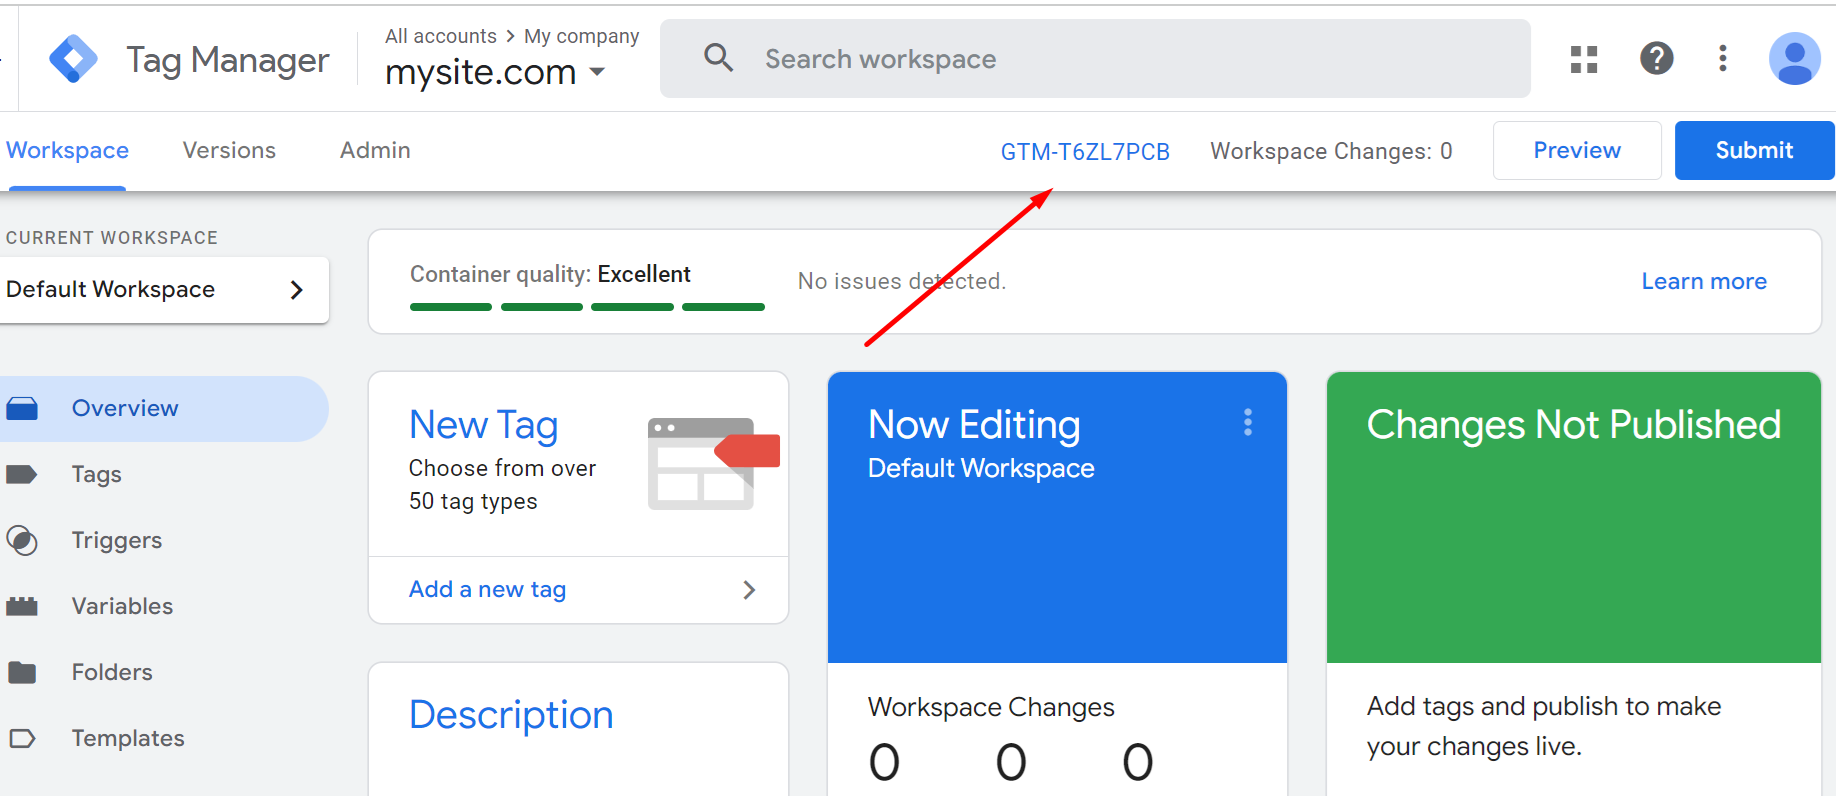
How do I get my Google Tag Manager Tracking ID or GTM Number? #
Look for the short text starting with “GTM-” in the top right corner of the GTM interface. That’s your GTM ID.
Congratulations! You’ve now created a GTM container and found your GTM ID. You’re ready to start using GTM to manage your website’s tracking codes and marketing integrations.
Now You can successfully use this GTM ID and your own GTM Container with our Conversios WordPress Plugins, Shopify Apps.