Are your Google Ads bringing in Conversions for you?
Have you set up Conversion tracking for your e-commerce store accurately?
Do you have any idea which of your Google Ads campaigns generates sales for your e-commerce business?
Here’s the thing, in today’s Digital paradigm it’s crucial for businesses to measure the success of their online marketing efforts accurately. Google Ads, being a popular advertisement platform, offers a powerful tool called Conversion Tracking that enables advertisers to track and analyze user actions and behaviors that align with their business goals.
By implementing effective and accurate conversion tracking, businesses gain valuable insights into the performance of their ads, optimize campaigns, and can maximize return on ad spends – ROAS. Said that, do you know how to track or implement Conversion tracking in Google ads?
Why To Setup Conversion Tracking in Google Ads?
With conversion tracking, you will get an idea about what action the user takes after clicking on your ads. You can determine which action is important for your business and consider it as a ‘conversion’. Conversion can be anything such as filling out the contact form, signing up for a newsletter, downloading your app, etc.
Google Ads conversion tracking can give you an idea about which ad drives more conversions. With this data, you can make changes in your keyword, bidding, budget & strategy to optimize your Google Ads campaign.
How does Google Ads Conversion tracking work?
Before setting up the Google Ads conversion tracking, it’s important to know how it works. Let’s say you keep “app install” as your conversion action.
- You add the conversion tracking tag to your website
- Users click on your ad and temporary cookies will be added to their device
- If they install your app ( which is your conversion action), Google recognizes the cookie and counts it as a ‘Conversion’
Now, let’s move forward to setting up Google Ads conversion tracking for your website.
Benefits of Proper Conversion Tracking
Optimize Budget: Identify the campaigns that actually lead to conversions, so you can reallocate budget where it matters.
Measure ROI: Go beyond impressions and clicks to see the real impact of your ad spend.
Improve User Experience: With insights into user behavior, you can refine your landing pages and overall website flow.
Manual Method: How To Setup Google Ads Conversion Tracking
As you know why it is important to install Google Ads conversion tracking, let’s look into the part you are looking for from the start, i.e. ‘Setting up Google Ads conversion tracking’.
Step 1: Create your conversion action
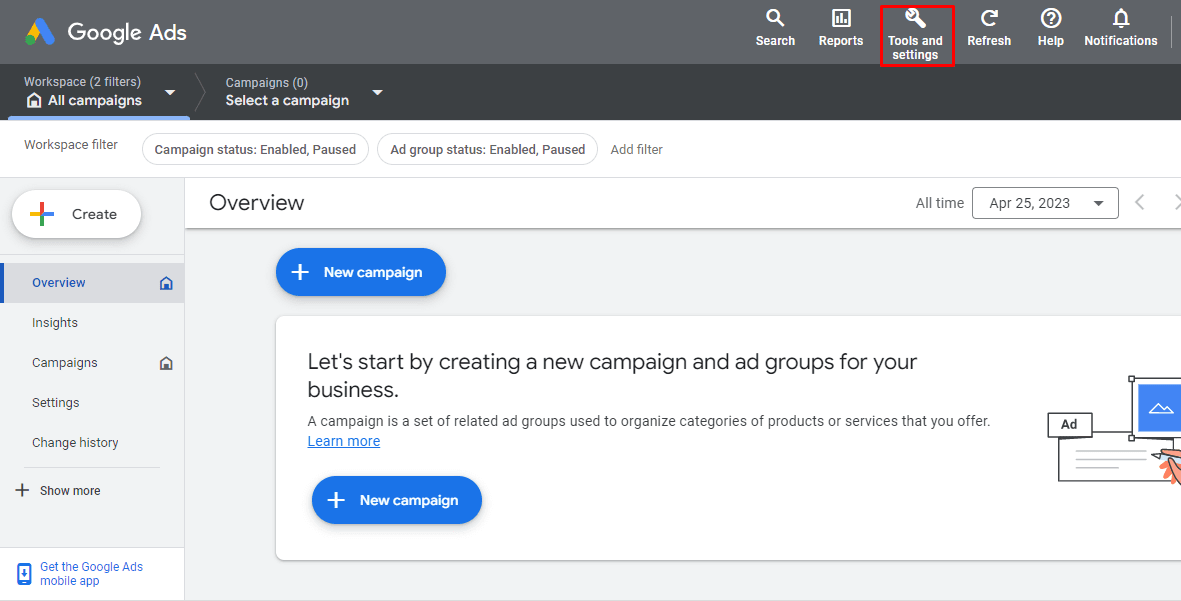
Log into your Google Ads account and click on ‘Tools and Settings’.
Go to the ‘Conversions’ under the ‘Measurement’ section.
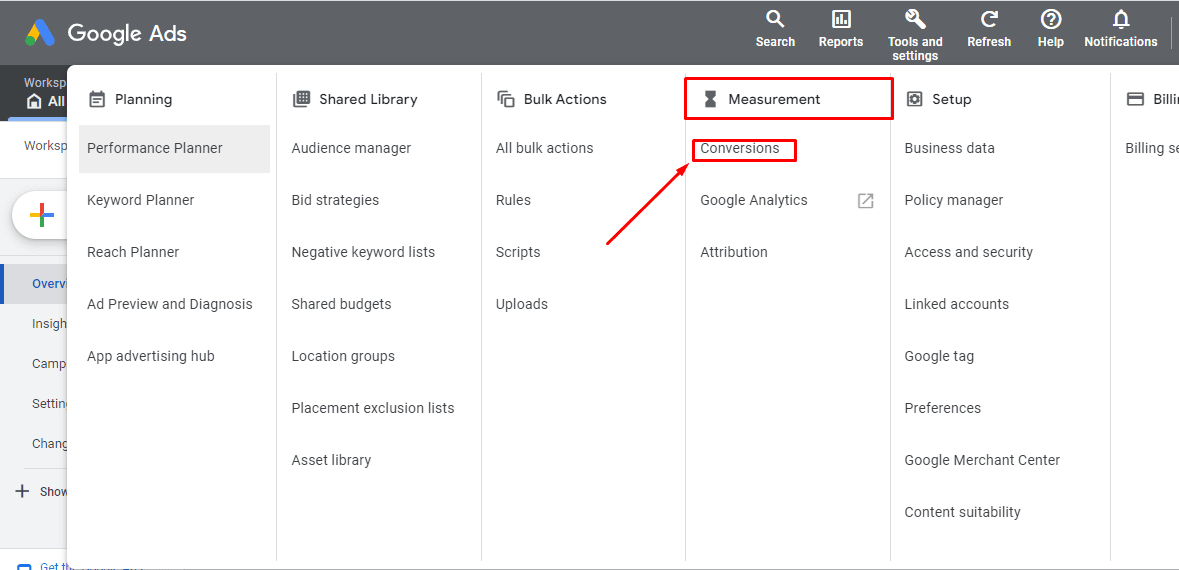
Here you will find an option of ‘New conversion action’, just click on it.

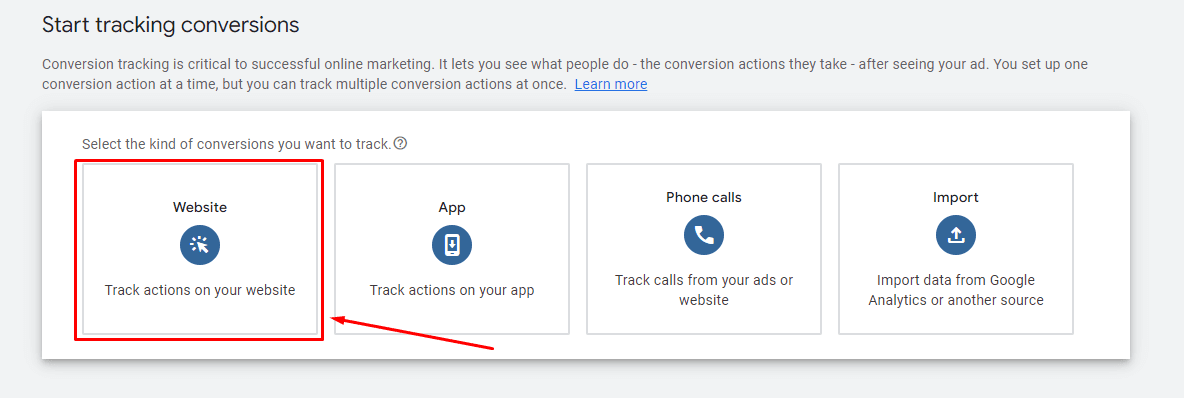
Usually, you can track conversions for websites, apps, and phone calls. Here we choose ‘Website’ as we need to track conversions from that.
Now Google Ads gives you an option to manually add your conversion action. With manual adding you can easily set the conversion action you want. For example, if you want to track ‘form sign-up’, just create a conversion action for the same.
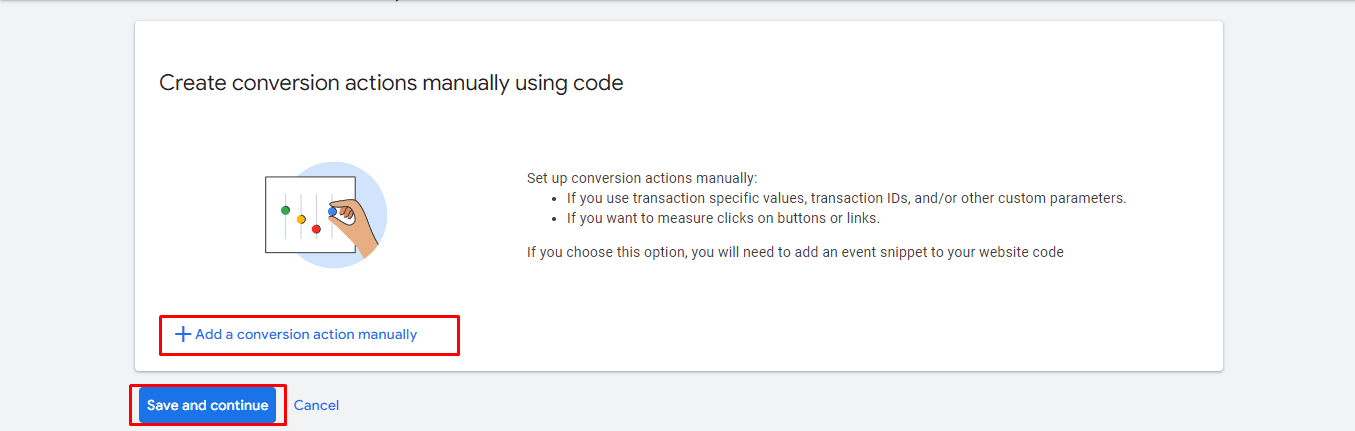
It’s simple to add, just follow the prompts and you are almost there with creating the conversion action.
Step 2: Set up your Google Tag
Your next step is to set up your Google Tag. Which interface you will get is dependent on what state you are in:
- If you successfully set up a Google tag and created your conversion action: you are good at tracking conversion.
- If you haven’t set up a Google Tag, but created your conversion action: you will redirect to the Google Tag setup page as shown in the below screenshot.
Here we choose the ‘Set up with a Google tag’ method.
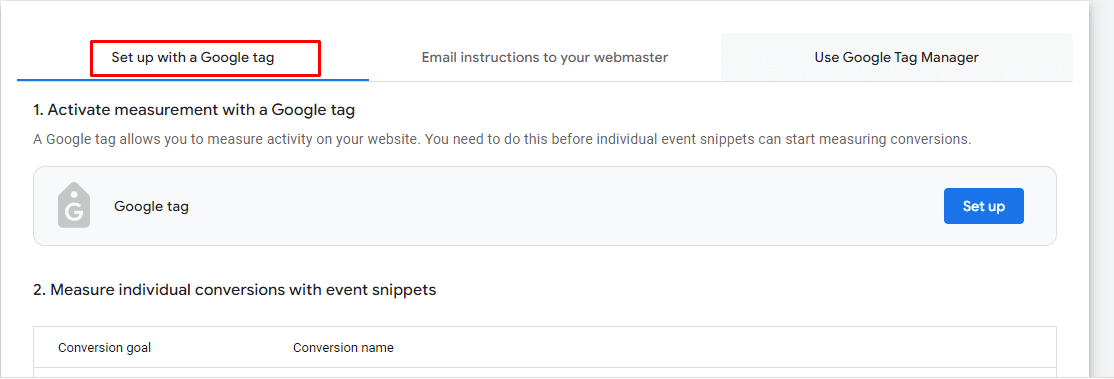
Once you click on the ‘Set up’ button provided on the right side, you will get the Google tag code which you need to paste on every page of your website. Ensure that only one tag is for one Google Ads account.
Step 3: Test your Google Tag
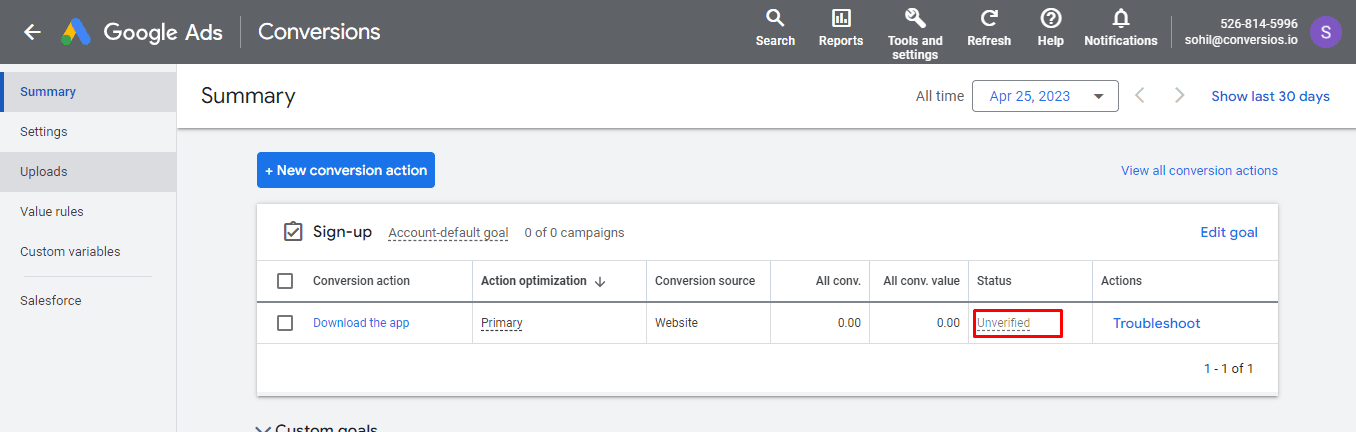
Go to your Google Ads account and go to ‘Conversions’ again. Here you will find the conversion action you have already created & ensure the status of your Google tag from there.
Step 4: Analyze Google Ads Conversion data
Once you install Google Ads conversion tracking correctly, you can track and analyze conversion data. Make sure you have added the conversion source, conversion value, and cost per conversion value into the view.
If you find any issues while installing the conversion action, you can check with the troubleshooting action.
Debug the Google Ads Conversion Tracking Issues
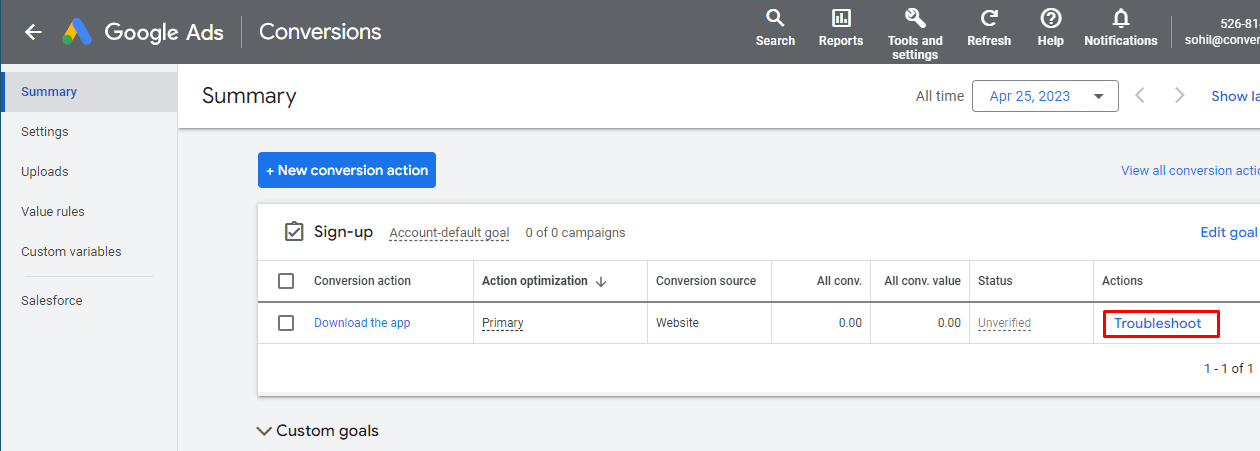
No matter what’s the roadblock, you need to resolve it to start tracking your Google Ads conversions.
For that, in the ‘conversion action’ summary- you will get the option of ‘Troubleshoot’.
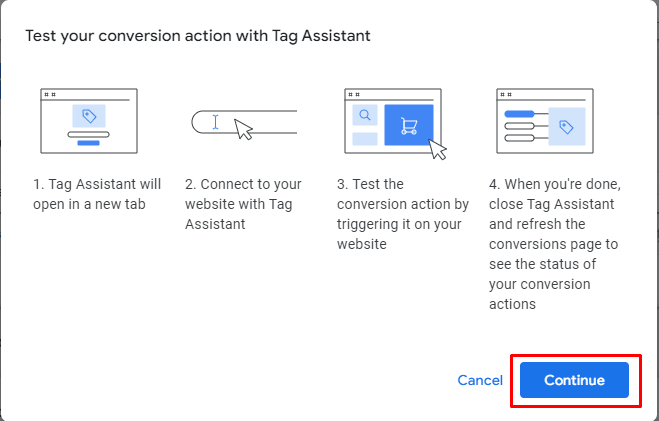
It gives you the option to test your conversion action with a tag assistant. Just click on ‘Continue’ from here.
Now you have to enter your website’s URL to connect the tag assistant with your website.
Once you click on ‘Continue’- you will get the information about what can be the possible roadblock for your Google Ads Conversion tracking.

Here’s few errors are mentioned such as:
The Google tag is not found. It means you need to check your Google tag setup.
Please verify that the tag:
- Is installed on this page
- Is not being blocked ( by a browser extension or consent dialog)
Once you resolve the issues, you can track the Google Ads conversion to optimize your ad campaigns.
Setup Google Ads Conversion for WooCommerce with Conversios Plugin
Not a fan of poking around in theme files? If your store is powered by WooCommerce, you can let the Conversios plugin handle most of the coding for you:
Step 1: Select Google Ads & Connect Your Account
- In your WordPress dashboard, go to Conversios > Pixels & Analytics.
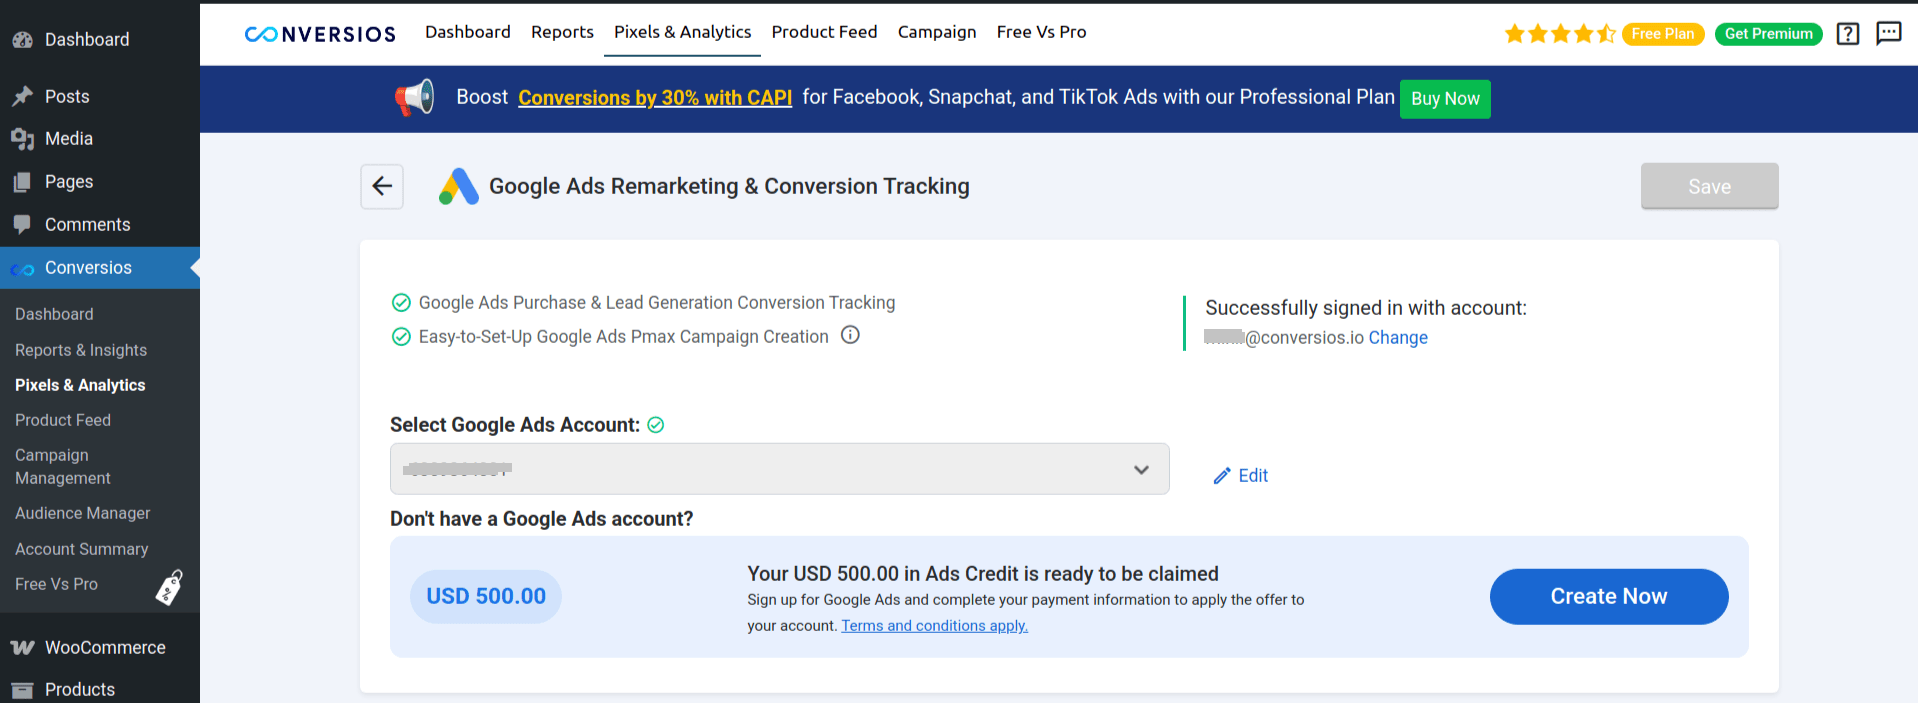
- Under Pixel Integrations, find Google Ads and sign in with your Google account.
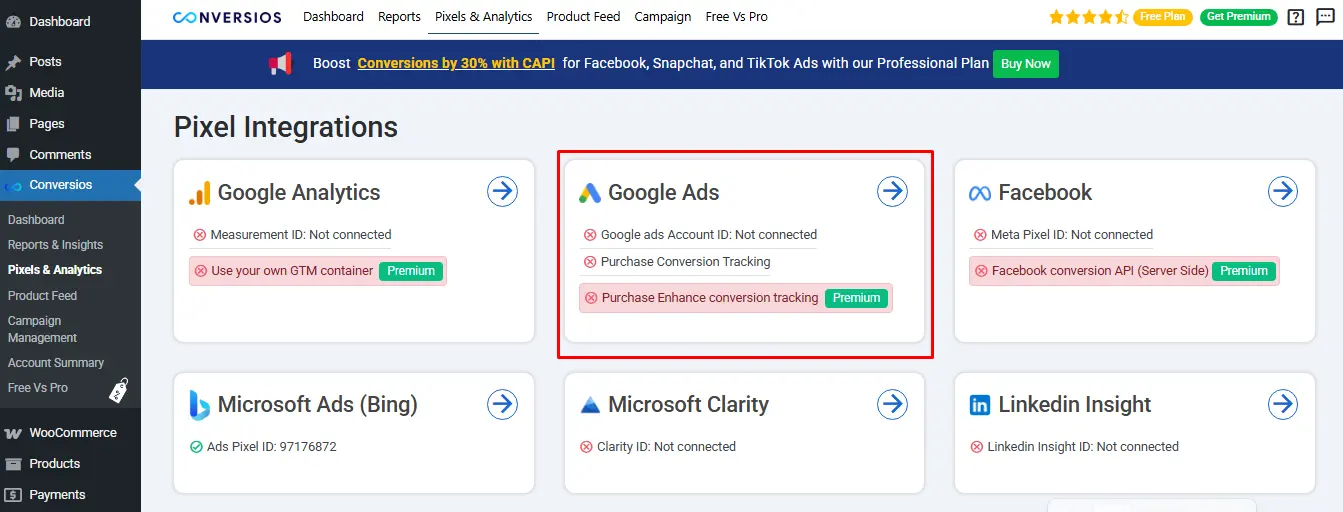
- Select the Google Ads account you want to use.
- (Optional) If you don’t already have a Google Ads account, click Create Now to set one up.
Step 2: Add Your Purchase (WooCommerce) Conversion
- Under Measure Your Campaign Conversion (For Google Ads conversion tracking), look for Purchase (WooCommerce).
- Click Add.
- A pop-up will appear, displaying any existing conversion actions you already have:
- If you already have one for Purchases, select it from the dropdown.
- If not, click Create New Conversion Action to set up a fresh one in Google Ads.
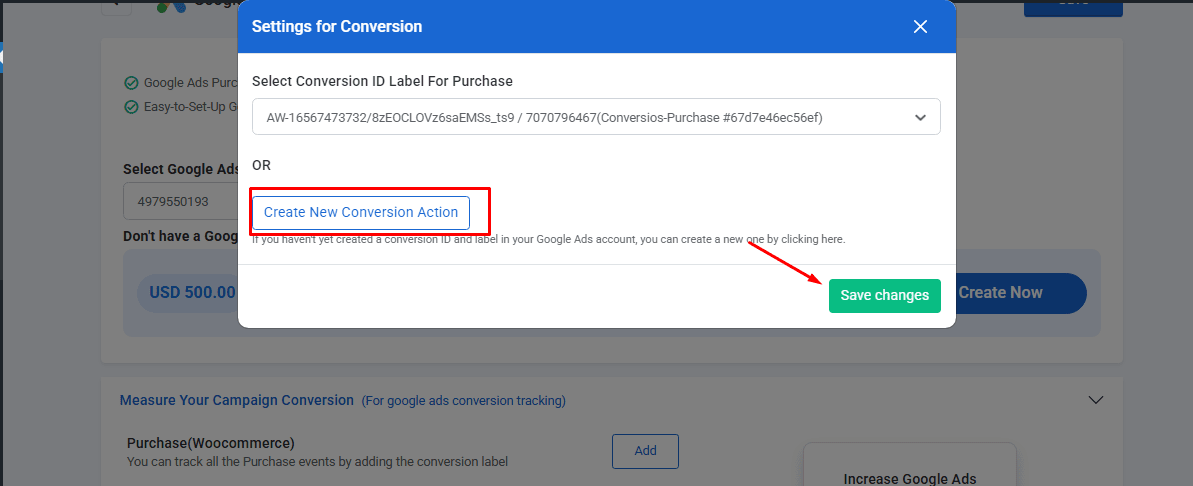
Step 3: Save & Check the Linked Conversion
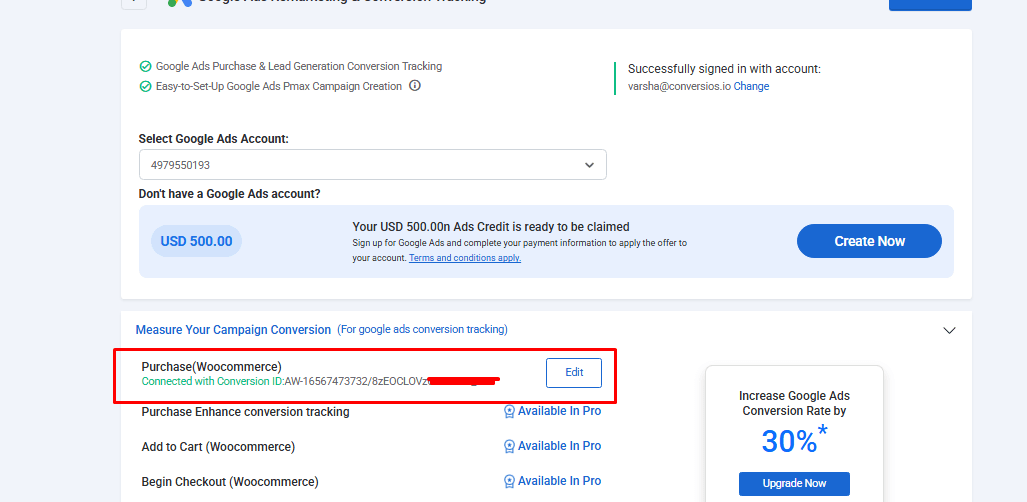
- Click Save changes. You’ll return to the main “Google Ads” section in Conversios.
- Beneath Purchase (WooCommerce), you should now see something like:
- Connected with Conversion ID: AW-123456789/SomeLabelName ( This indicates your WooCommerce store is linked to that specific Google Ads conversion.)
Step 3: Verify in Google Ads
- In your Google Ads dashboard, go to Tools & Settings → Conversions.
- You’ll see your Purchase (WooCommerce) action listed. It might initially appear as “Inactive” until the first conversion occurs.
- Once a purchase is made, Google Ads will begin showing data for this conversion, typically within 24–48 hours.
Setup Google Ads Conversion for Shopify
If your store runs on Shopify, the setup process is a bit different. Check this blog:
Google Ads Conversion Tracking for Shopify
Conclusion
Google Ads Conversion Tracking reveals whether clicks turn into actions—like sales, sign-ups, or any other valuable event. By implementing either the manual method or using a WooCommerce plugin like Conversios, you’ll see exactly where your ad spend is making a difference.
Next Steps
- Check your Google Ads dashboard regularly to track performance.
- Refine your campaigns: Increase bids on high-converting ads, lower or pause underperformers.
- Optimize user experience: Improve landing pages based on user behavior and conversion insights.
With accurate conversion tracking, you can invest confidently in marketing strategies that deliver real results. Good luck, and happy tracking!
If you’re having trouble setting up Google Ads Conversion Tracking, email us at [email protected] or WhatsApp us at +91 72848 54854. You can also check our Pricing for more details on our tools.
Frequently Asked Questions
Q. What is Google Ads Conversion Tracking and why is it important?
Google Ads Conversion Tracking lets you track key user actions after someone clicks your ad—like purchases, signups, or app installs. It helps you measure ROI, optimize ad spend, and improve campaign performance based on real results.
Q. What’s the difference between manual tracking and plugin-based tracking?
Manual tracking involves creating conversion actions and adding Google tag code to your website manually. Plugin-based tracking (like Conversios for WooCommerce) automates this setup without code, saving time and reducing errors.
Q. How do I create a conversion action in Google Ads?
Go to your Google Ads account → Tools & Settings → Conversions → New Conversion Action → Choose ‘Website’ → Define your conversion goal (like form signup or purchase) and follow prompts to finish setup.
Q. How do I check if my Google tag is working?
After setting up the tag, go back to the ‘Conversions’ section in Google Ads and view the status of the action. You can also use Google Tag Assistant or the built-in ‘Troubleshoot’ tool for debugging.
Q. Can I set up Google Ads Conversion Tracking for WooCommerce without coding?
Yes, using the Conversios plugin. Just connect your Google Ads account, select your purchase event, and the plugin will handle the integration and conversion linking automatically via Google Tag Manager.
Q. How long does it take for conversion data to show in Google Ads?
Conversion data usually starts appearing within 24 to 48 hours after a user completes a tracked action like a purchase or signup.