

If you’re relying on Google Ads or GA4 to fuel your marketing campaigns in 2025, you’re probably already aware that data quality isn’t what it used to be. With browsers tightening cookie policies, ad blockers becoming more aggressive, and platforms like iOS limiting third-party scripts, server-side tagging is becoming a must-have upgrade for advertisers who want to maintain reliable conversion tracking. Standard tracking setups are getting crippled.
That’s where Google Tag Gateway (GTG) steps in.
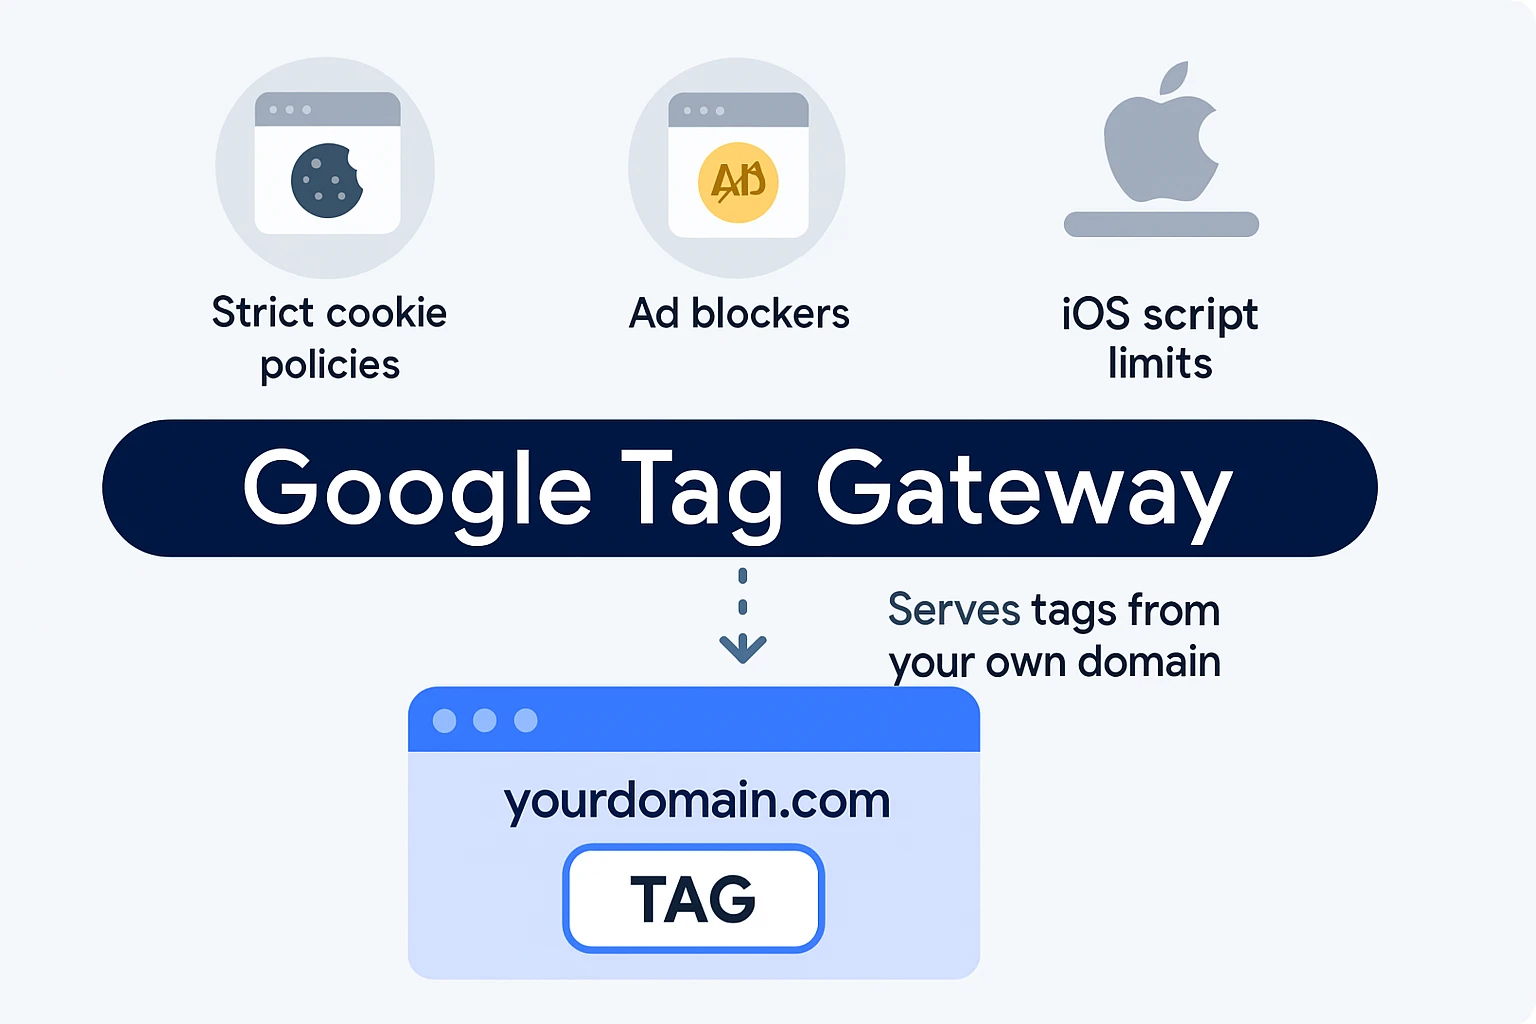
Google Tag Gateway is a free solution from Google that lets you serve your tags from your own domain, not from Google-owned servers like googletagmanager.com. This small shift has big benefits: improves first-party data, higher signal recovery, stronger privacy compliance, and better conversion attribution. Google reports that advertisers who implement Gateway see a median 11% improvement in measurement signals.
In this guide, we’ll walk through the manual setup process, help you decide whether to use Cloudflare or your own CDN, and share tips to keep your data clean, fast, and fully compliant.
What Is Google Tag Gateway?
Google Tag Gateway acts like a proxy for your existing Google tags. Instead of serving tags from Google’s domain (which can be blocked), it lets you serve them from your own site, making them look and behave like first-party content.
That means:
- Your Google tags are less likely to get blocked or stripped
- Your conversion tracking and analytics remain more accurate
- You’re better aligned with GDPR, CCPA, and other privacy frameworks
It works across Google Ads, GA4, and Google Tag Manager without rewriting your existing tag code.
Before You Begin: Everything Needed to Set Up Tag Gateway
Before setting up GTG manually, make sure you have:
- A working Google tag (GA4, Google Ads, or GTM) already installed on your site.
- A CDN or server that supports request forwarding (e.g. Cloudflare, Fastly, NGINX).
- Admin-level access to your domain DNS and SSL certificate setup.
- A dedicated path or subdomain (e.g. /metrics or tags.yourdomain.com) for serving tags.
- Basic familiarity with Consent Mode and GTM trigger configuration.
Step-by-Step Manual Setup of Google Tag Gateway
1. Reserve Your Tag Path
Pick a unique path or subdomain where tags will be served. Examples:
- Path: https://yourdomain.com/metrics
- Subdomain: https://tags.yourdomain.com
💡 Make sure this path isn’t already used on your site.
2. Create or Use an Existing GTM Server Container
If you’re using GTM:
- Log into your GTM account.
- Create a web container (if not already installed).
- Optionally, create a server container if you plan to upgrade to server-side tagging later
3. Set Up Your CDN
If you’re using Cloudflare (recommended):
- Go to: Tag Management → Google Tag Gateway
- Select your domain and set the tag path
- Authorize Google to link your Cloudflare account
- Finish setup – it takes just a few clicks
If using another CDN or your own server:
- Manually set up a reverse proxy
- Add SSL to the path or subdomain
- Forward requests to Google’s tag servers (as per Google’s documentation)
4. Enable Gateway in Google Interfaces
GTM:
- Go to Admin → Google Tag Gateway
- Enter your domain path (e.g. /metrics)
- Authorize via Cloudflare if prompted
GA4 or Google Ads:
- Navigate to your tag settings
- Find the “Google Tag Gateway” option
- Connect and verify your reserved path
5. Test Your Setup
Use these tools to confirm everything is working:
- Tag Assistant: Check that requests originate from your domain or troubleshoot deeper pixel-level issues like missing conversions or misfiring tags.
- Browser Dev Tools: Look in the Network tab for requests to /metrics
Cloudflare Dashboard: Confirm Gateway status is Active
Manual vs Cloudflare Setup: Which Is Better?
| Feature | Manual Setup | Cloudflare (Automated) |
| Control | Full customization | Simpler, guided setup |
| Complexity | Higher – requires DNS + SSL config | Low – mostly click-through |
| Maintenance | You manage updates and security | Cloudflare handles most of it |
| Compatibility | Any CDN or server | Only works if you’re on Cloudflare |
| Performance | Depends on your infra | Optimized via Cloudflare edge CDN |
Verdict:
- Choose Cloudflare if you want fast setup with minimal work.
- Go manual if you’re using another CDN or want deeper control
If you’re working with a CDN other than Cloudflare or prefer a more tailored setup, the manual route gives you greater flexibility and control.
However, if you’d rather not manage the technical details yourself, our team at Conversios can assist you. We offer custom server-side tracking plans that include Google Tag Gateway setup, designed around your platform (Shopify, WooCommerce, or custom) and your data needs.
Pricing is transparent and based on a simple rate card.
Get in touch if you’d like guidance or want us to take care of the setup for you.
Troubleshooting Tips
Tags not firing? Try this checklist:
- DNS changes can sometimes take up to 72 hours to fully take effect across the internet.
- Double-check that you have a valid SSL certificate for your path or subdomain.
- Verify that Consent Mode is configured correctly.
- Use Tag Assistant diagnostics for real-time errors.
- Make sure your GTM triggers are firing as expected.
- Disable browser extensions that might block tags while testing
Advanced Google Tag Gateway Configuration Best Practices
- Set up firewall rules to protect your /metrics endpoint from unwanted access or abuse.
- Ensure Consent Mode v2 is respected Google Tag Gateway won’t override user preferences sure your consent settings are properly implemented.
- Monitor latency and request speed using your CDN or server’s analytics tools to avoid slow tag responses.
- Keep your GTM containers up to date so you benefit from the latest tracking improvements and fixes.
Consider pairing with server-side tagging if you need longer cookie lifetimes, advanced privacy handling, or more control over data collection.
Final Thoughts
In 2025, clean data is your competitive edge. Google Tag Gateway helps you maintain that edge by making your tags look native, behave privately, and perform reliably. Whether you use Cloudflare or go manual, this setup is one of the easiest and most effective upgrades you can make this year.