Struggling with broken tracking? Here’s how to validate Server Side GTM in under a minute, using a real-world example of the Facebook Purchase event.
Perfect for Shopify, WooCommerce, and privacy-first marketers.
Maya’s Costly Lesson in Missed Purchases
Let’s start with a story you might relate to.
Maya, a smart digital marketer, had her Shopify client running hot with ads – traffic was flowing, and sales were rolling in. But Meta’s Events Manager told a different story: barely any purchases were being tracked.
Blame flew in all directions: the creatives, the audience, even the algorithm.
But the truth?
A tiny break in the server side tracking setup meant the Facebook Purchase event wasn’t firing at all. No signals to Meta. No visibility. Just… silence.
The result?
Over $15,000 in missed attributed purchases, all because no one validated the setup after implementing GTM.
That’s where this guide comes in to help you avoid Maya’s mistake by validating your Server Side GTM implementation in under 1 minute.
And yes, we’ll walk through a real-world example focusing specifically on the Facebook Purchase event.
Why Server-Side Tracking Is a Must-Have
Whether you’re managing Server Side Tracking for Shopify, setting up Server Side Tracking for WooCommerce, or working with custom stacks, it’s important to understand the difference between server side tagging versus client side tagging.
Thanks to iOS14+, cookie restrictions, and ad blockers, the signal loss is real.
Server Side Tagging helps:
- Make sure high-value events like purchase actually reach Meta
- Improve data accuracy for reporting and remarketing
- Give you more control over what’s sent, and how
But here’s the kicker, if that Meta purchase event silently breaks?
You won’t know… until performance drops, and clients get mad.
Validate Your Facebook Purchase Event in Under 1 Minute
Here’s the good news, you don’t need a dev, a test suite, or hours of debugging.
You can validate your Facebook Purchase event using GTM Preview Mode inside your Server container, and do it in just a few steps.
1-Minute Validation Flow for Facebook Purchase Event
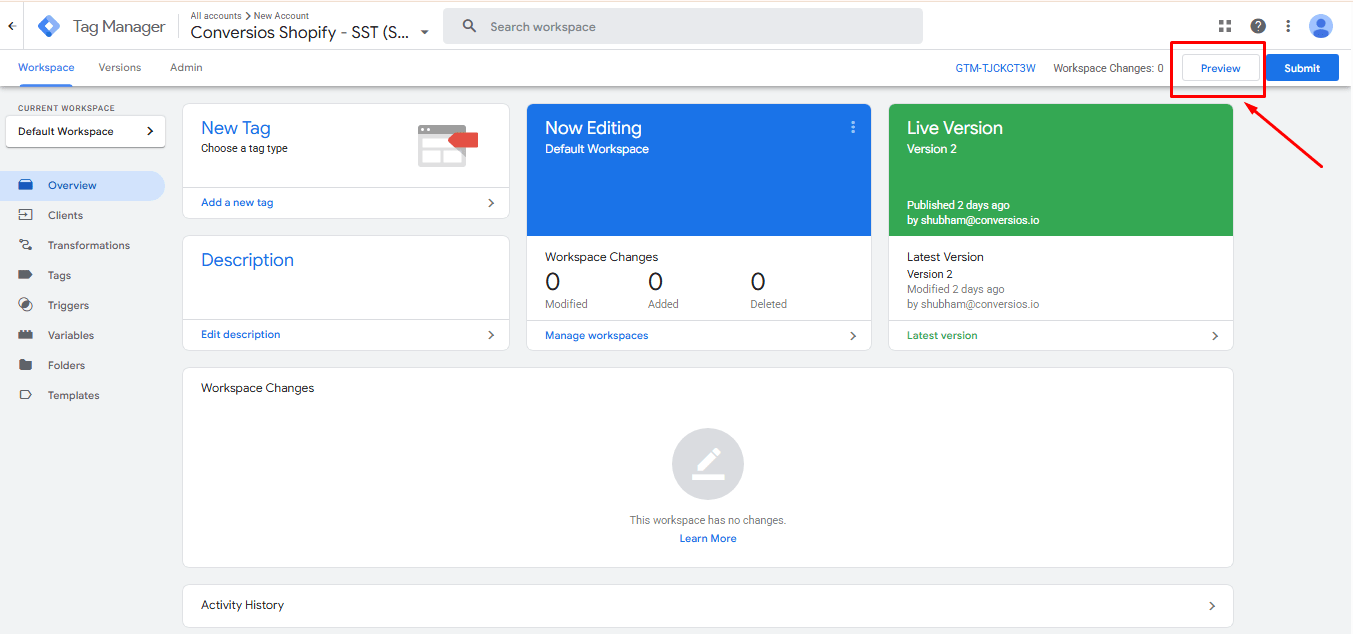
- Open Your GTM Server Container
- Go to your server-side GTM container > Click on Preview
- Go to your server-side GTM container > Click on Preview
- Complete a Mock Purchase
- Trigger a purchase event just like a real customer would
- Trigger a purchase event just like a real customer would
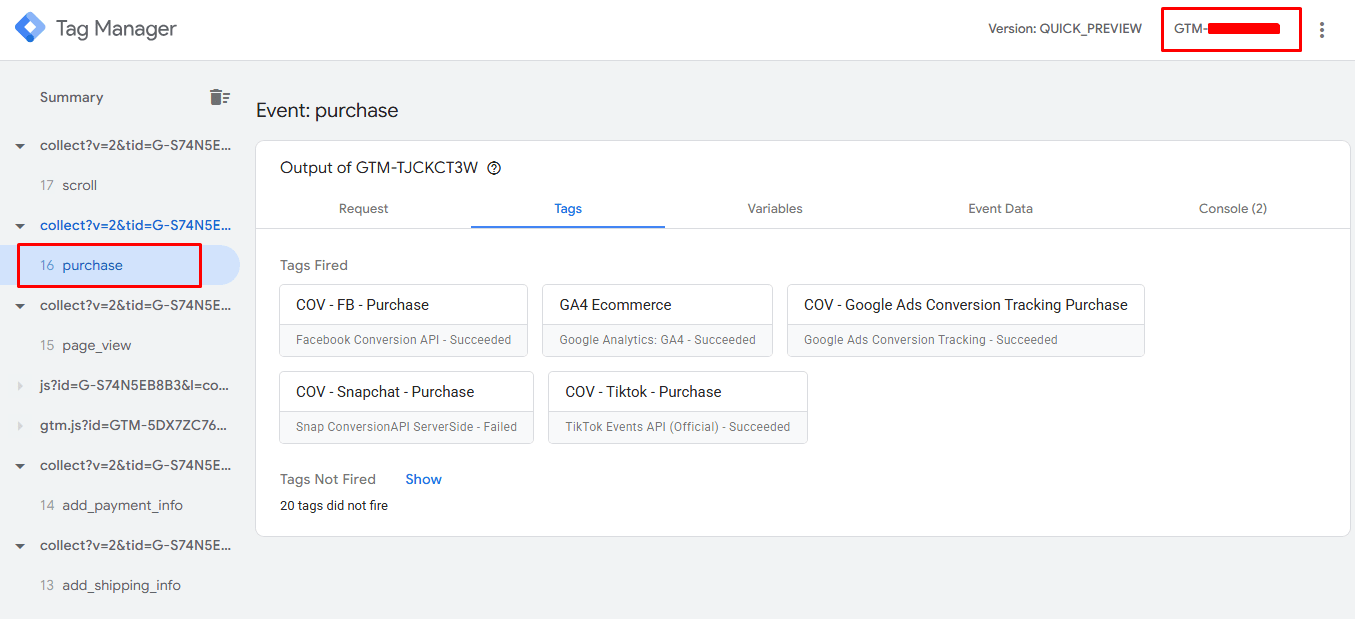
- Check the Debug Panel
- Look for the purchase event in the Incoming Requests
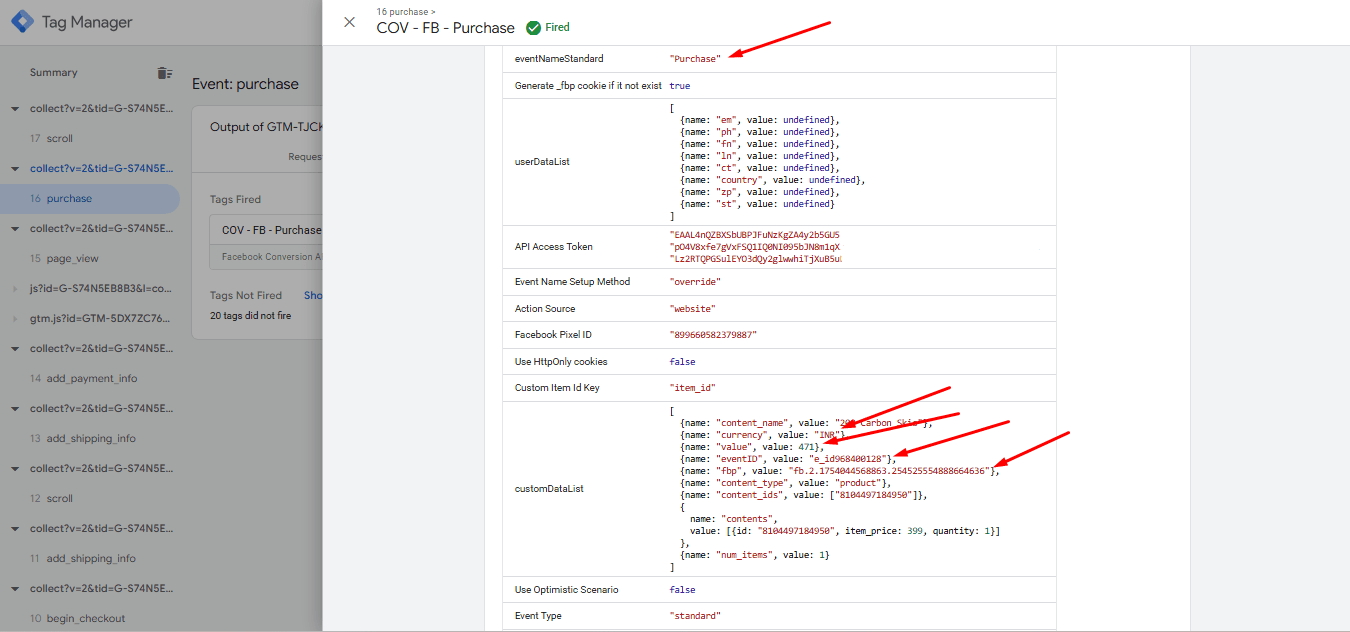
- Click into the request and verify key Meta-specific parameters:
- event_name: Purchase
- event_id
- value, currency
- fbp, fbc (Meta click/session identifiers)
- Confirm the Facebook Tag Fired
- Make sure the Facebook Conversion API (CAPI) tag triggered correctly
- No 400s or 500s, and if you’re forwarding events to Events Manager, check there too. If you spot errors or mismatches, this Meta Pixel fires but no conversions fix guide will help troubleshoot common issues.
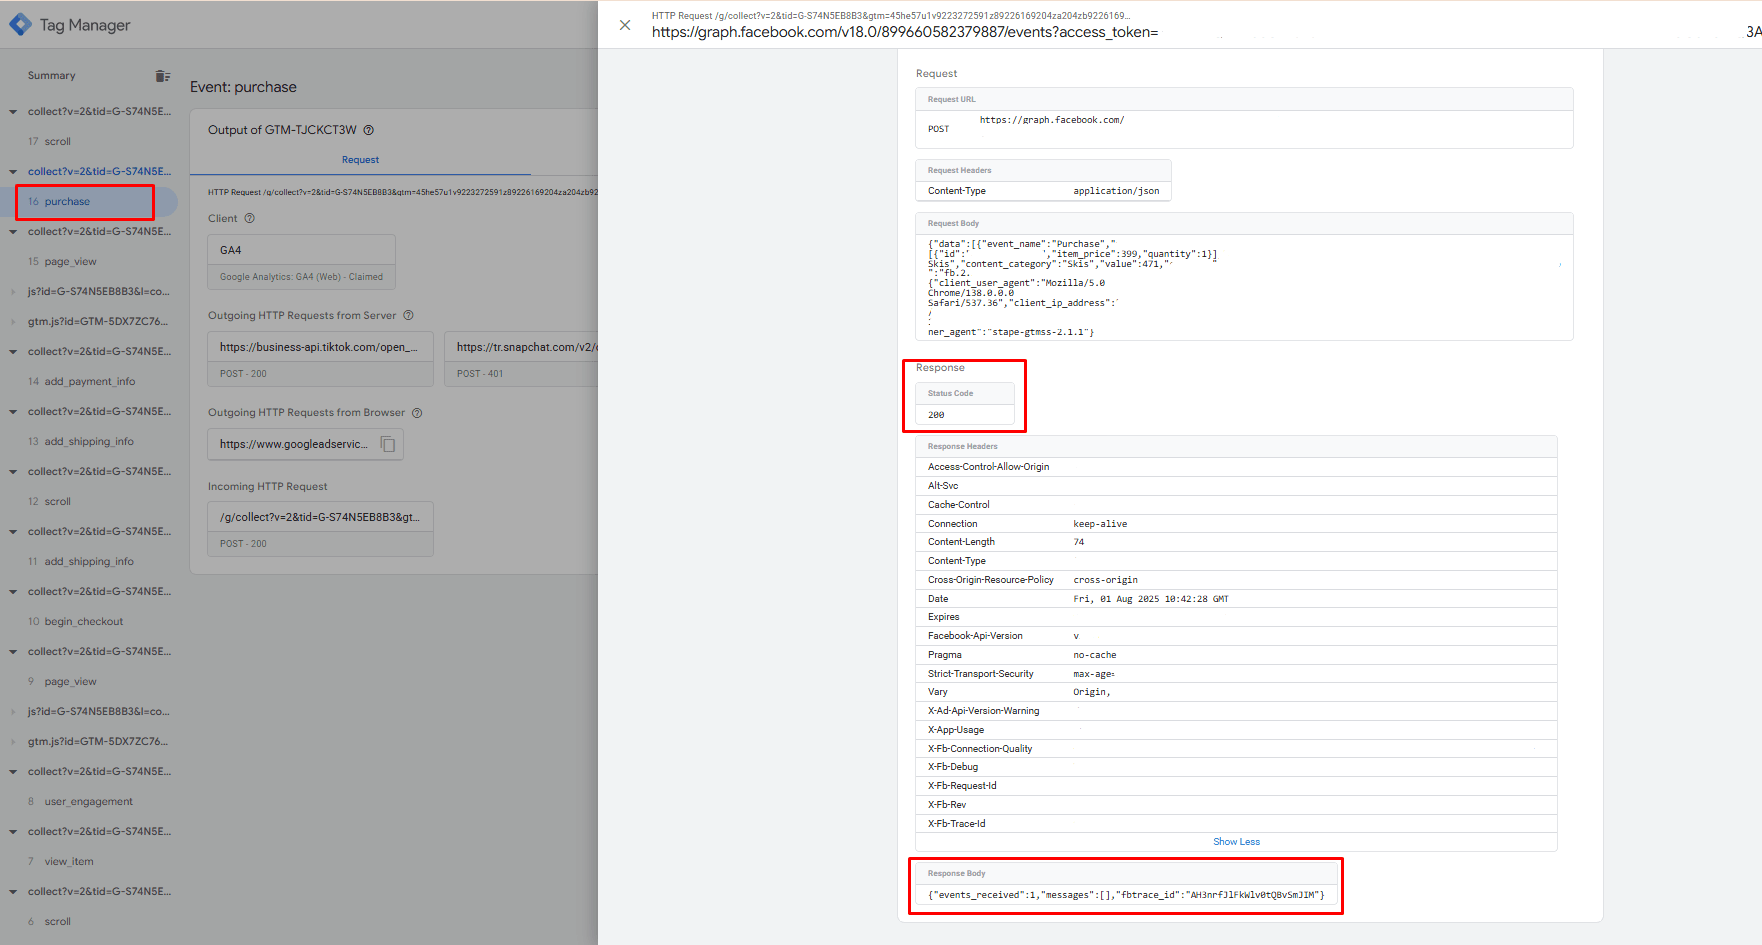
Boom. Done. That’s a clean Facebook Purchase validation, in under a minute.
So, What’s Next?
You’ve validated your Facebook Purchase event in just under a minute, and avoided the exact nightmare Maya faced.
But one manual check isn’t always enough.
As your business grows, so does the complexity of your tracking stack. That’s where we come in.
Meet Website Tracking Checker Tool
No jargon. No complicated dashboards. Just answers.
Tracking Checker is your personal tracking assistant, built for marketers, advertisers, and store owners who want to make sure their analytics and ad tracking actually work the way they should. For a deeper look at how our solution compares in the market, see Conversios vs Stape – the best server side tagging solution.
In simple terms, it’ll help you:
- Know if Ads and GA4 are set up correctly
- Understand if your site is ready for the first-party tracking world (aka: post-iOS14 chaos)
- Save time, reduce stress, and gain confidence in your data
Why This Matters Now More Than Ever
Let’s face it, the rules of digital tracking have changed.
Browsers block cookies. iOS users opt out. Platforms update faster than most of us can keep up. This is why understanding how server side tagging improves first party data is critical for long-term resilience.
So if your tracking breaks, even a little?
- Your conversions drop
- Your ad performance suffers
- And you’re stuck wondering what went wrong
That’s why Tracking Checker exists, to give you clarity and control, without needing to be a data nerd.
Ready to Take Control of Your Tracking
You’ve seen how quickly things can break, and how easy it is to miss critical events like purchases when server side setups aren’t properly validated.
Tracking Checker gives you the confidence to move fast without second-guessing your data.
Whether you’re scaling ads, managing clients, or just tired of debugging…
👉 Check your tracking health now →
Simple. Smart. Built for the new world of first-party tracking.
Final Words
Let Maya’s story be your reminder: always validate your Facebook Purchase event after setting up or editing GTM.
And when you’re ready for peace of mind across your entire tracking stack, GA4, Ads, first-party setups, and more,
Tracking Checker will be here to back you up.
Frequently Asked Questions
Q: Why focus on the Facebook Purchase event?
Because it’s the most valuable event in your Meta ads funnel, and the one most impacted by tracking issues.
Q: Will GTM Preview Mode show me Meta-specific details?
Yes, you’ll be able to inspect exactly what’s being sent to Facebook via CAPI.
Q: What’s the difference between browser and server-side purchase events?
Browser-side events can be blocked or lost. Server-side events are more reliable, especially with consent and signal loss. For platform-specific setup, check out our Shopify Server Side GTM Tracking guide.
Q: Will Tracking Checker help with Meta tracking too?
Yes! Tracking Checker supports Meta, Ads, GA4, and other major ad platforms right out of the box, so you can audit across all your key channels in one place